Modeling & Materials

Modeling & Materials

Weekly Design Challenge


Boahs Park


This page documents my work for Module 1 of Modeling & Materials, including weekly design challenges, material workshops, and the development of Project 1.


Module 1


I explore everyday objects through photography and introductory 3D modeling. I examine their forms, materials, proportions, structures, and details from different viewpoints.

Design Challenge 1
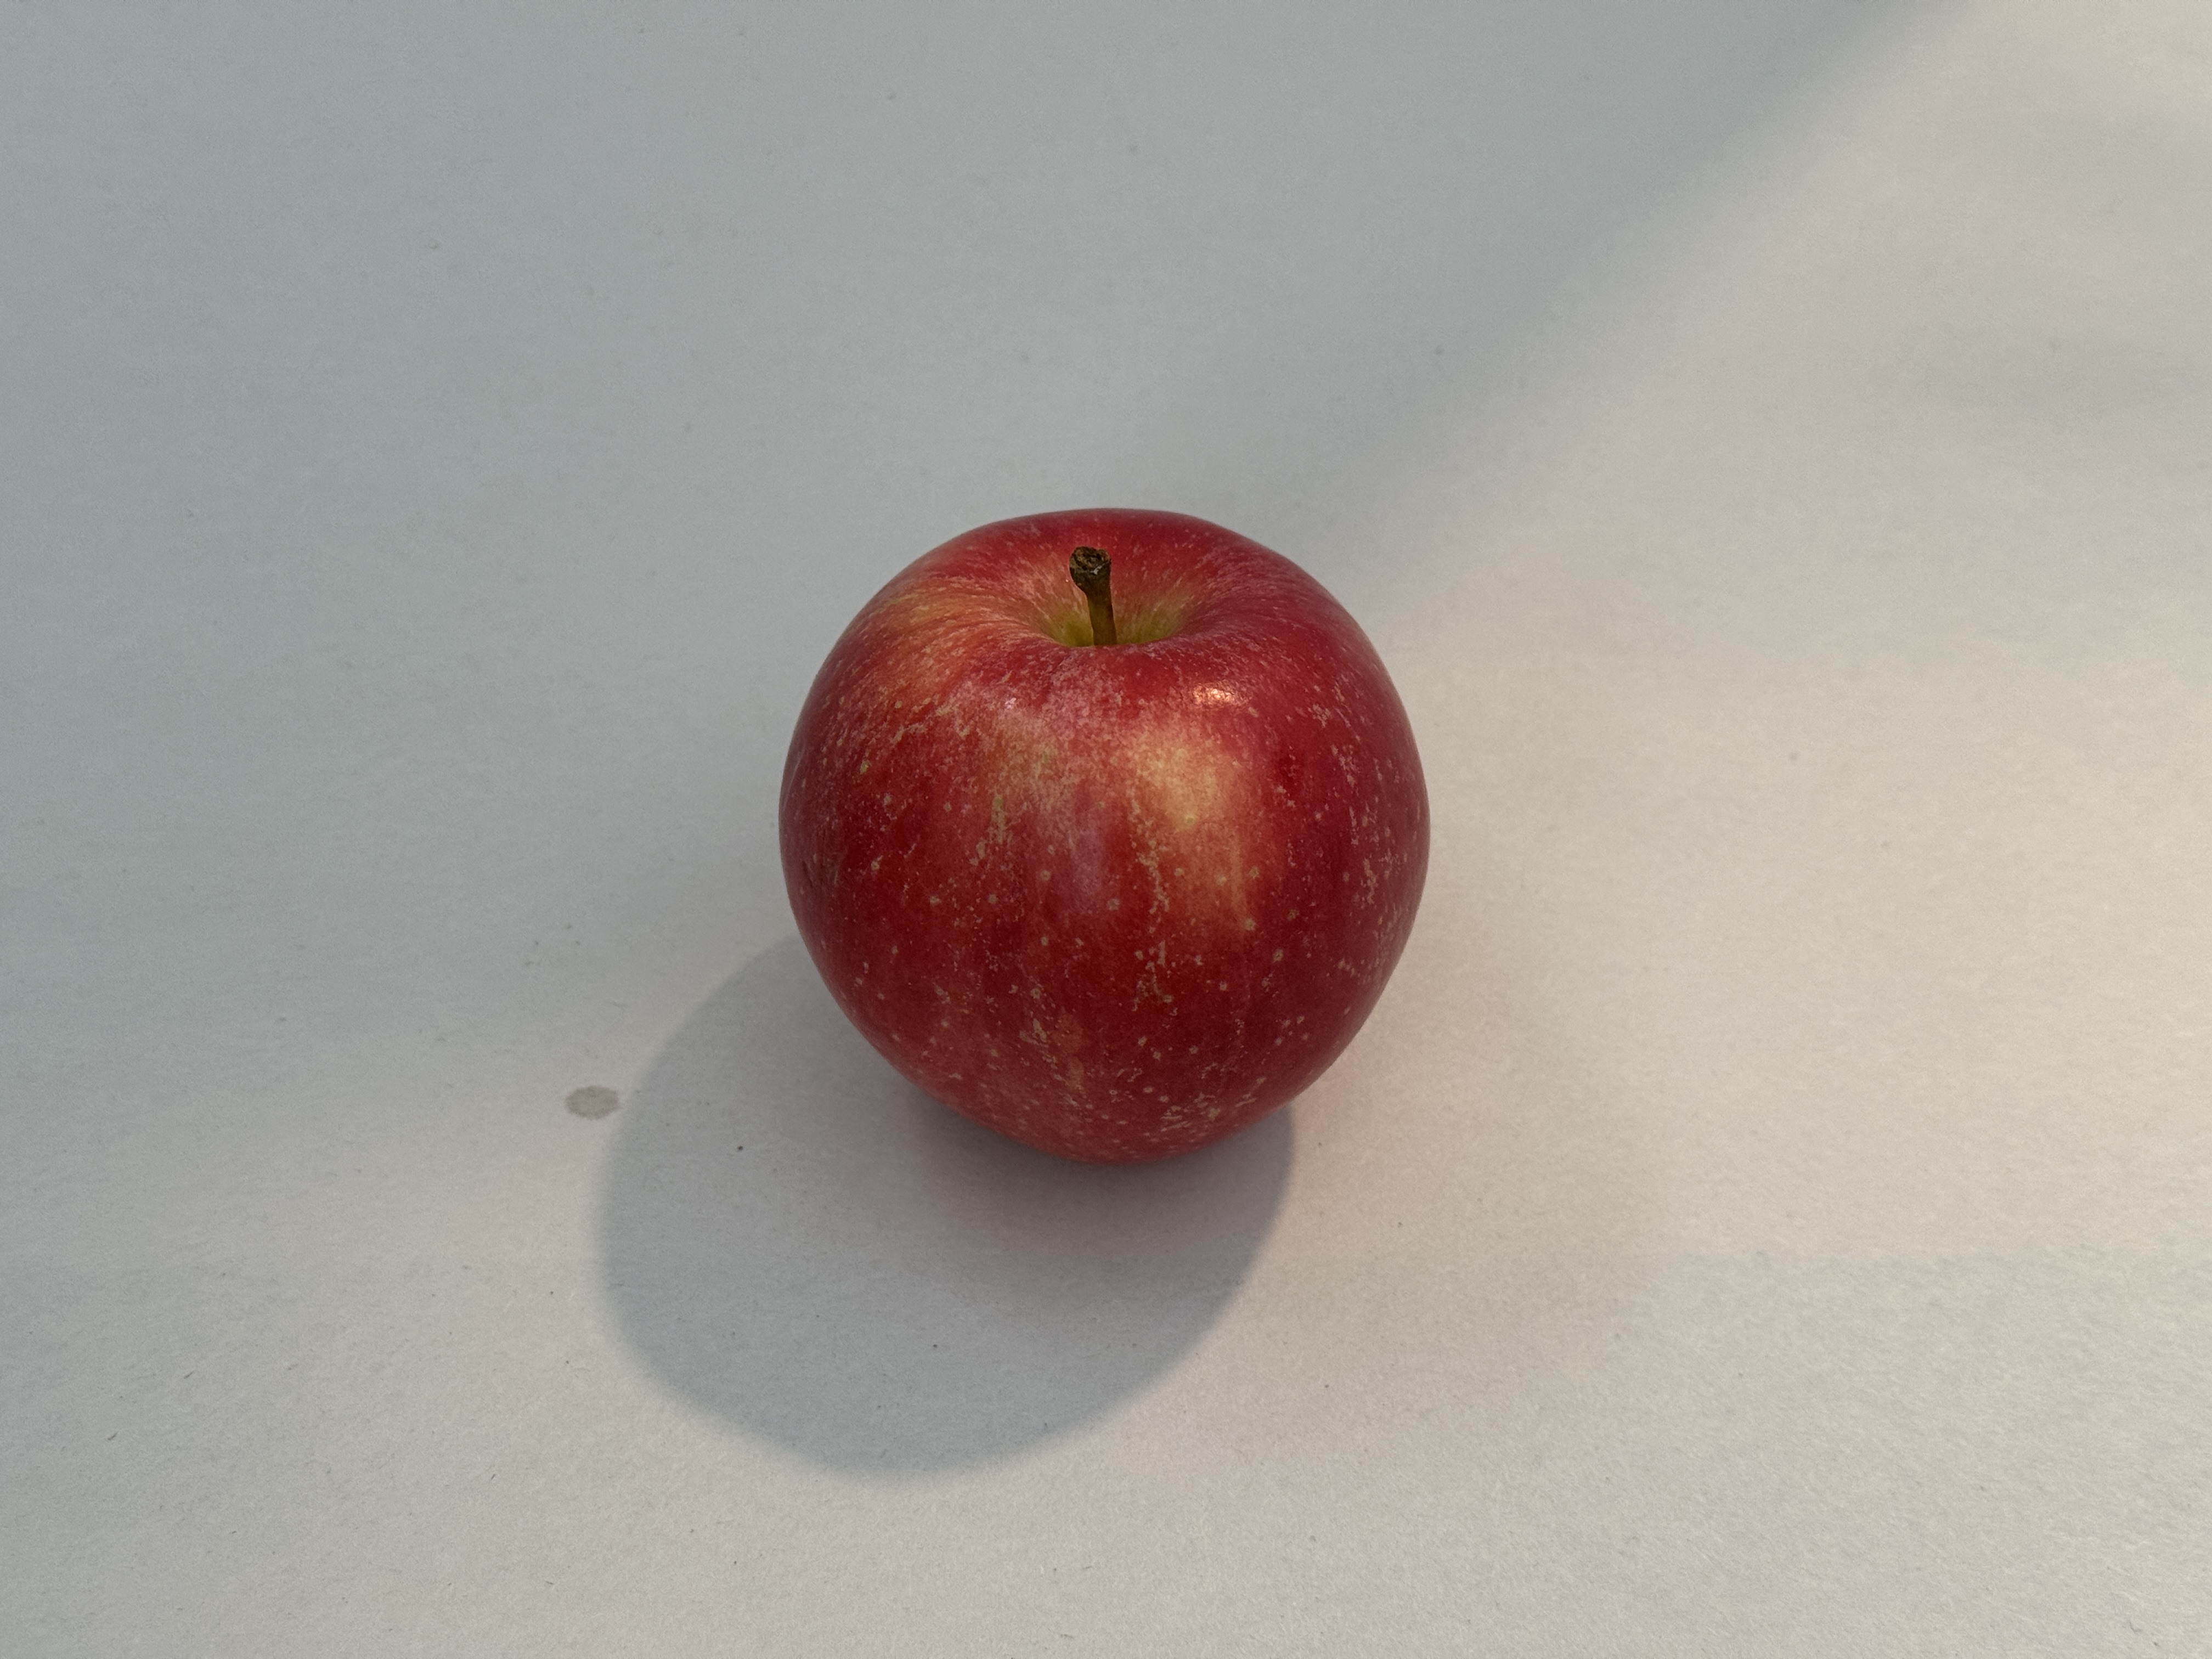
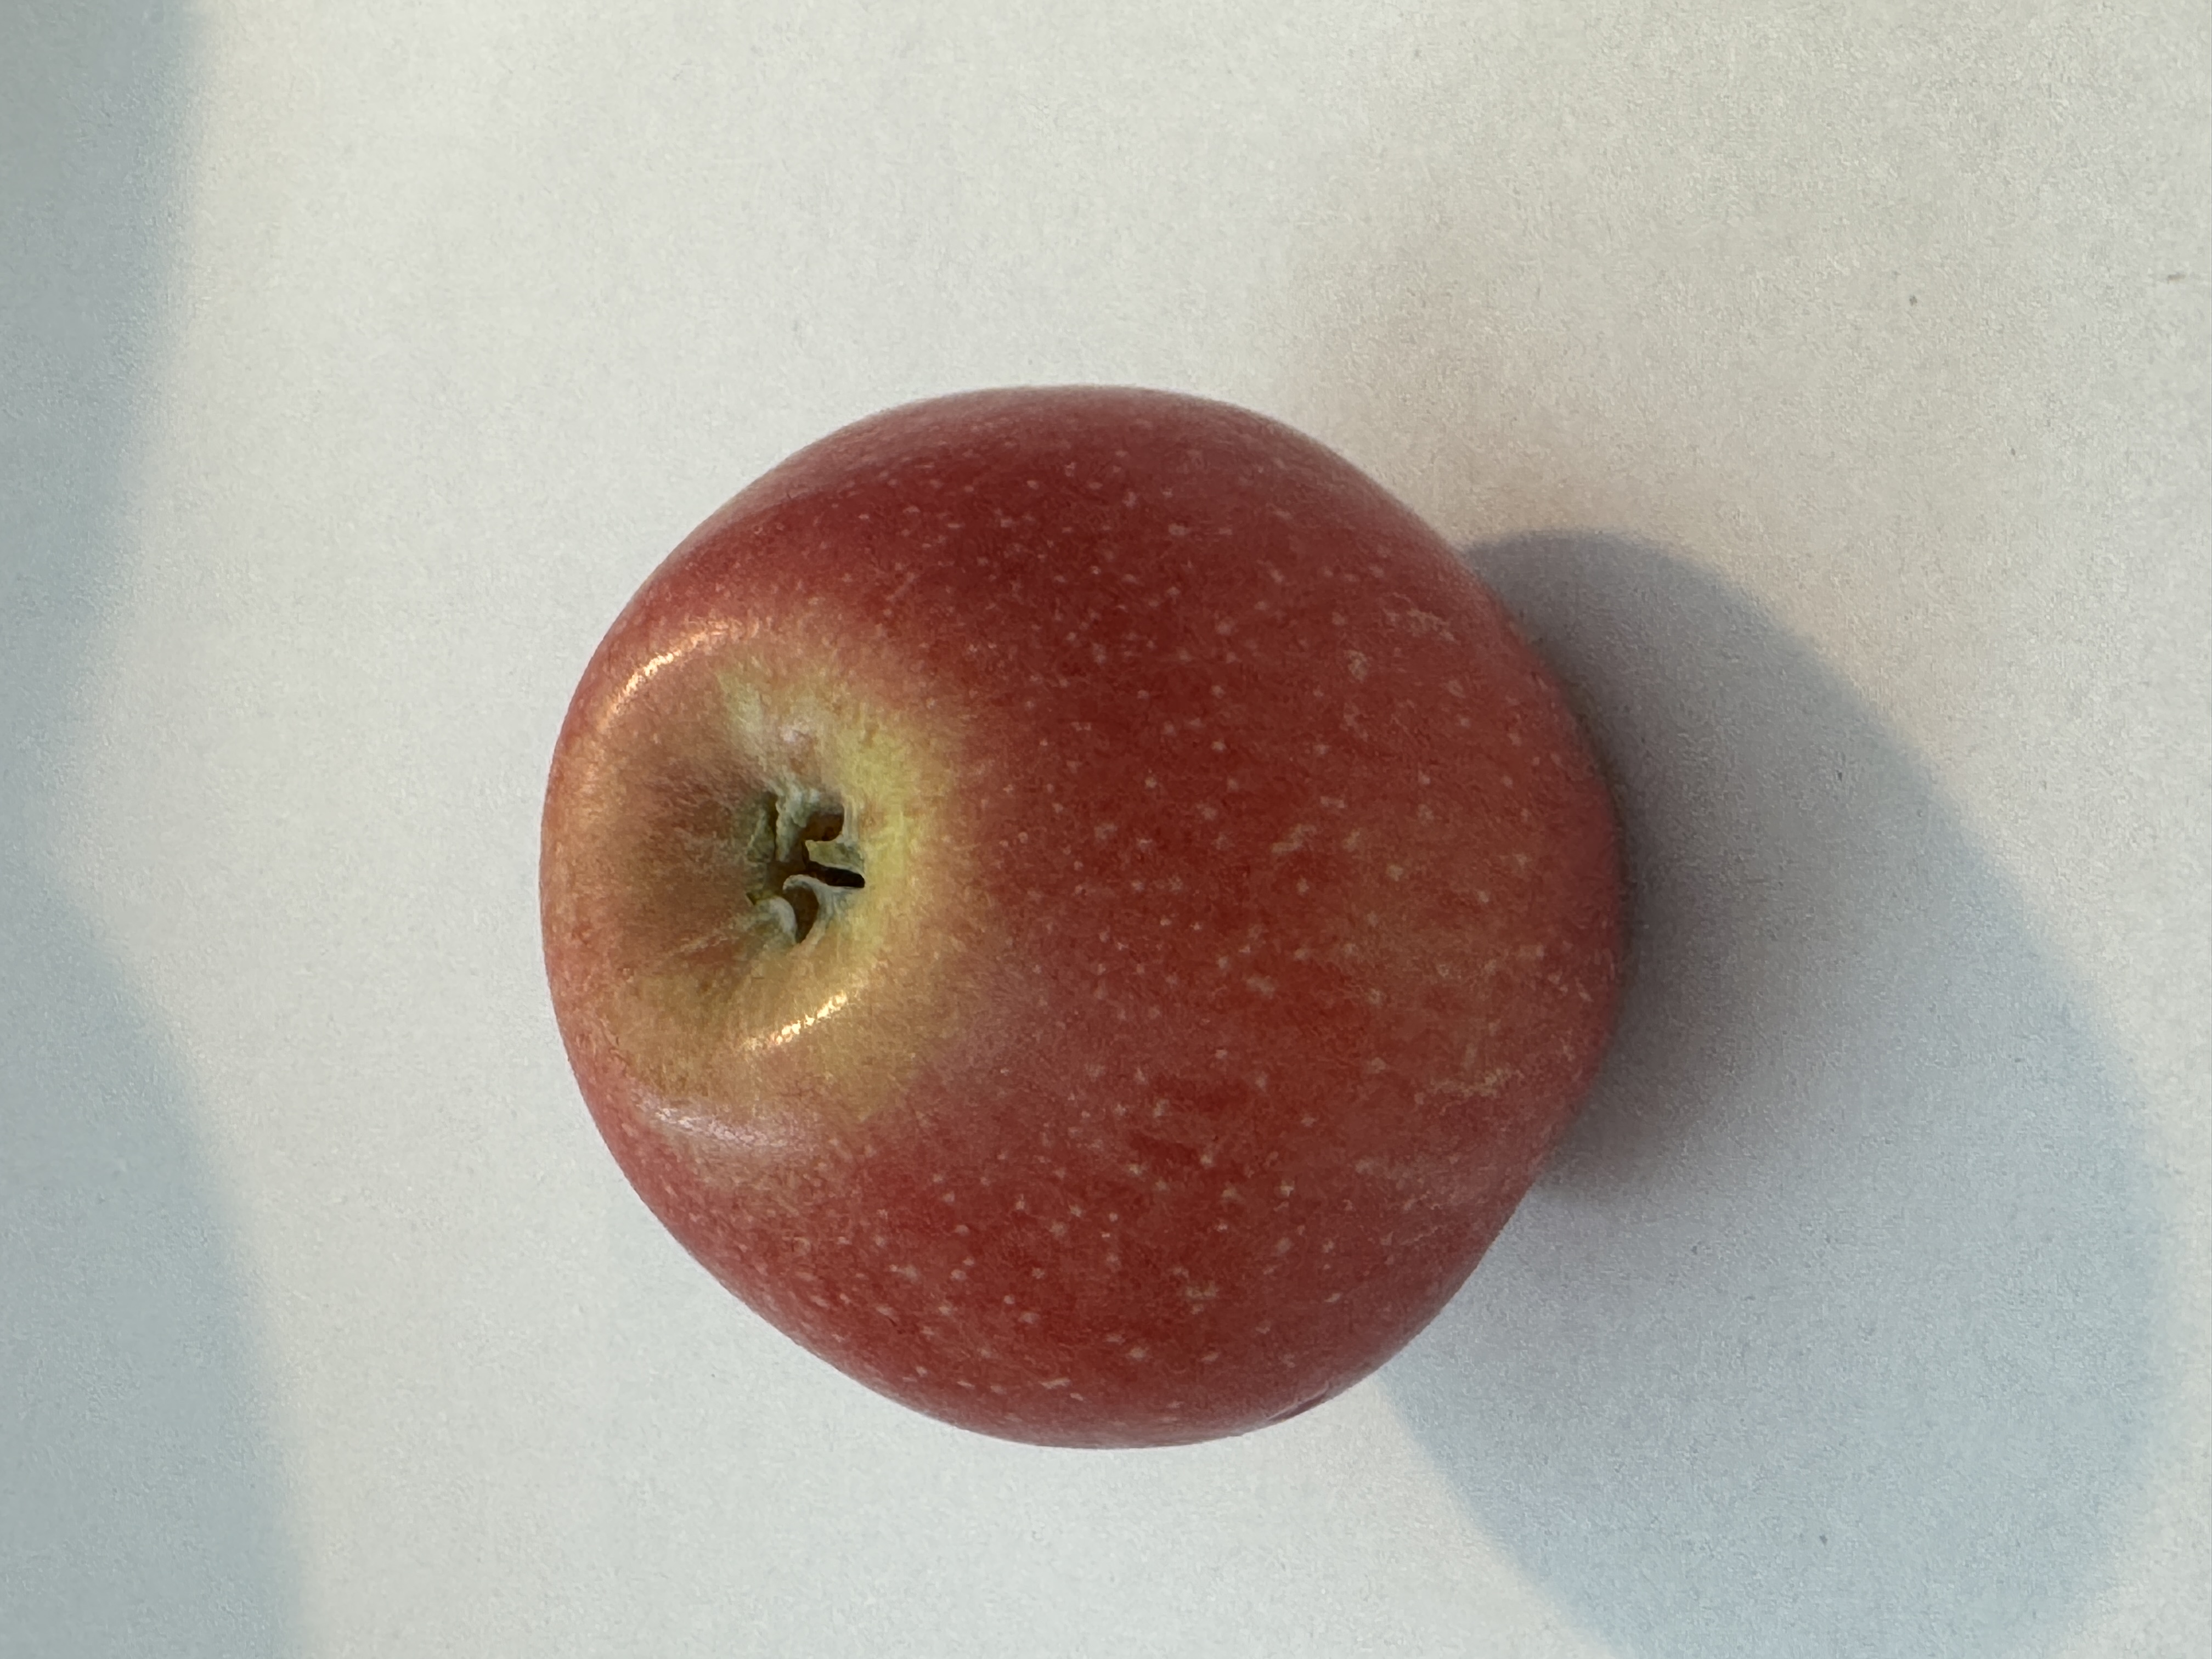
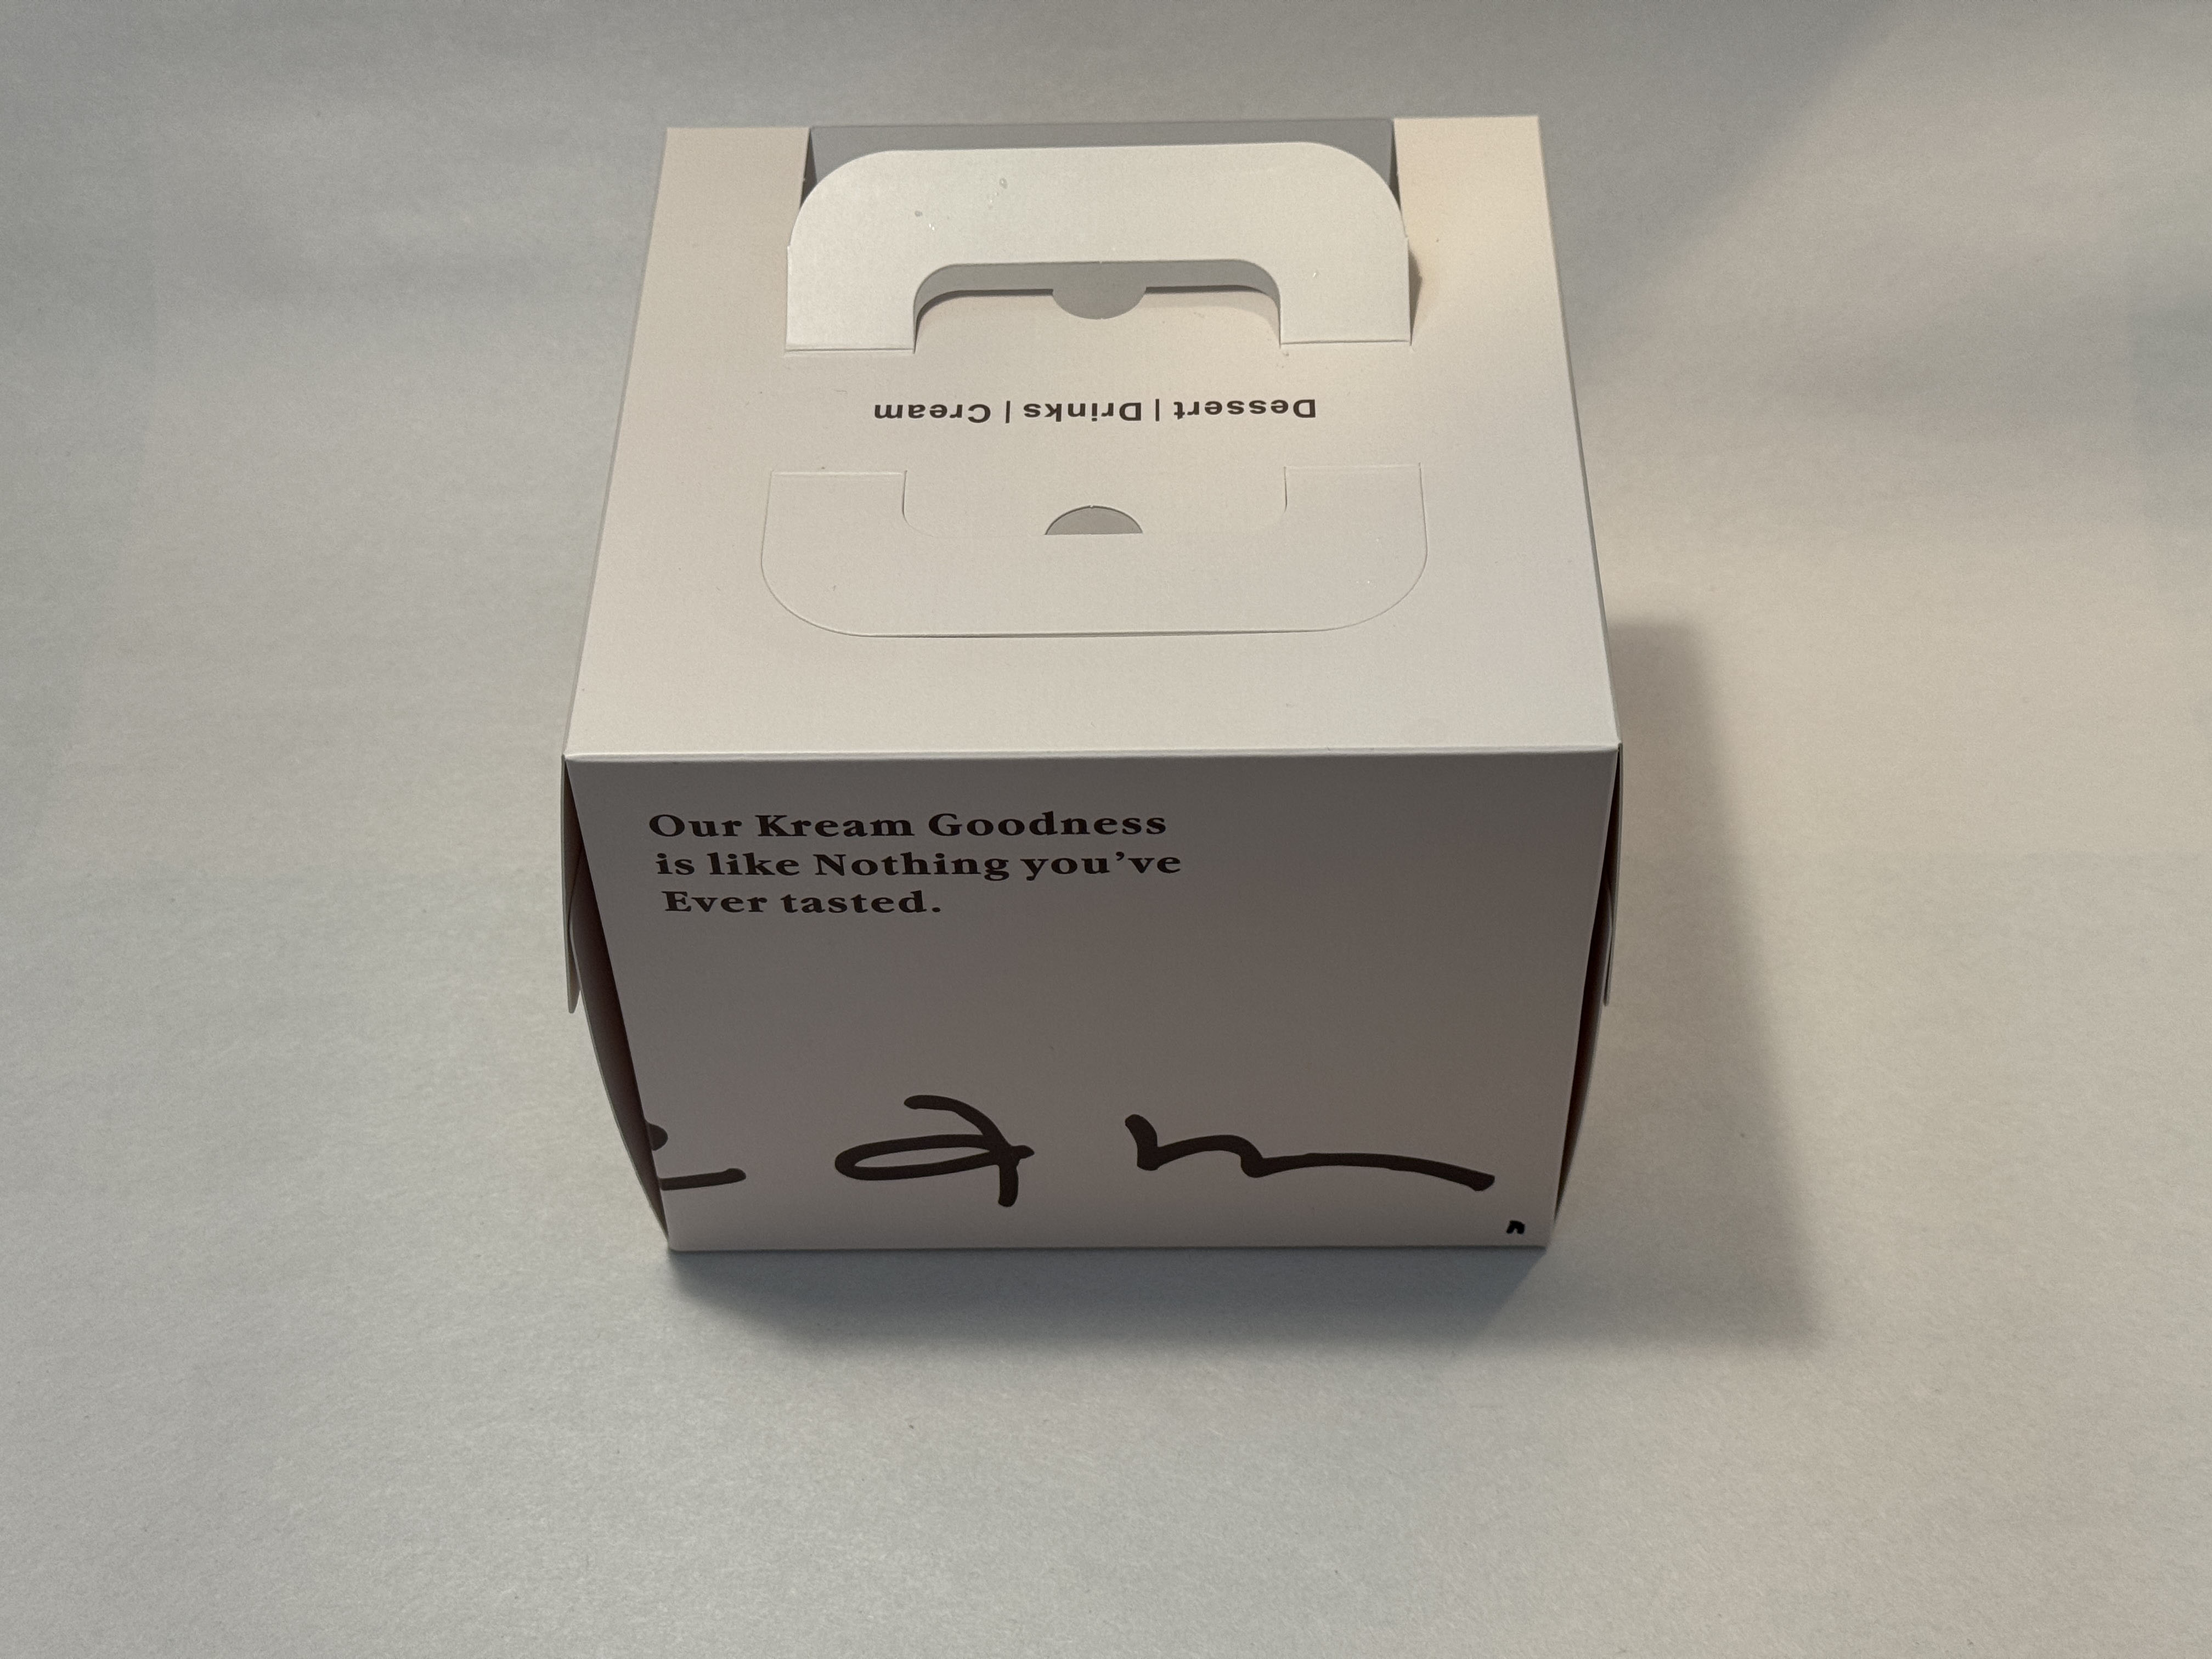
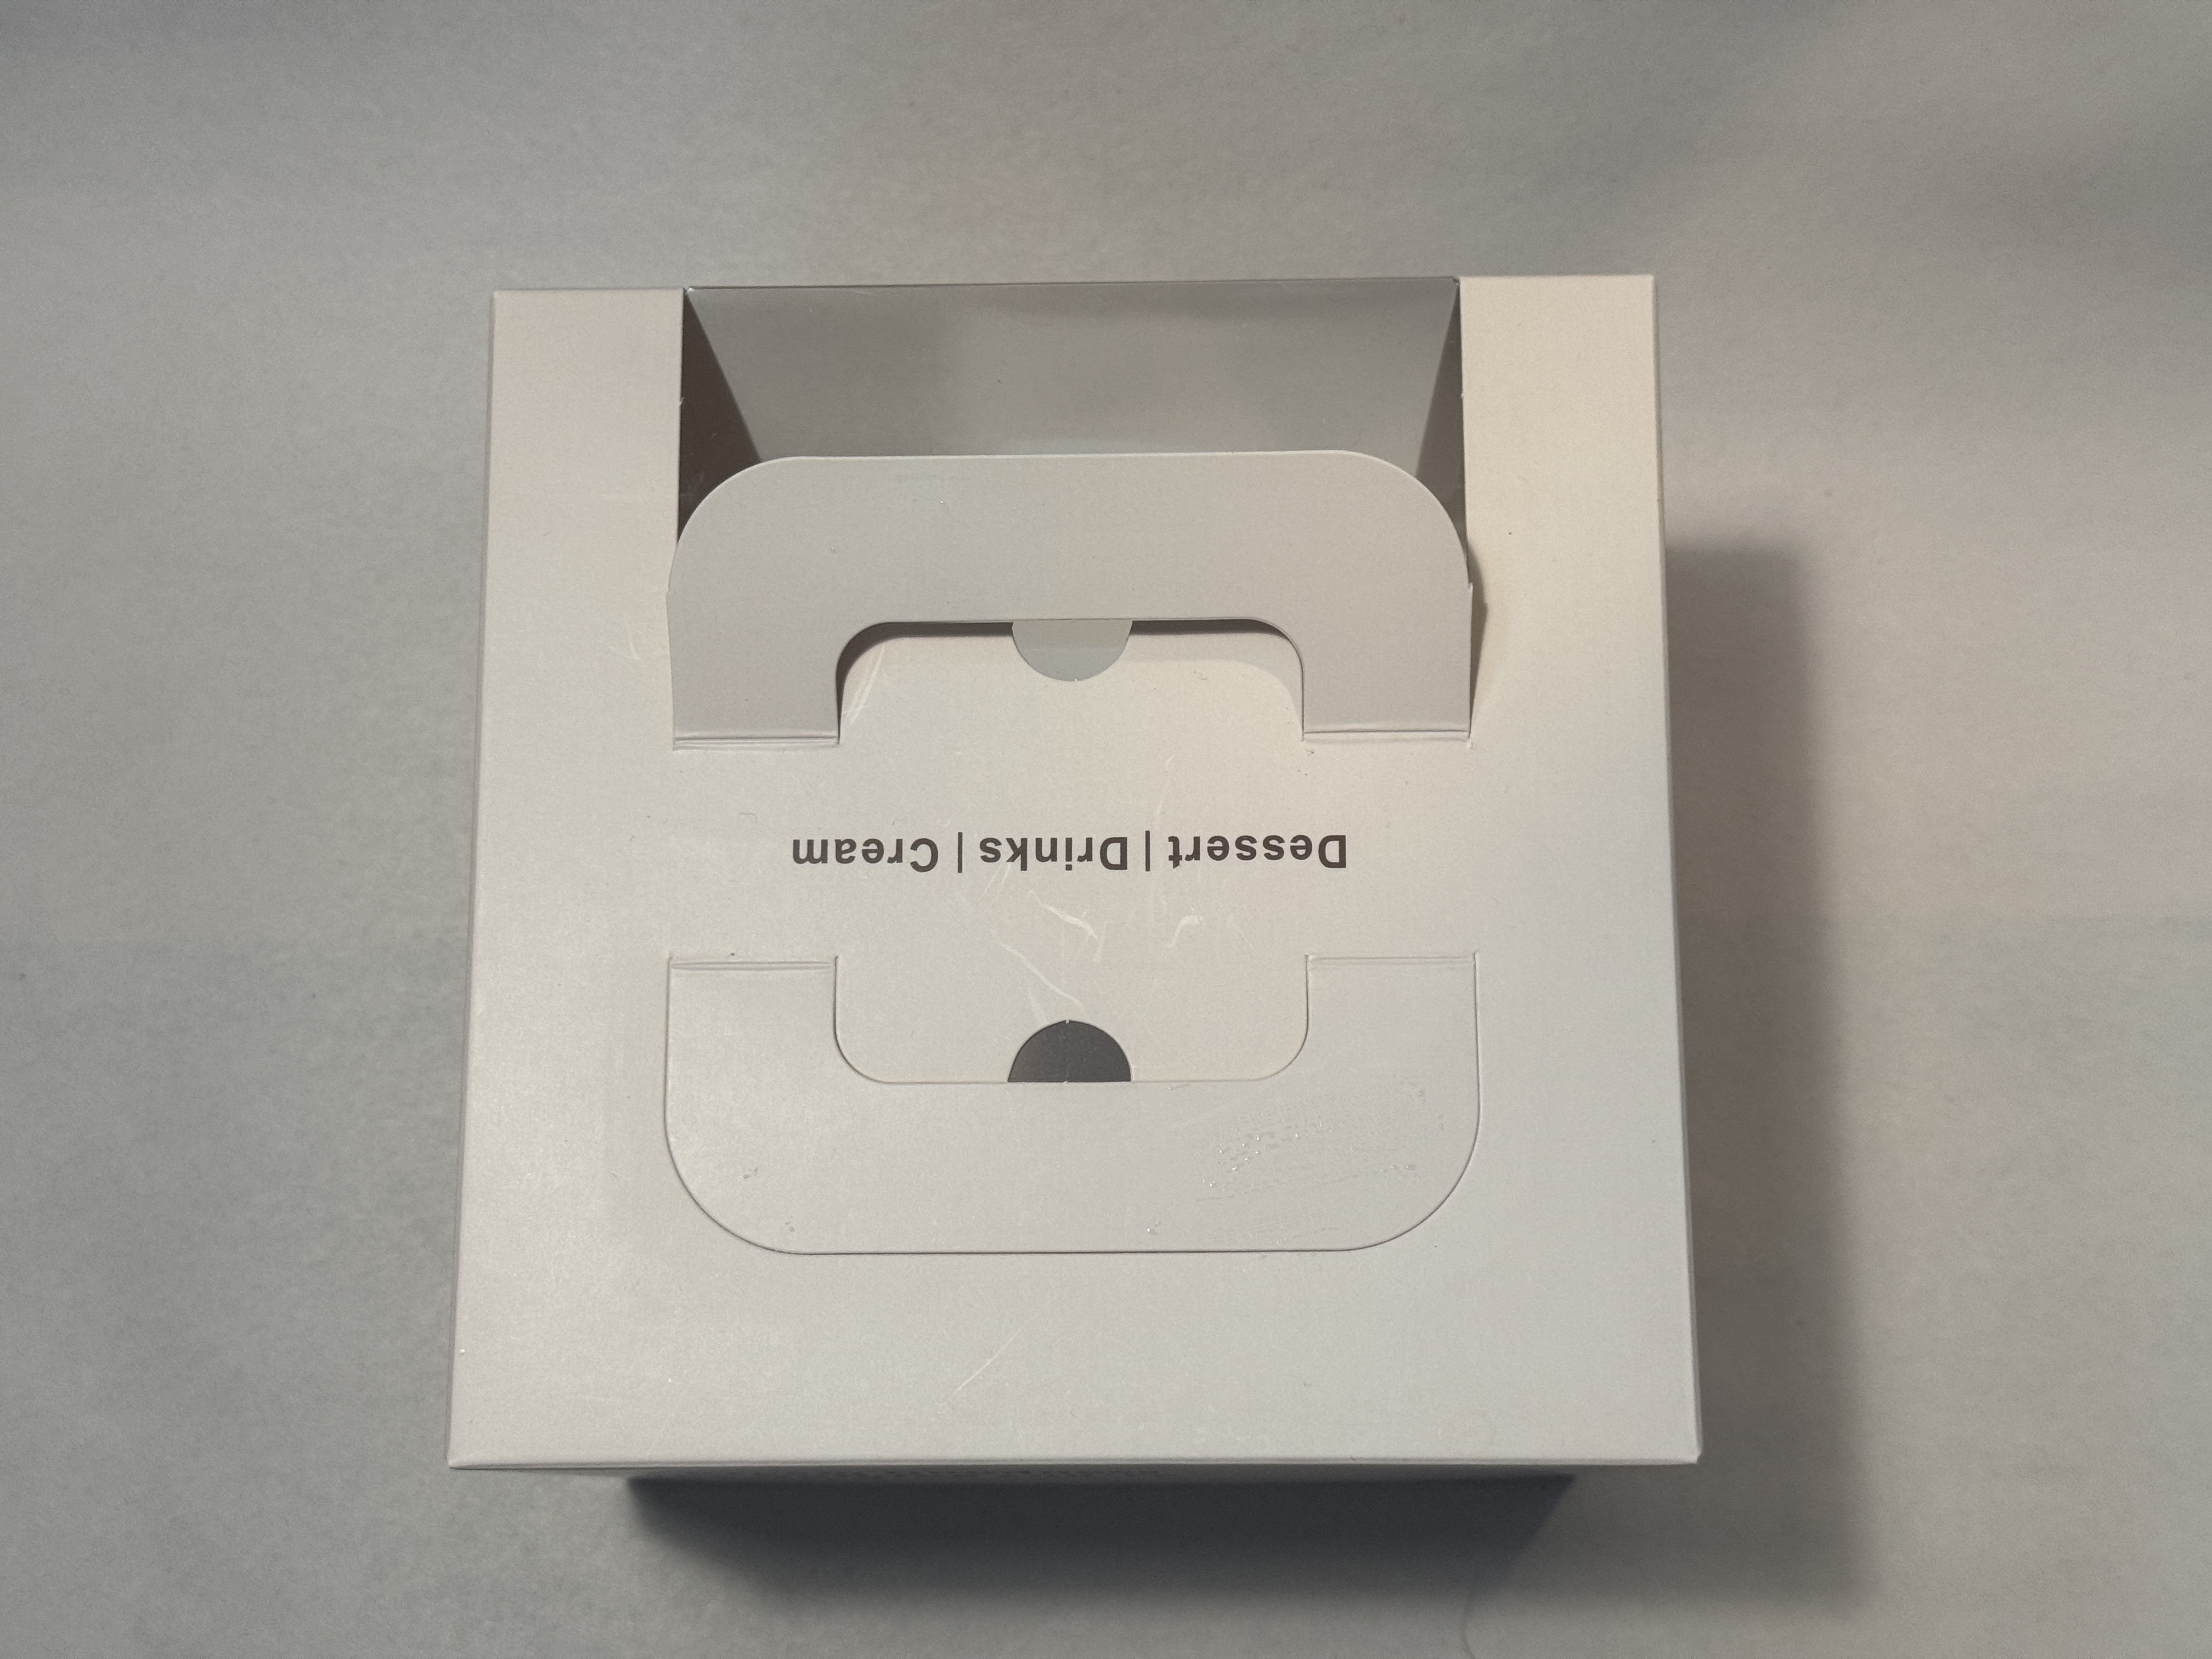
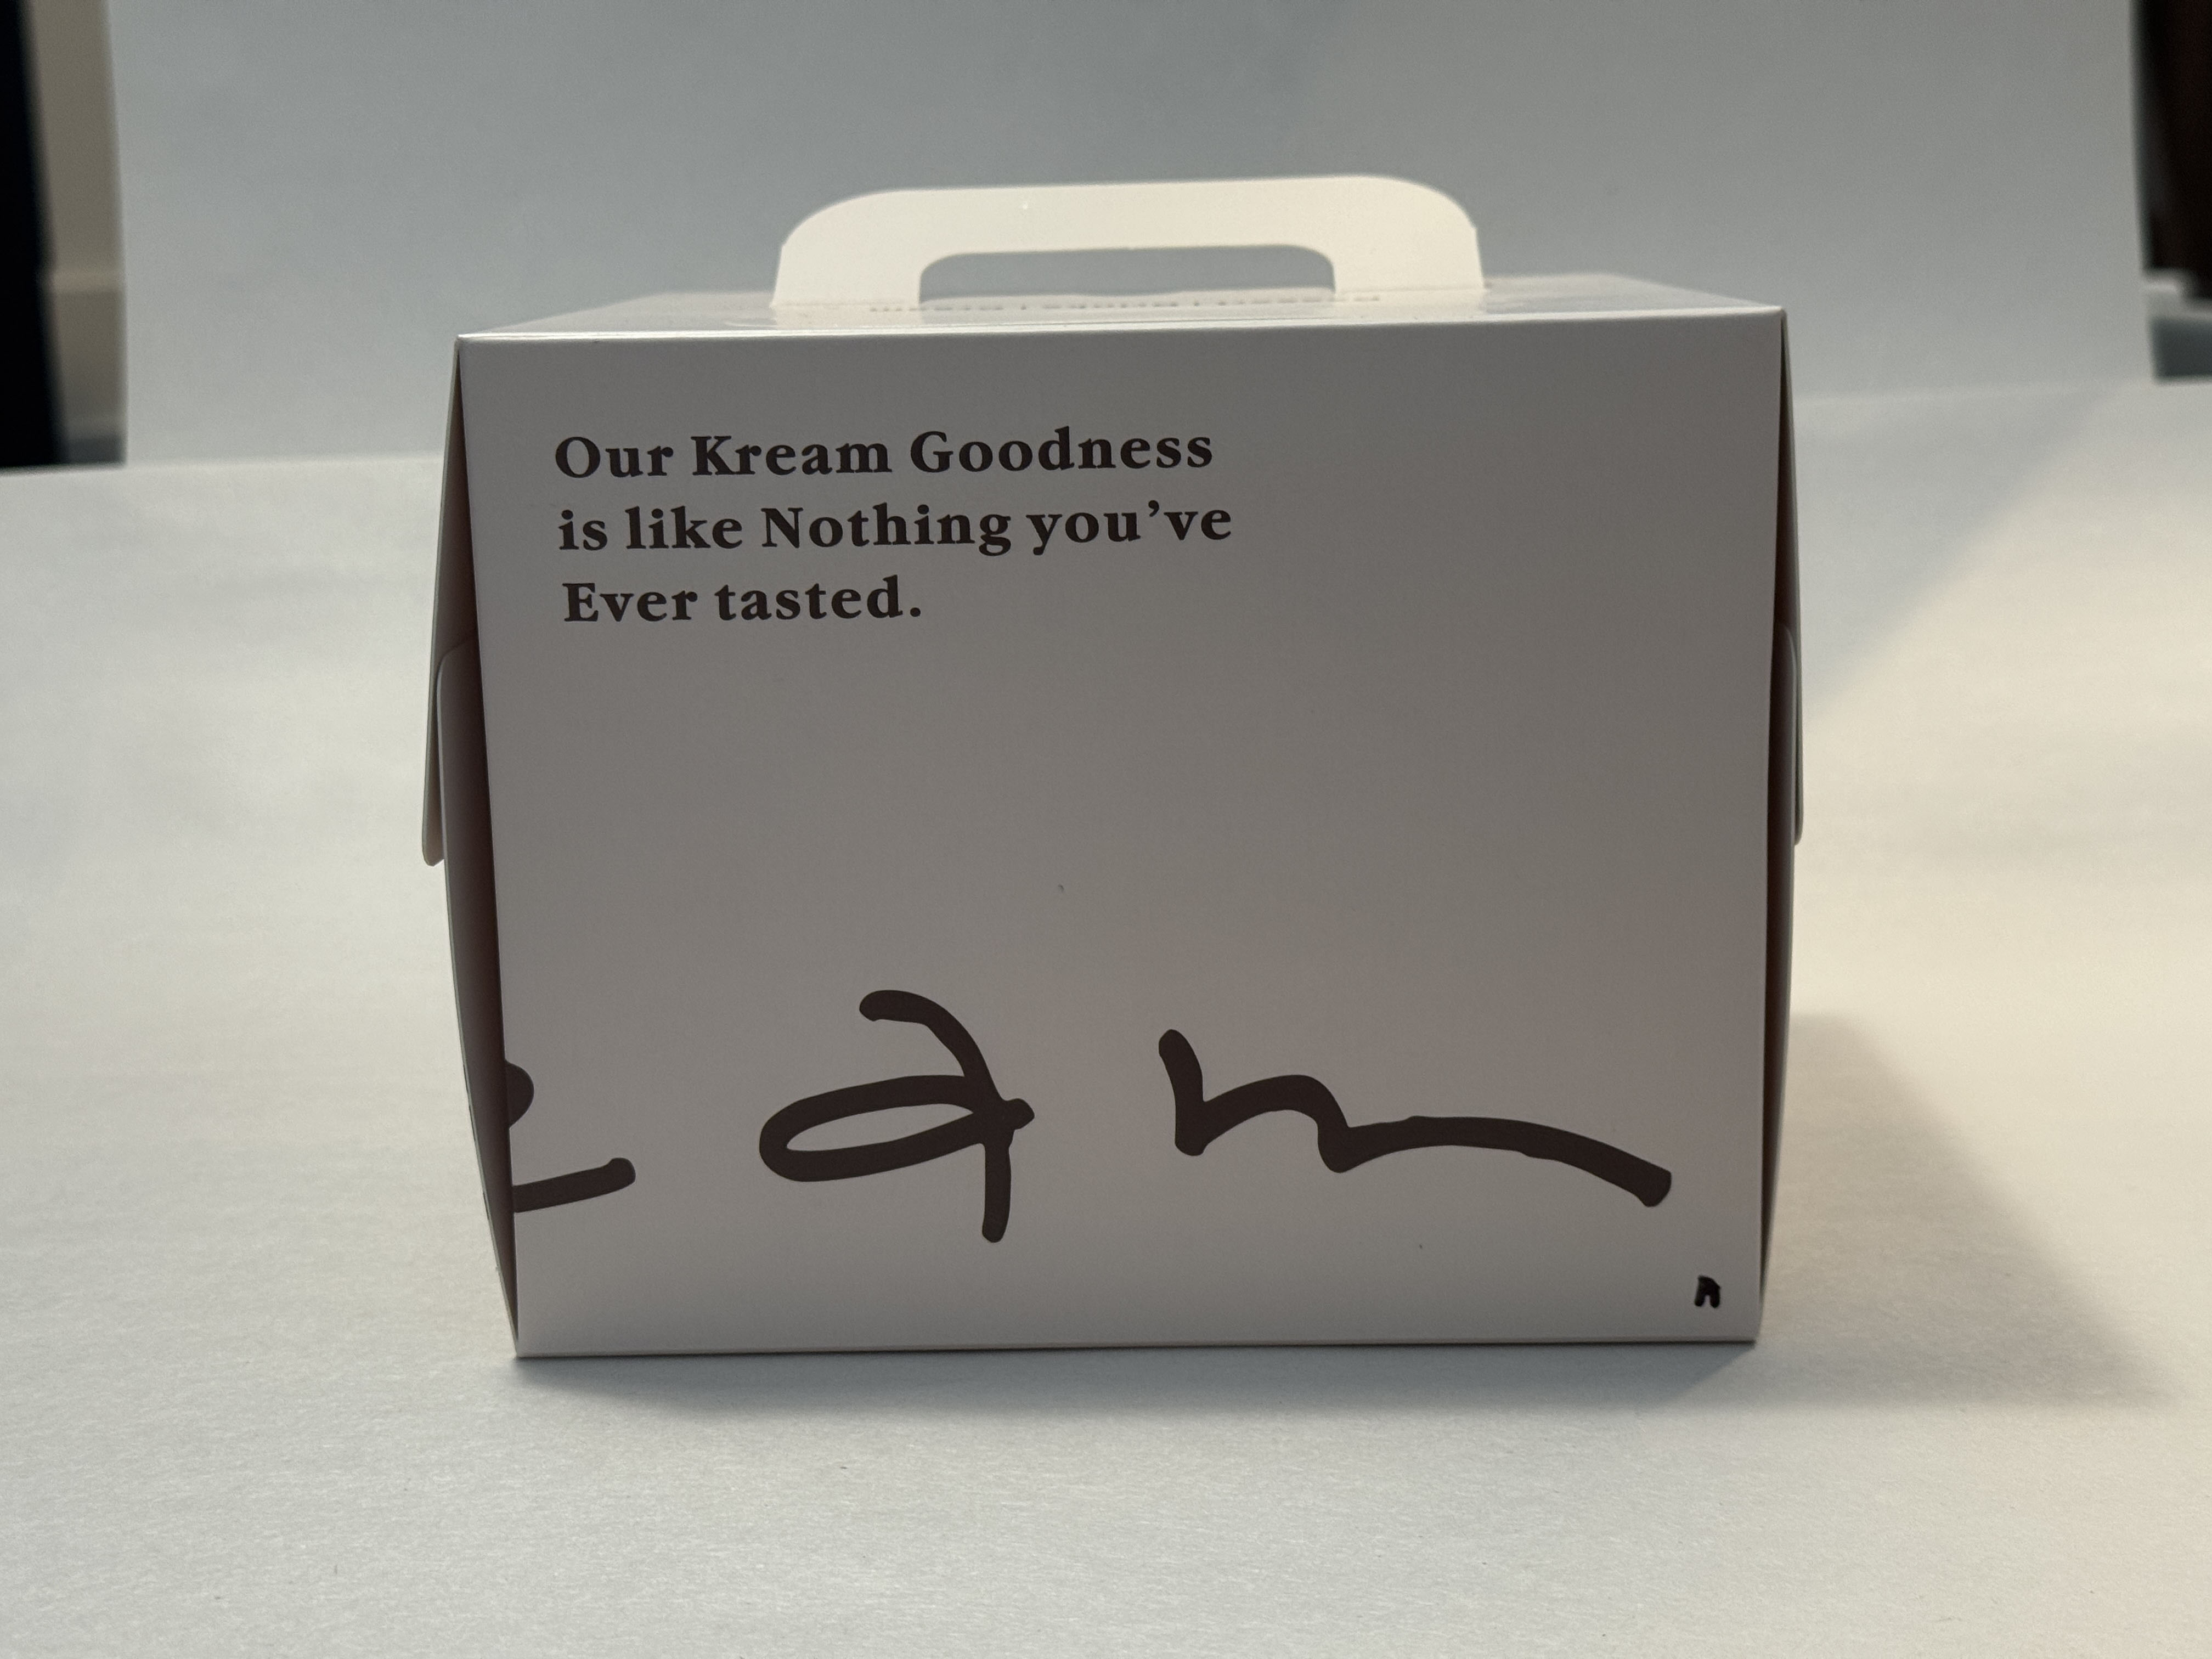
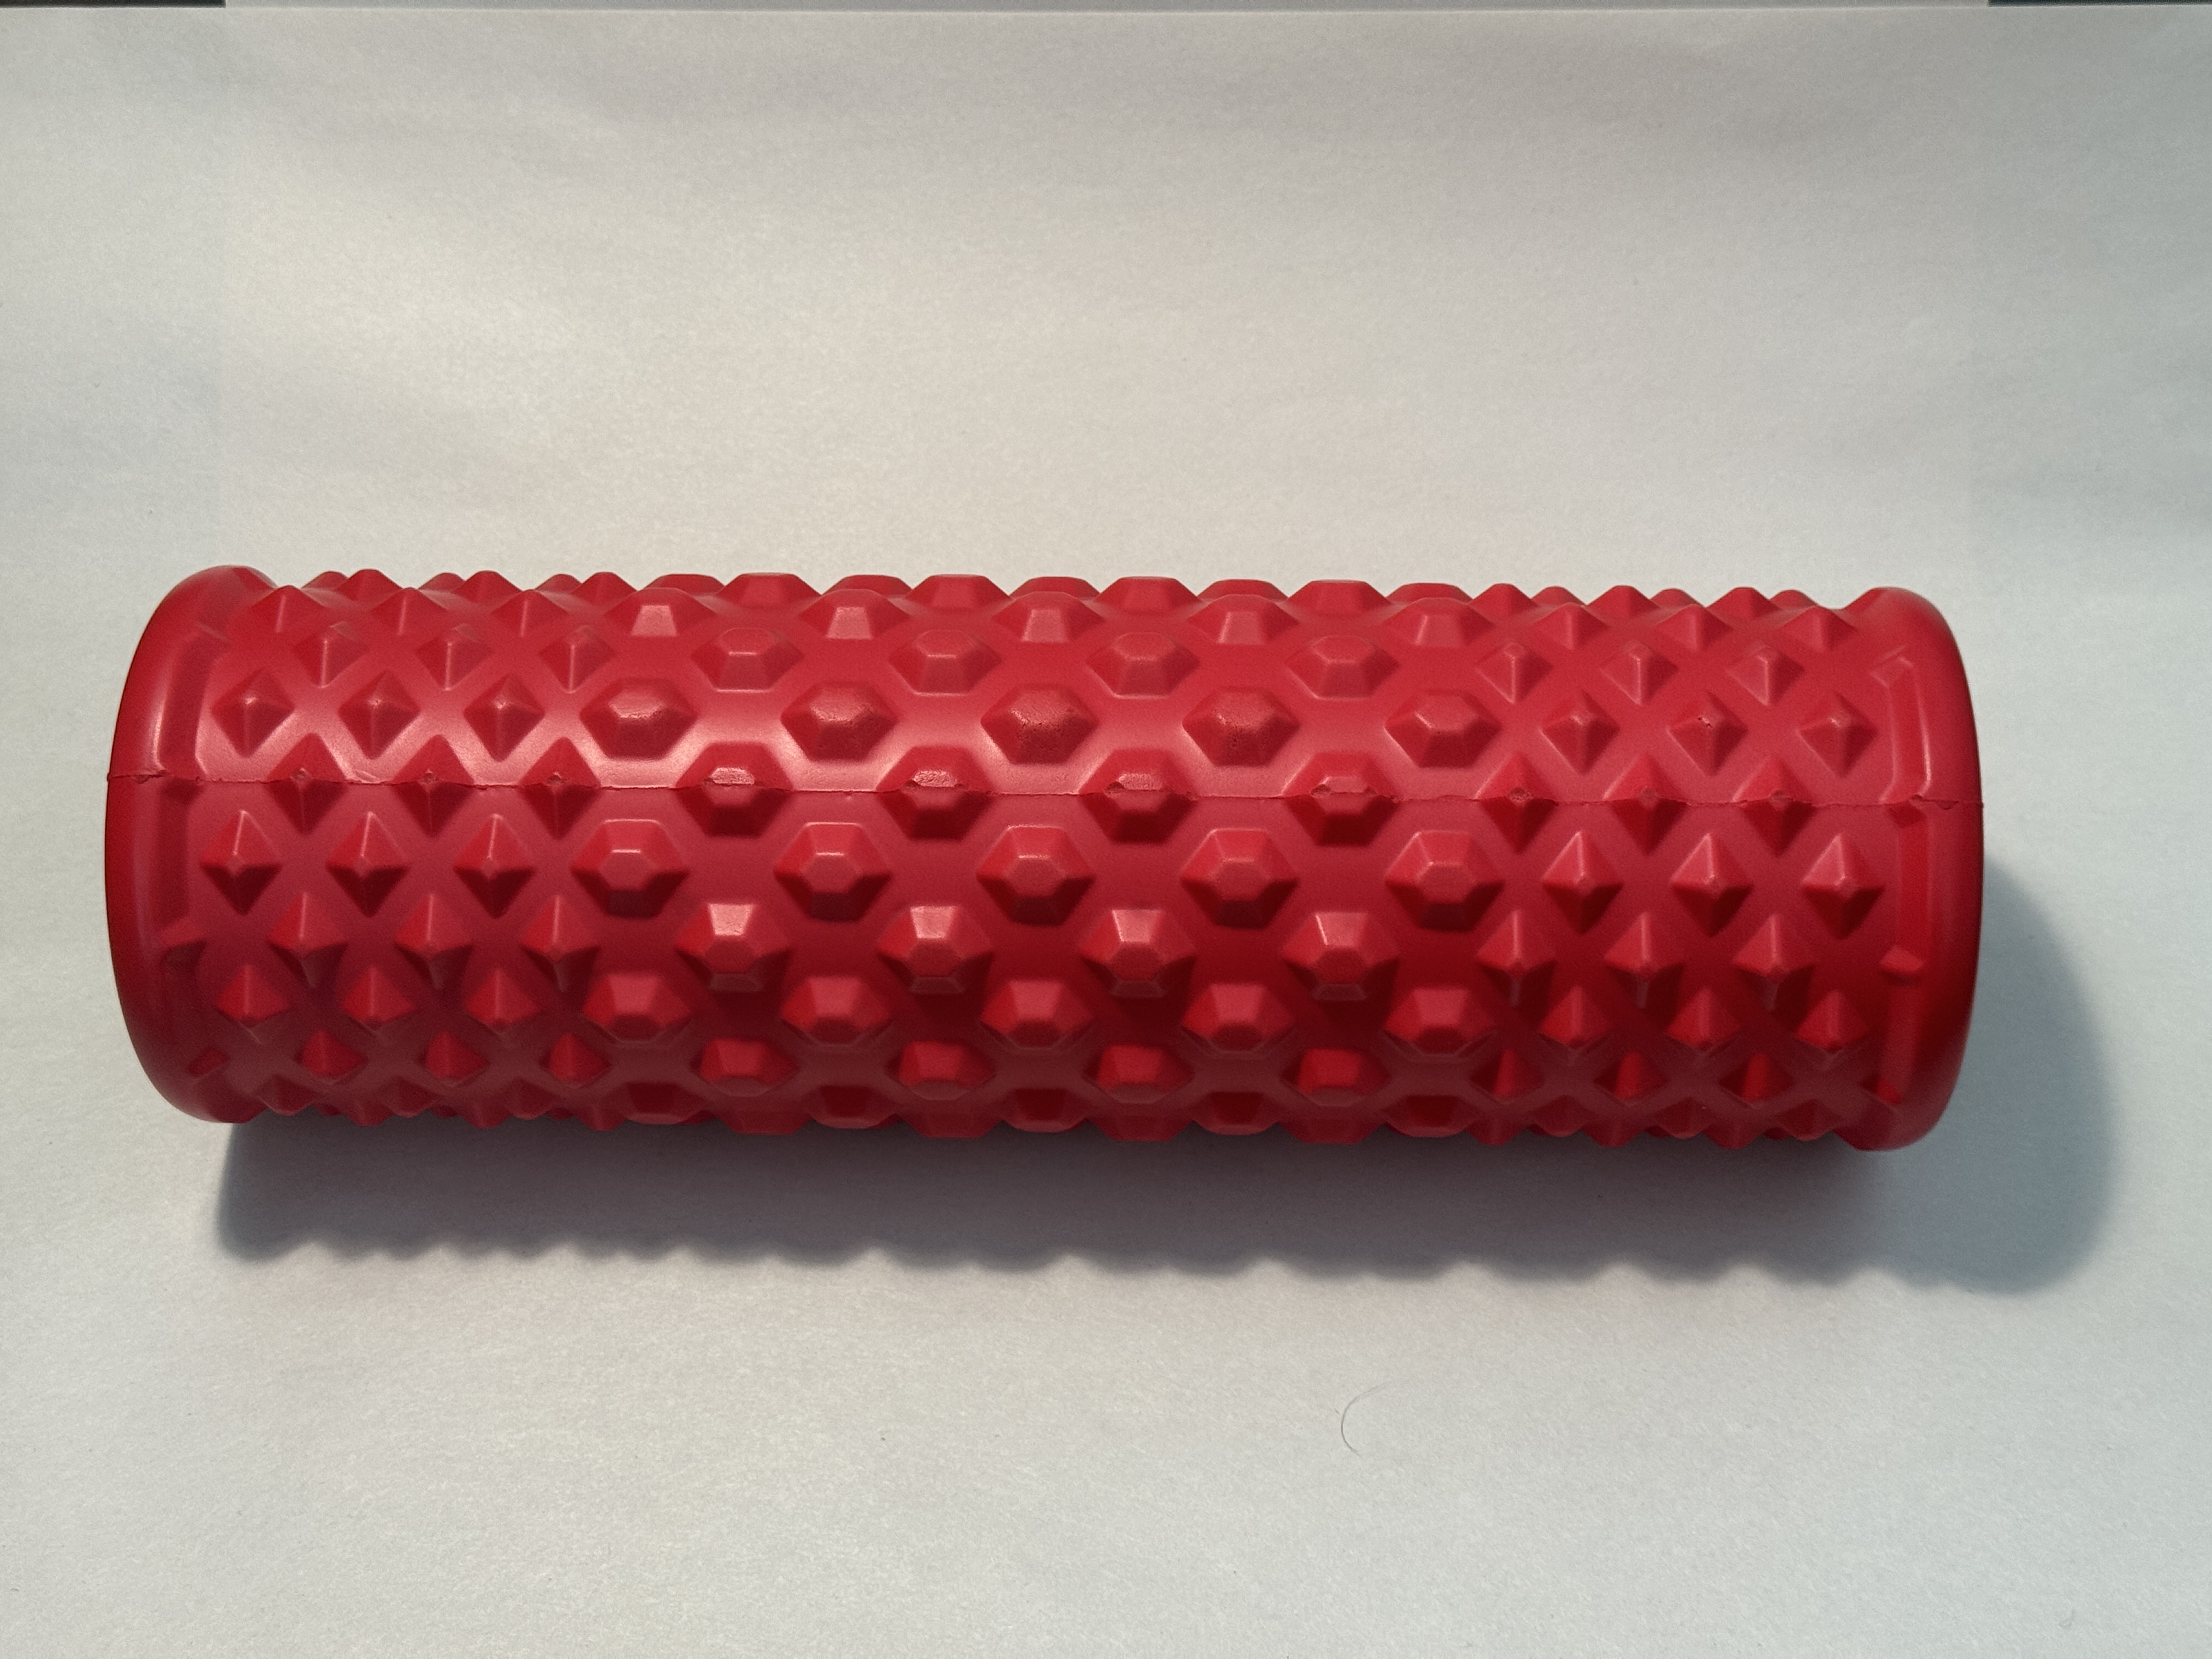
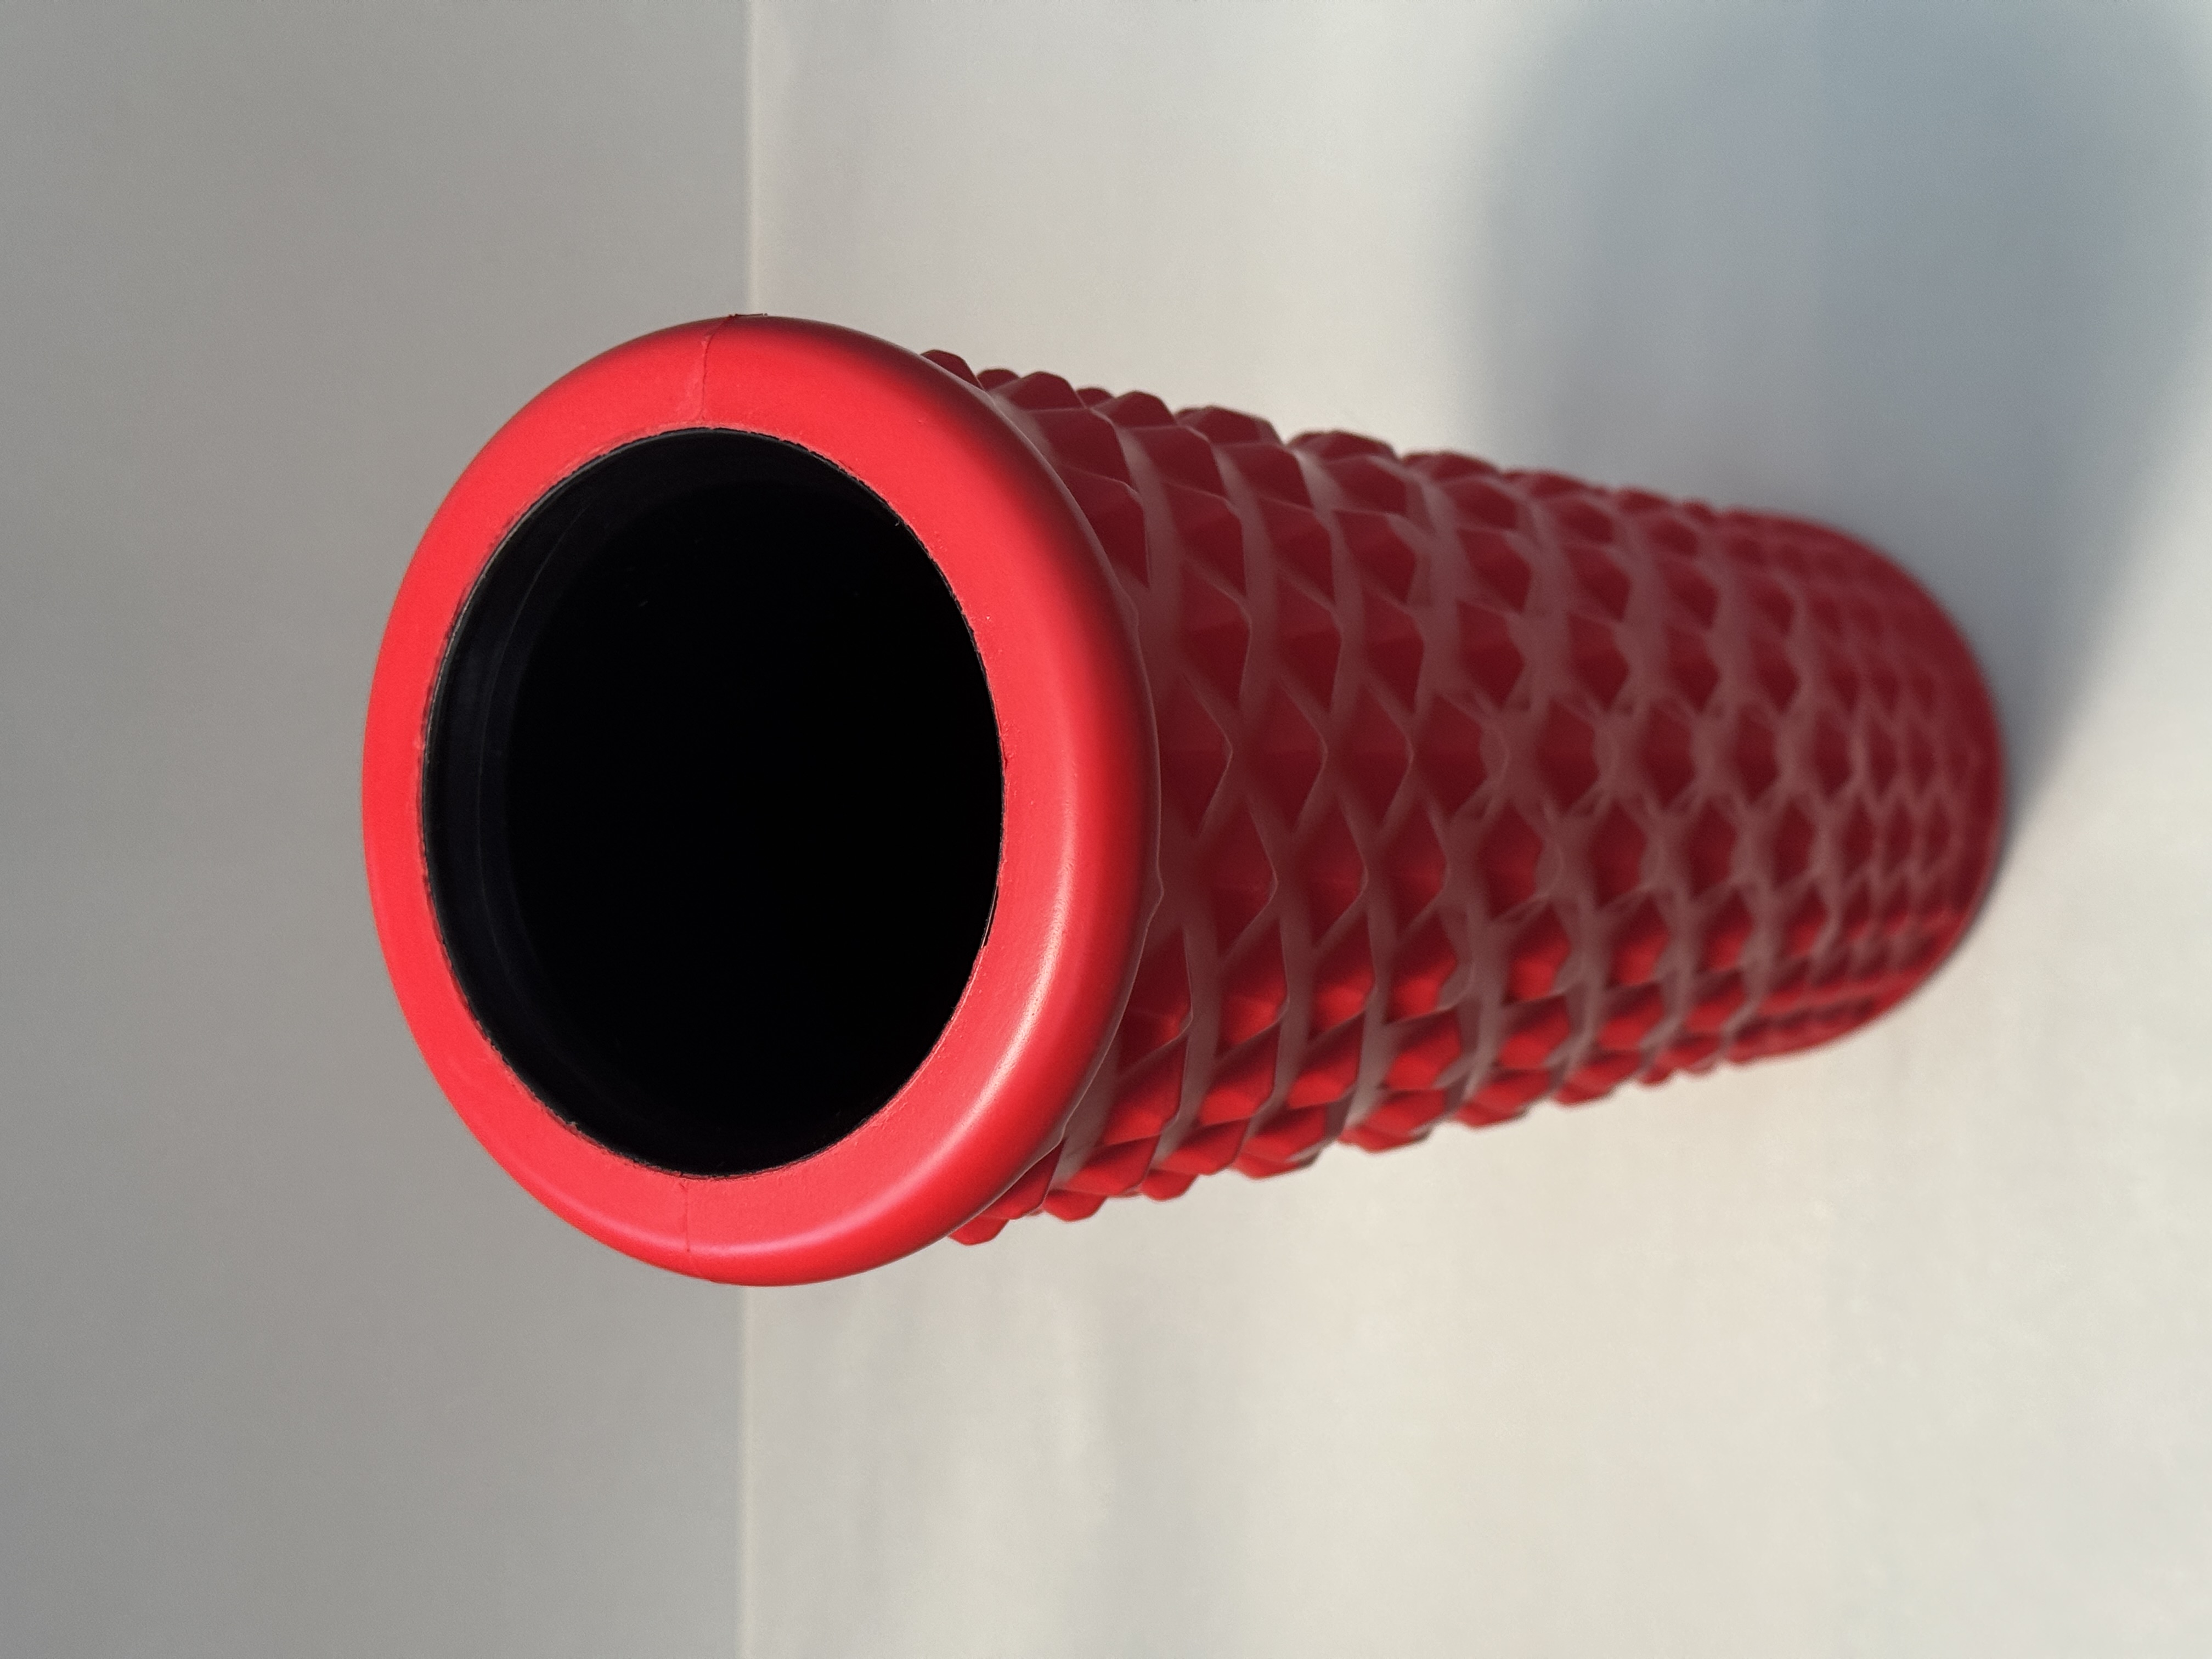
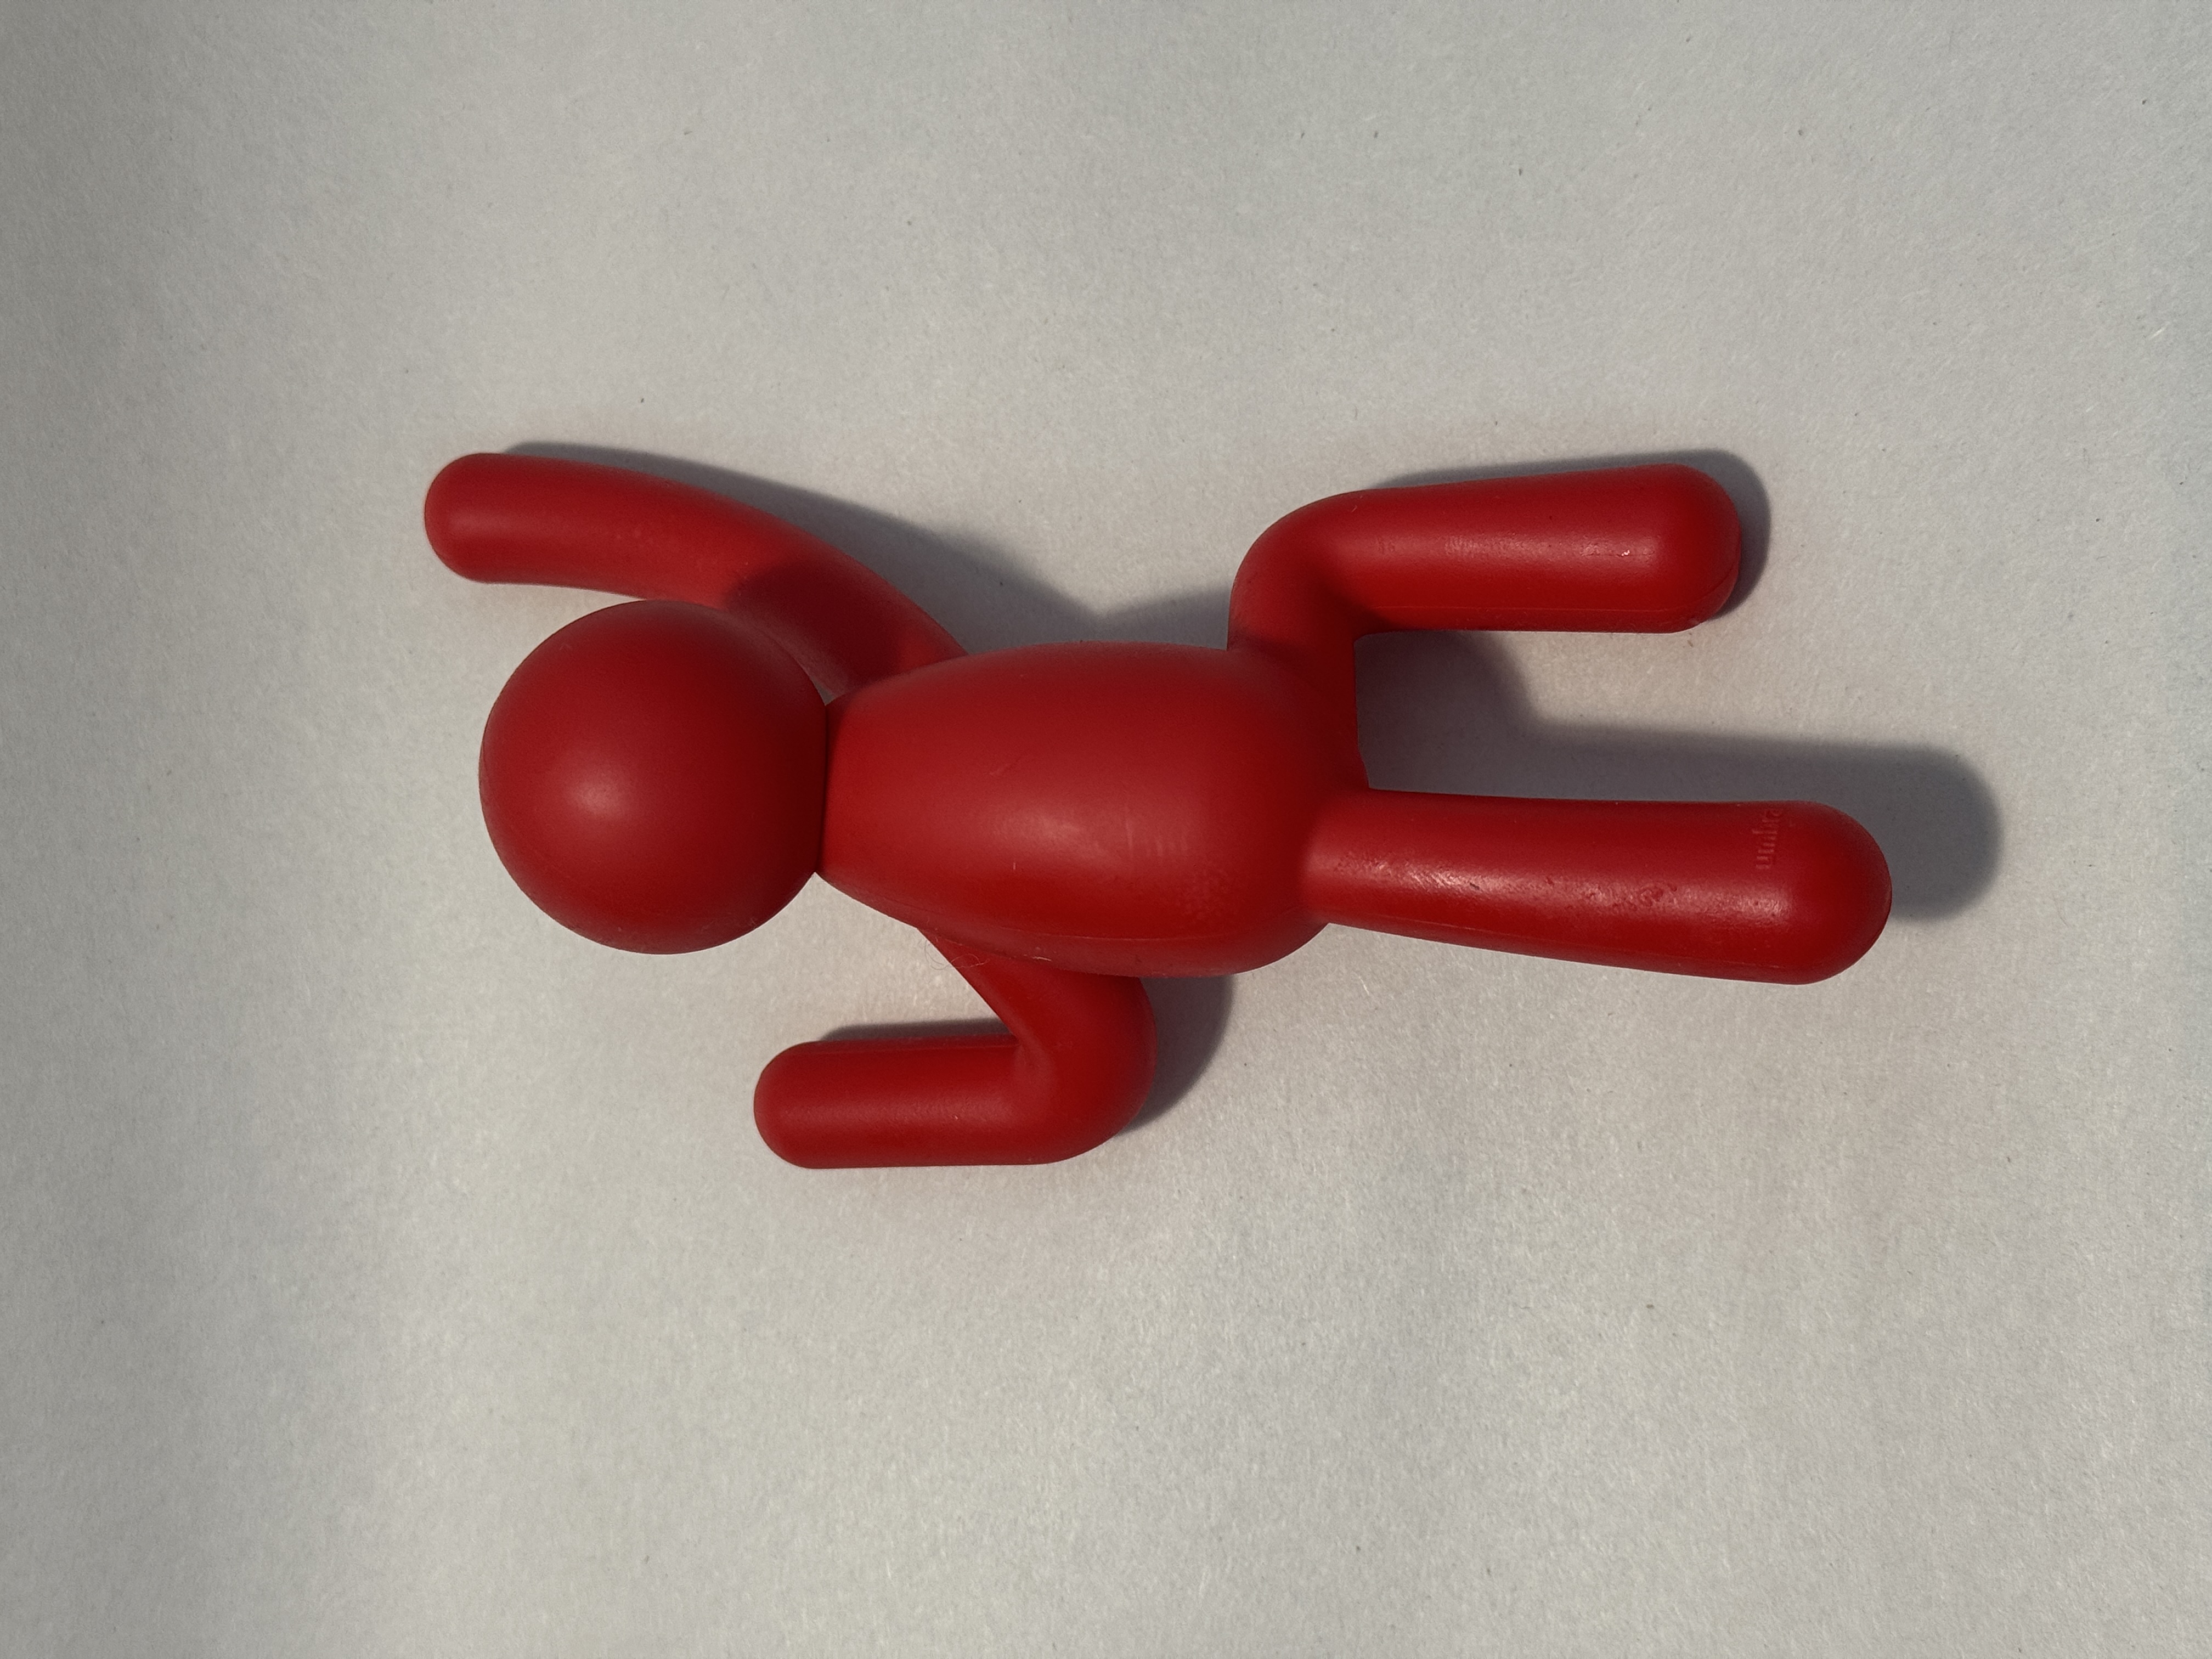
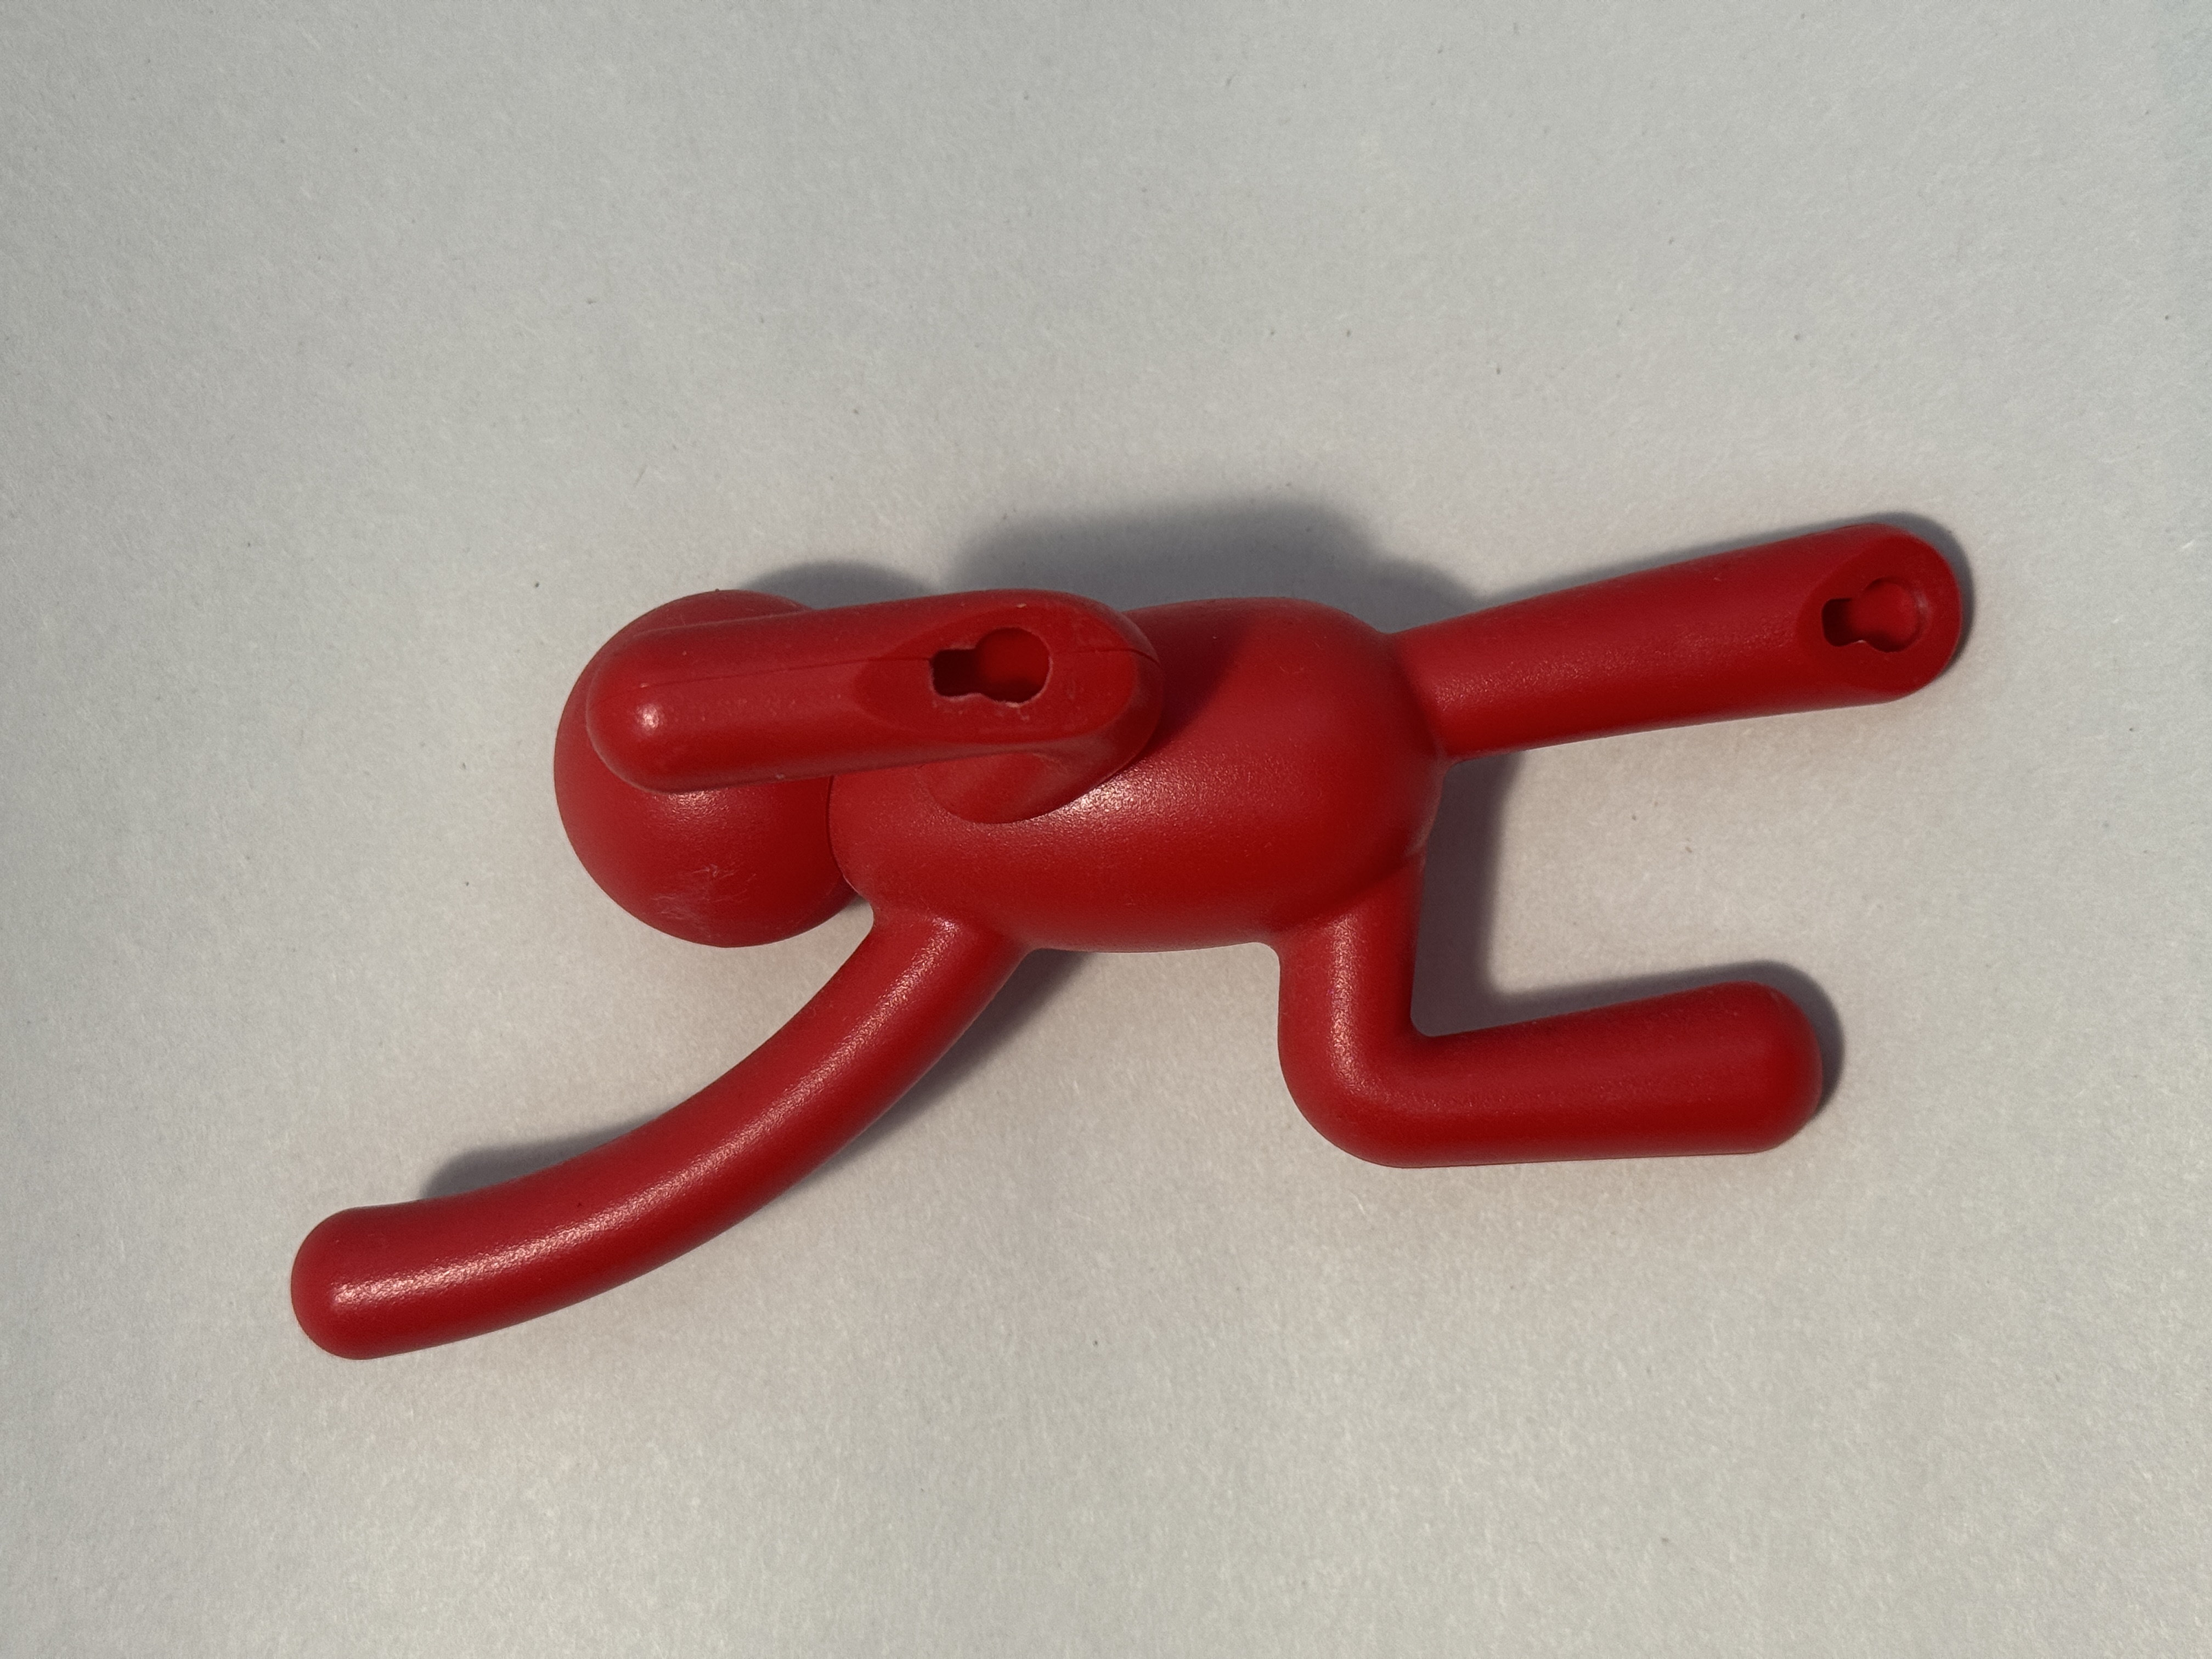
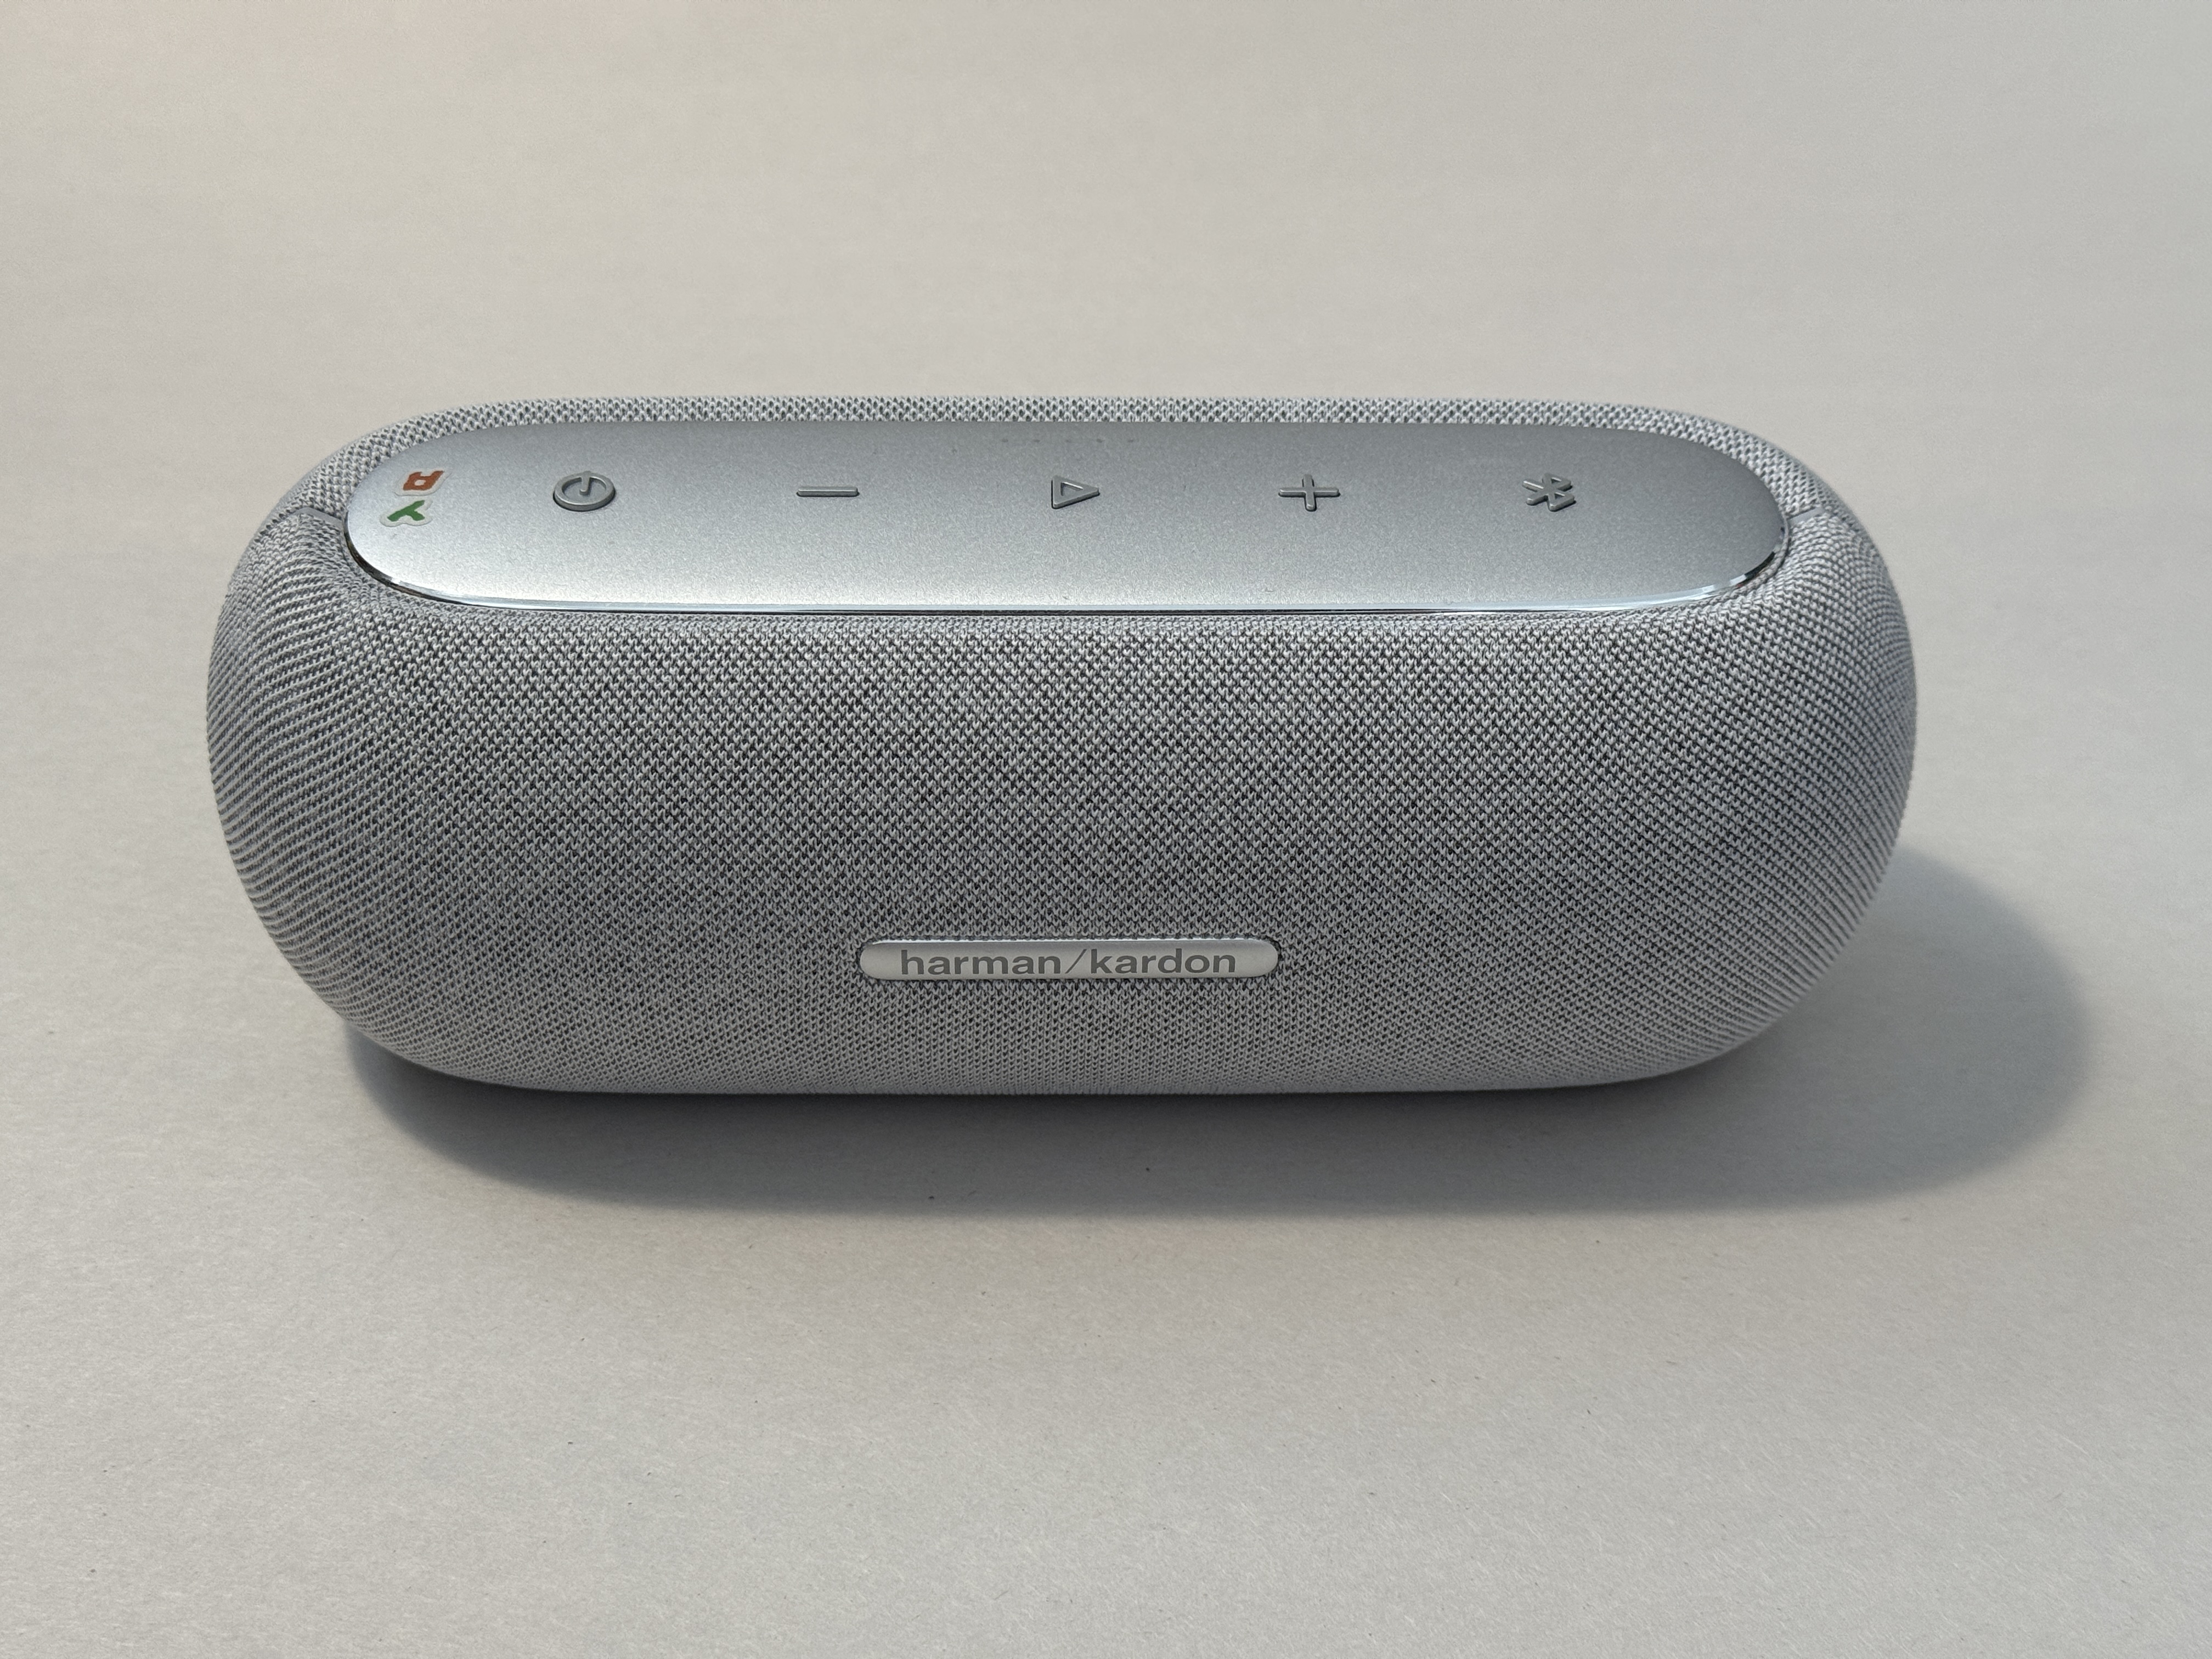
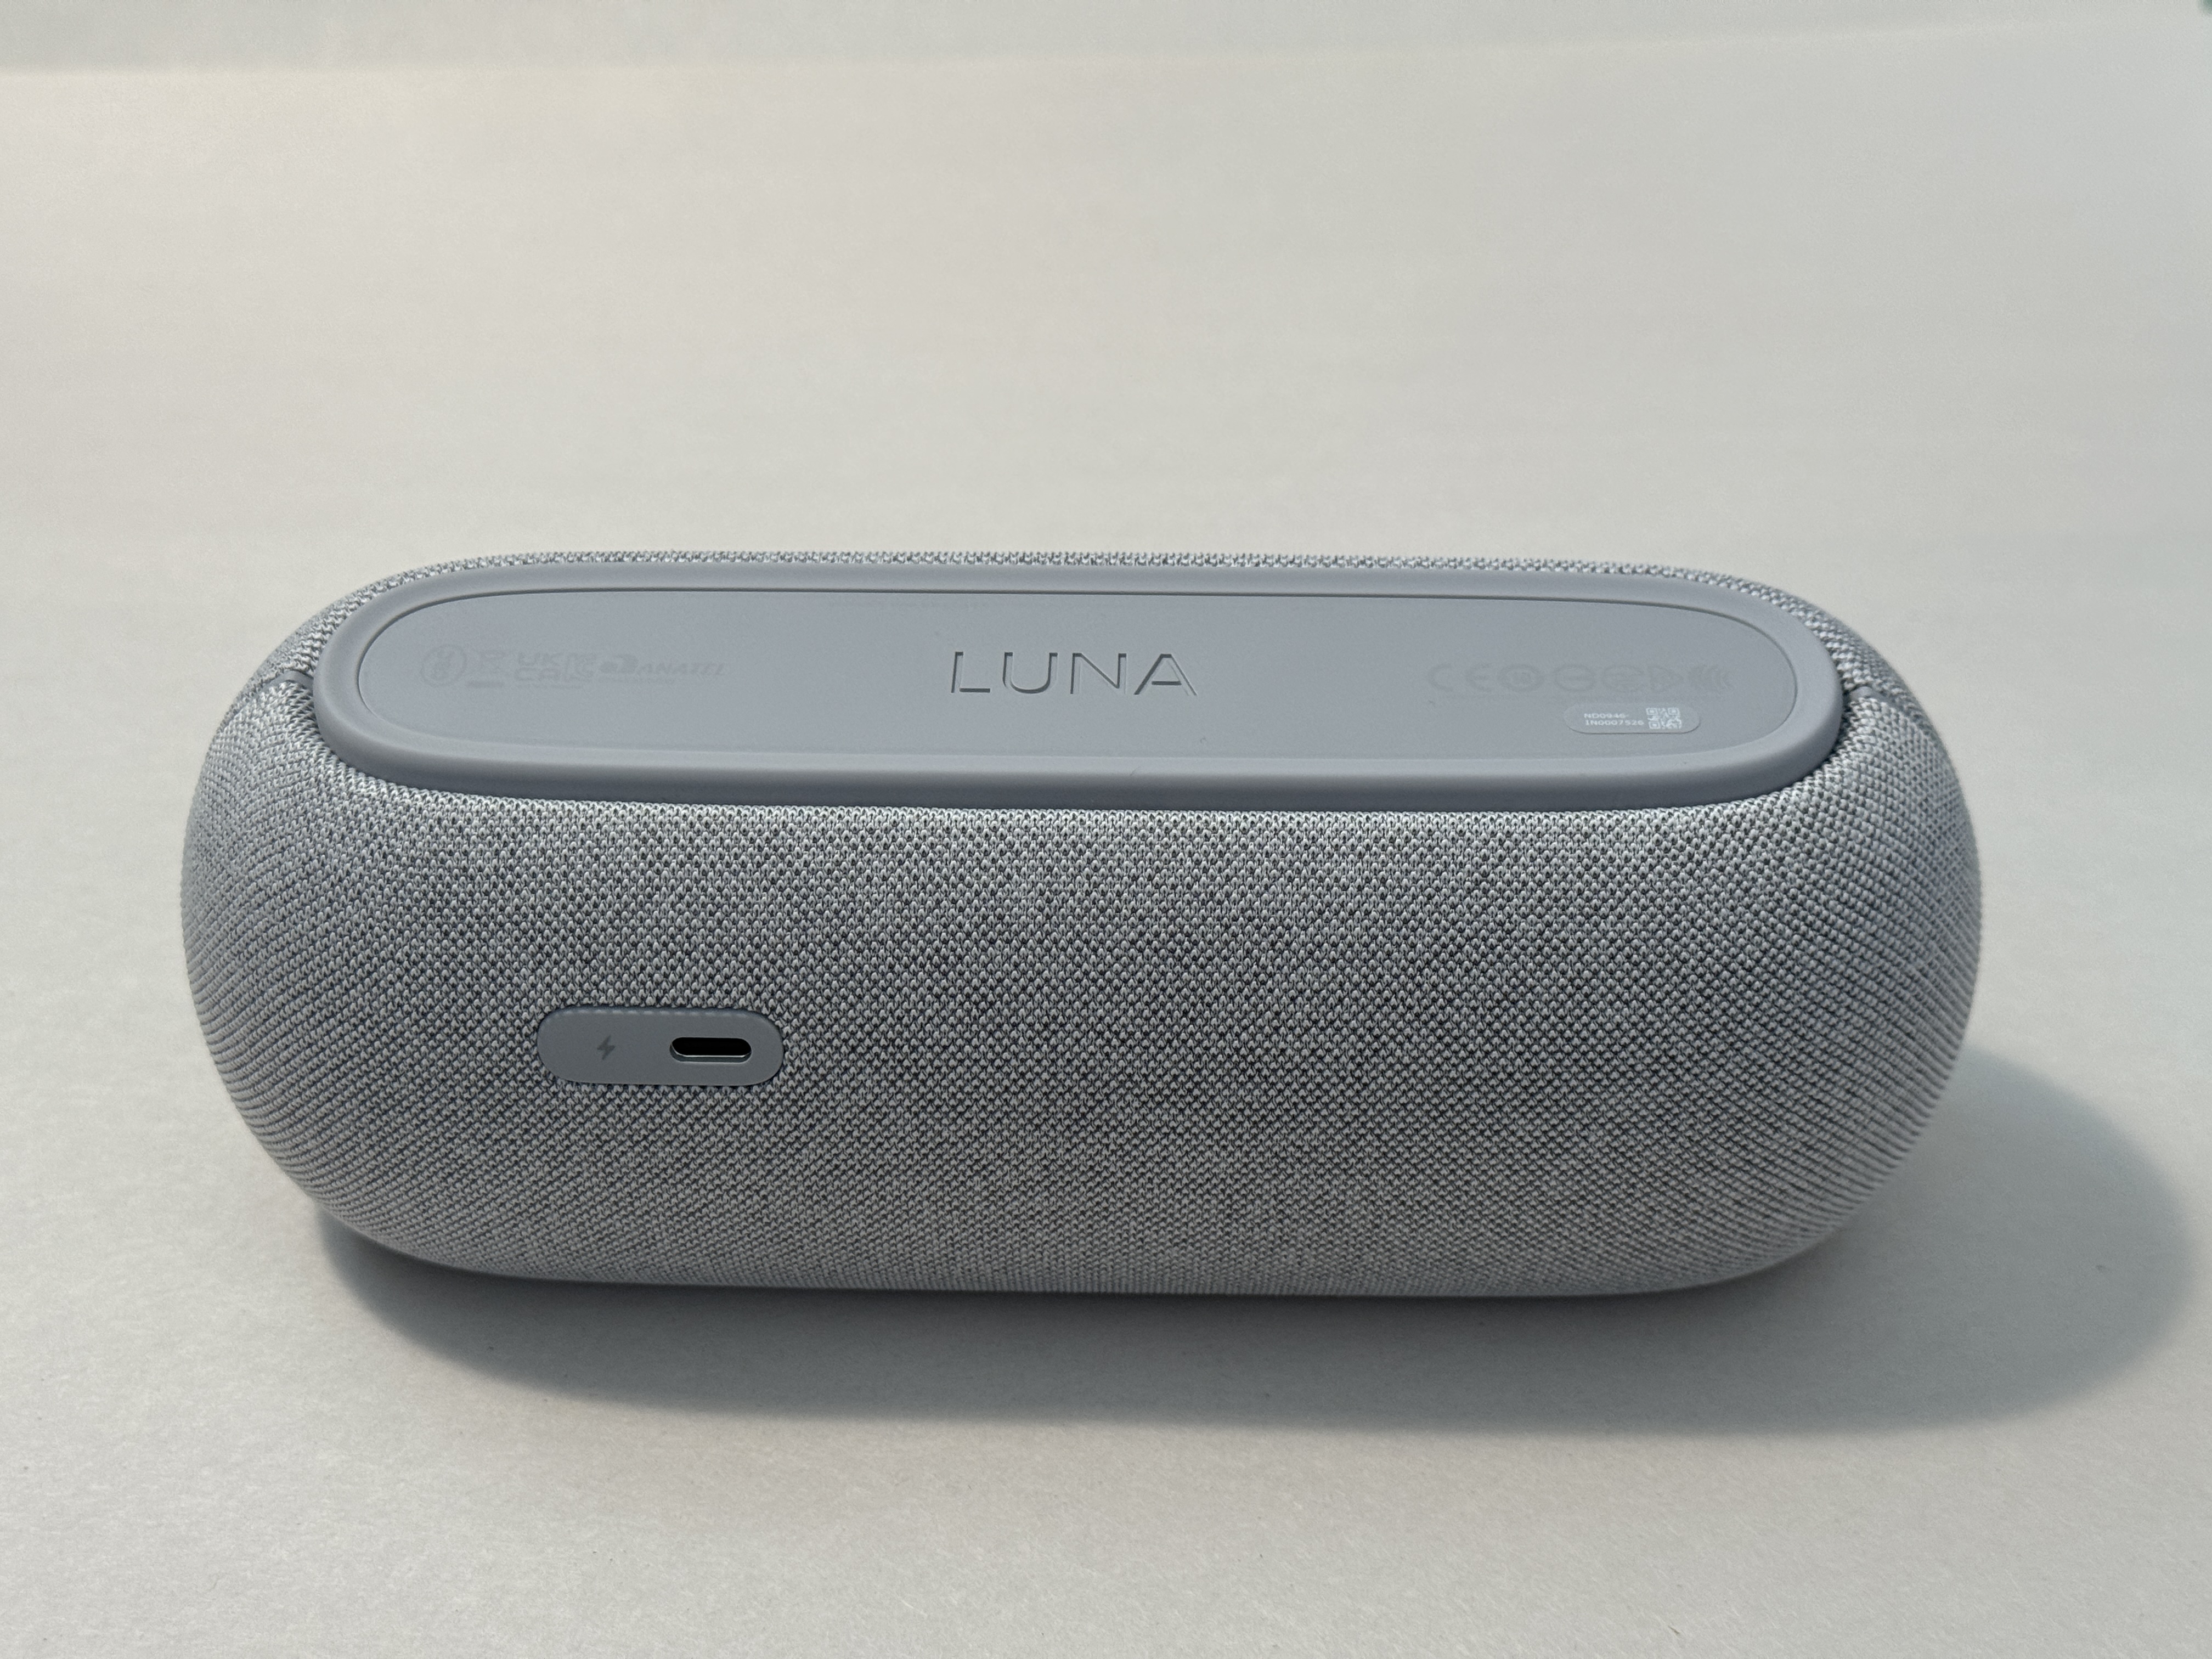
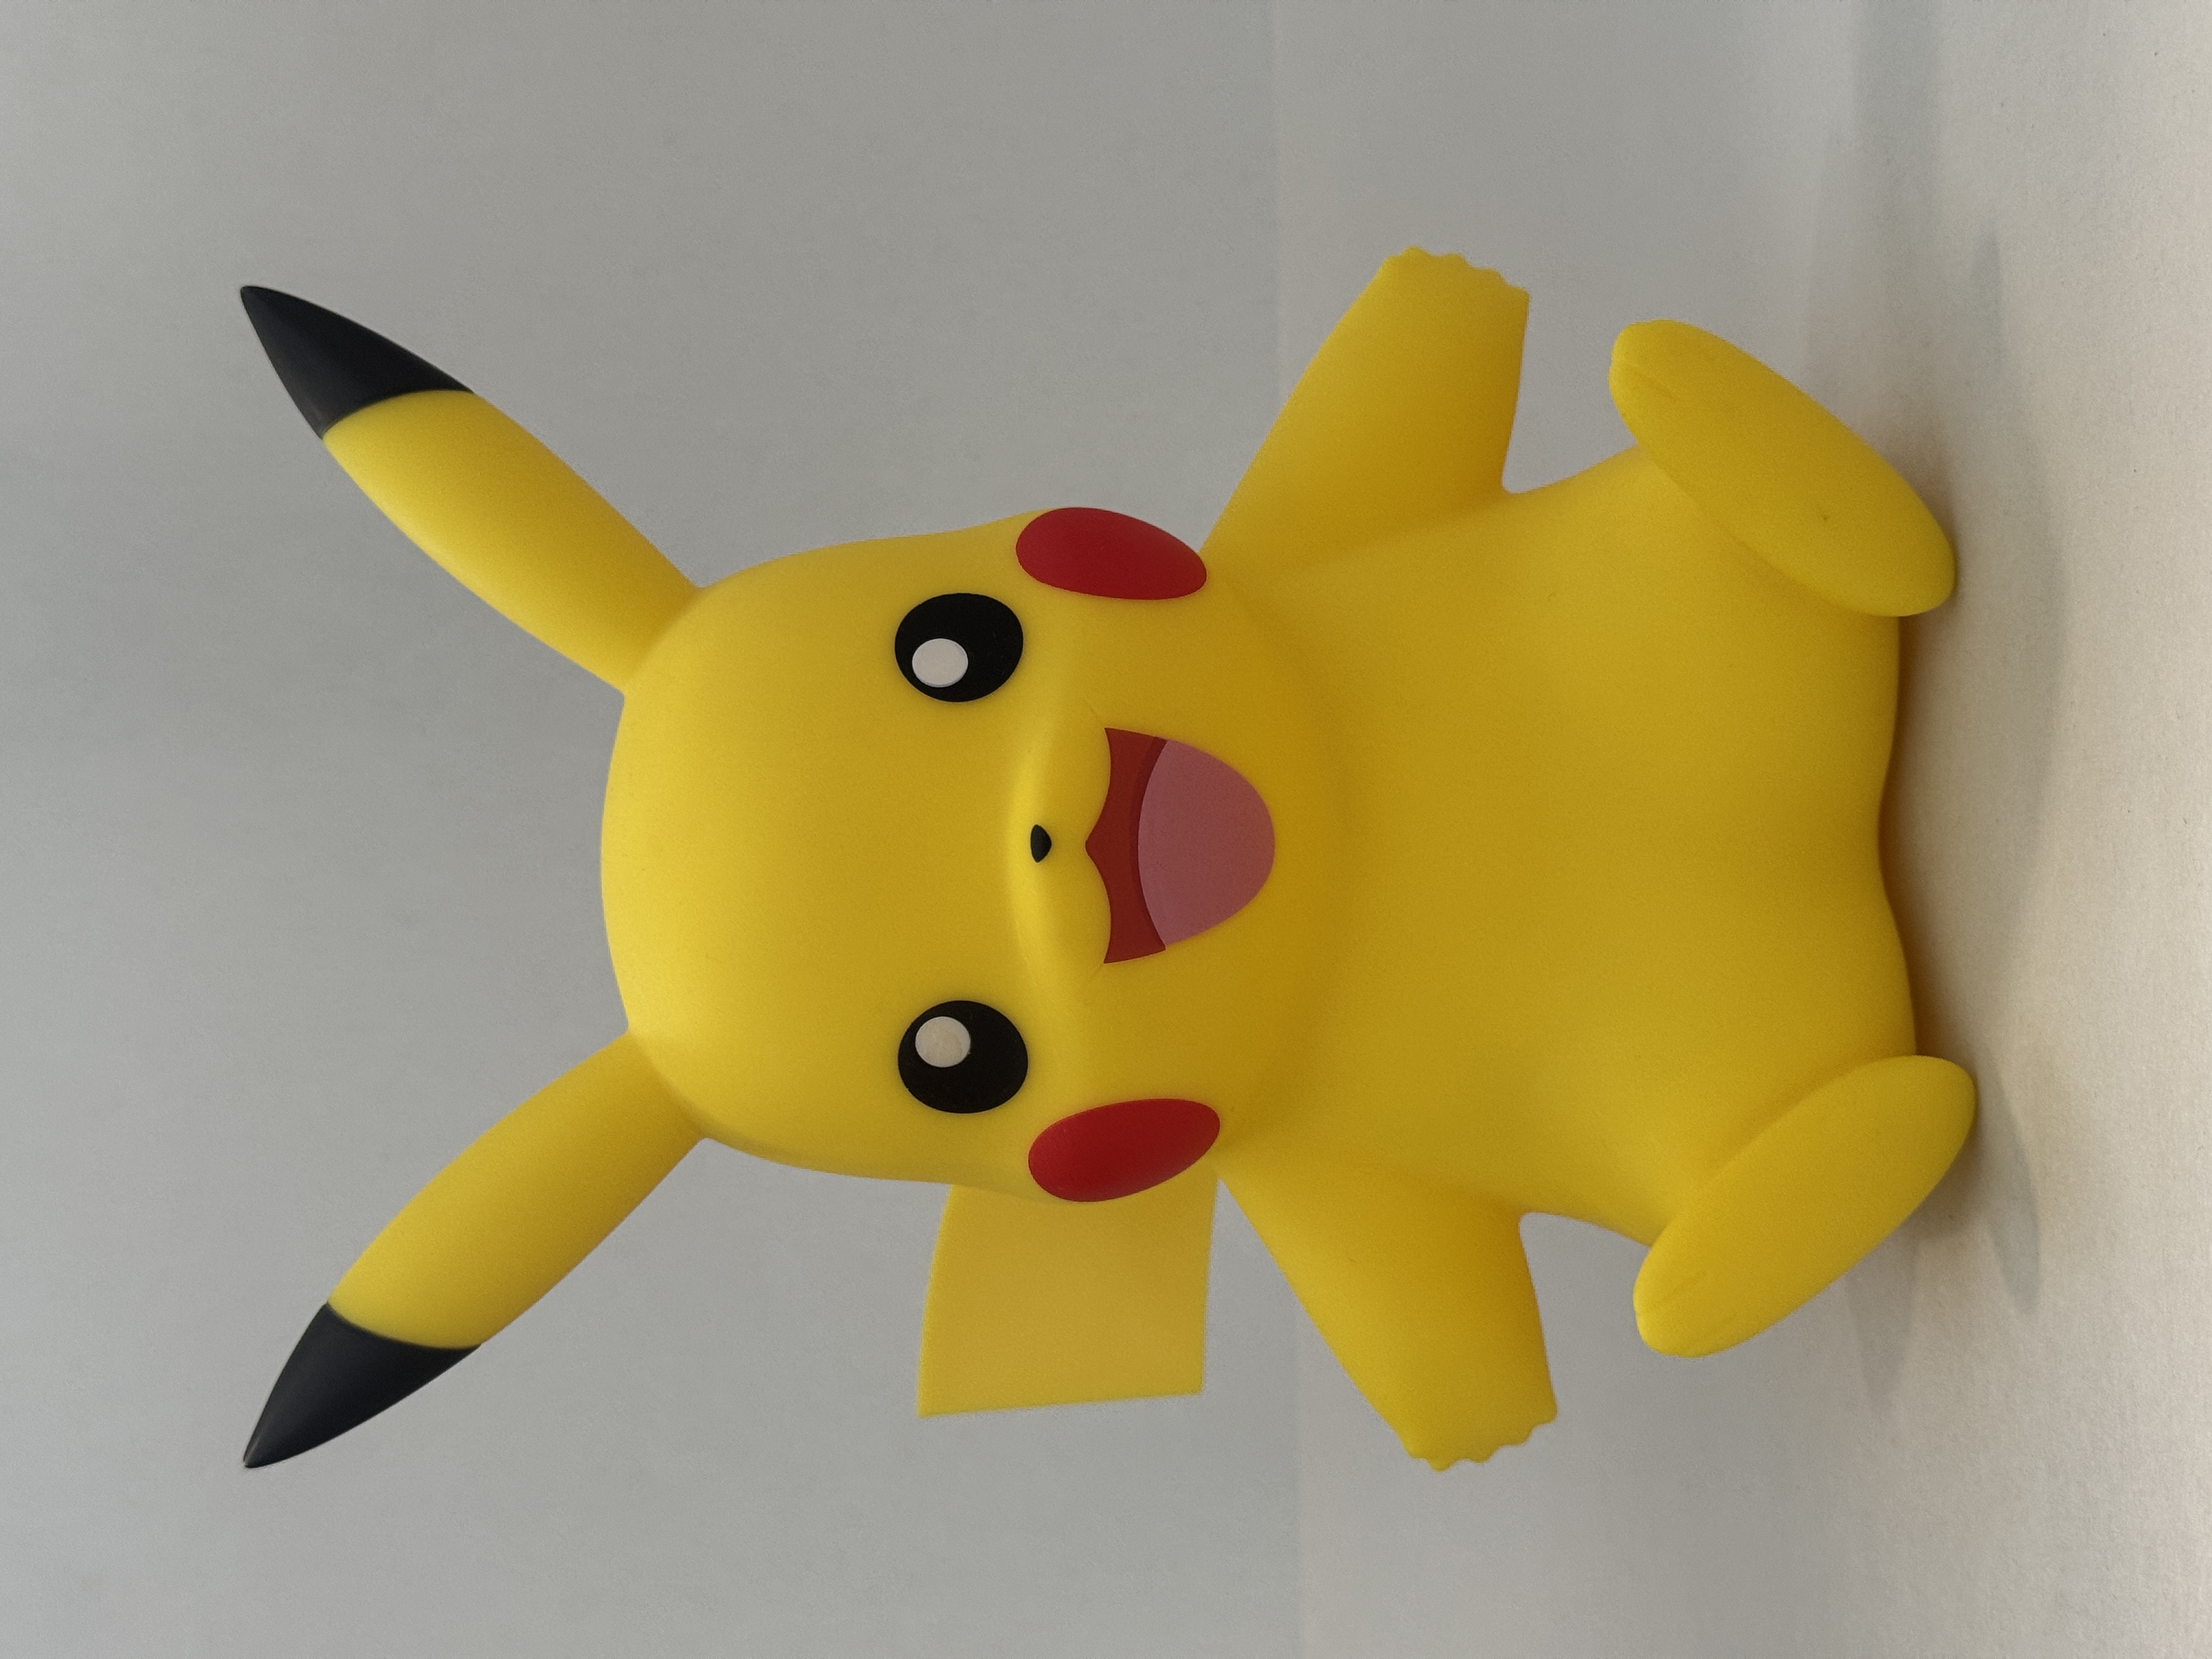
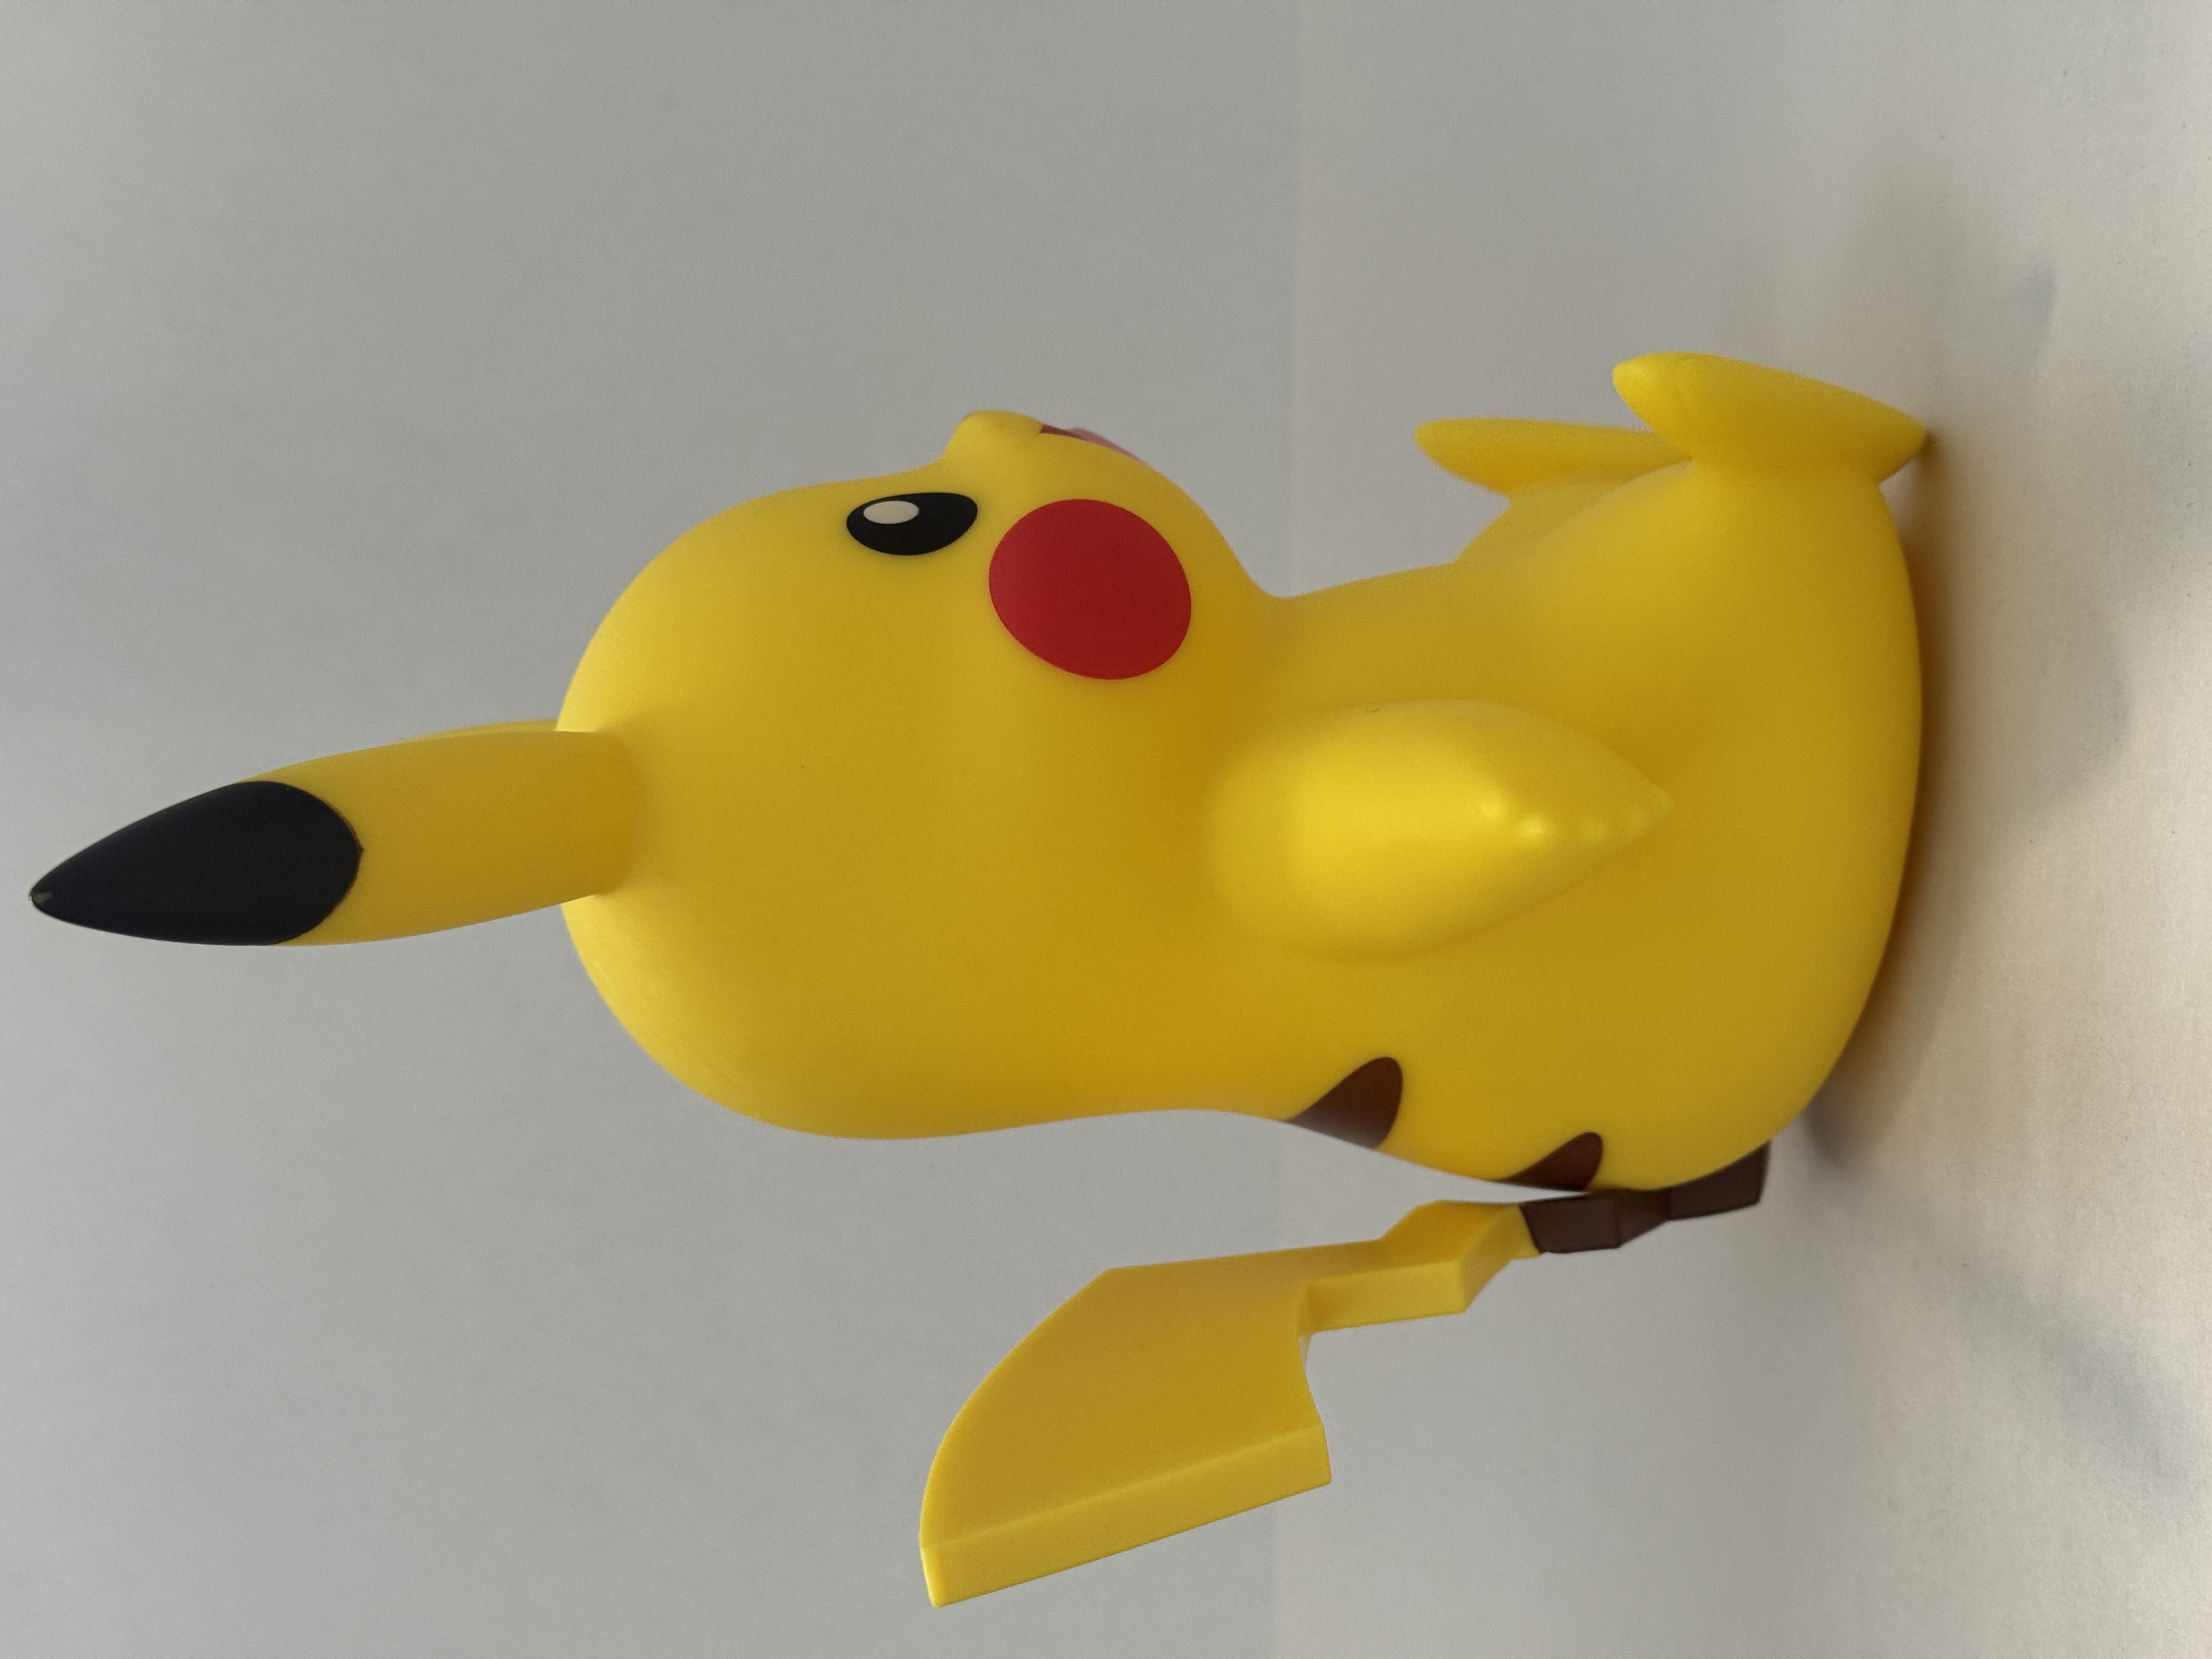
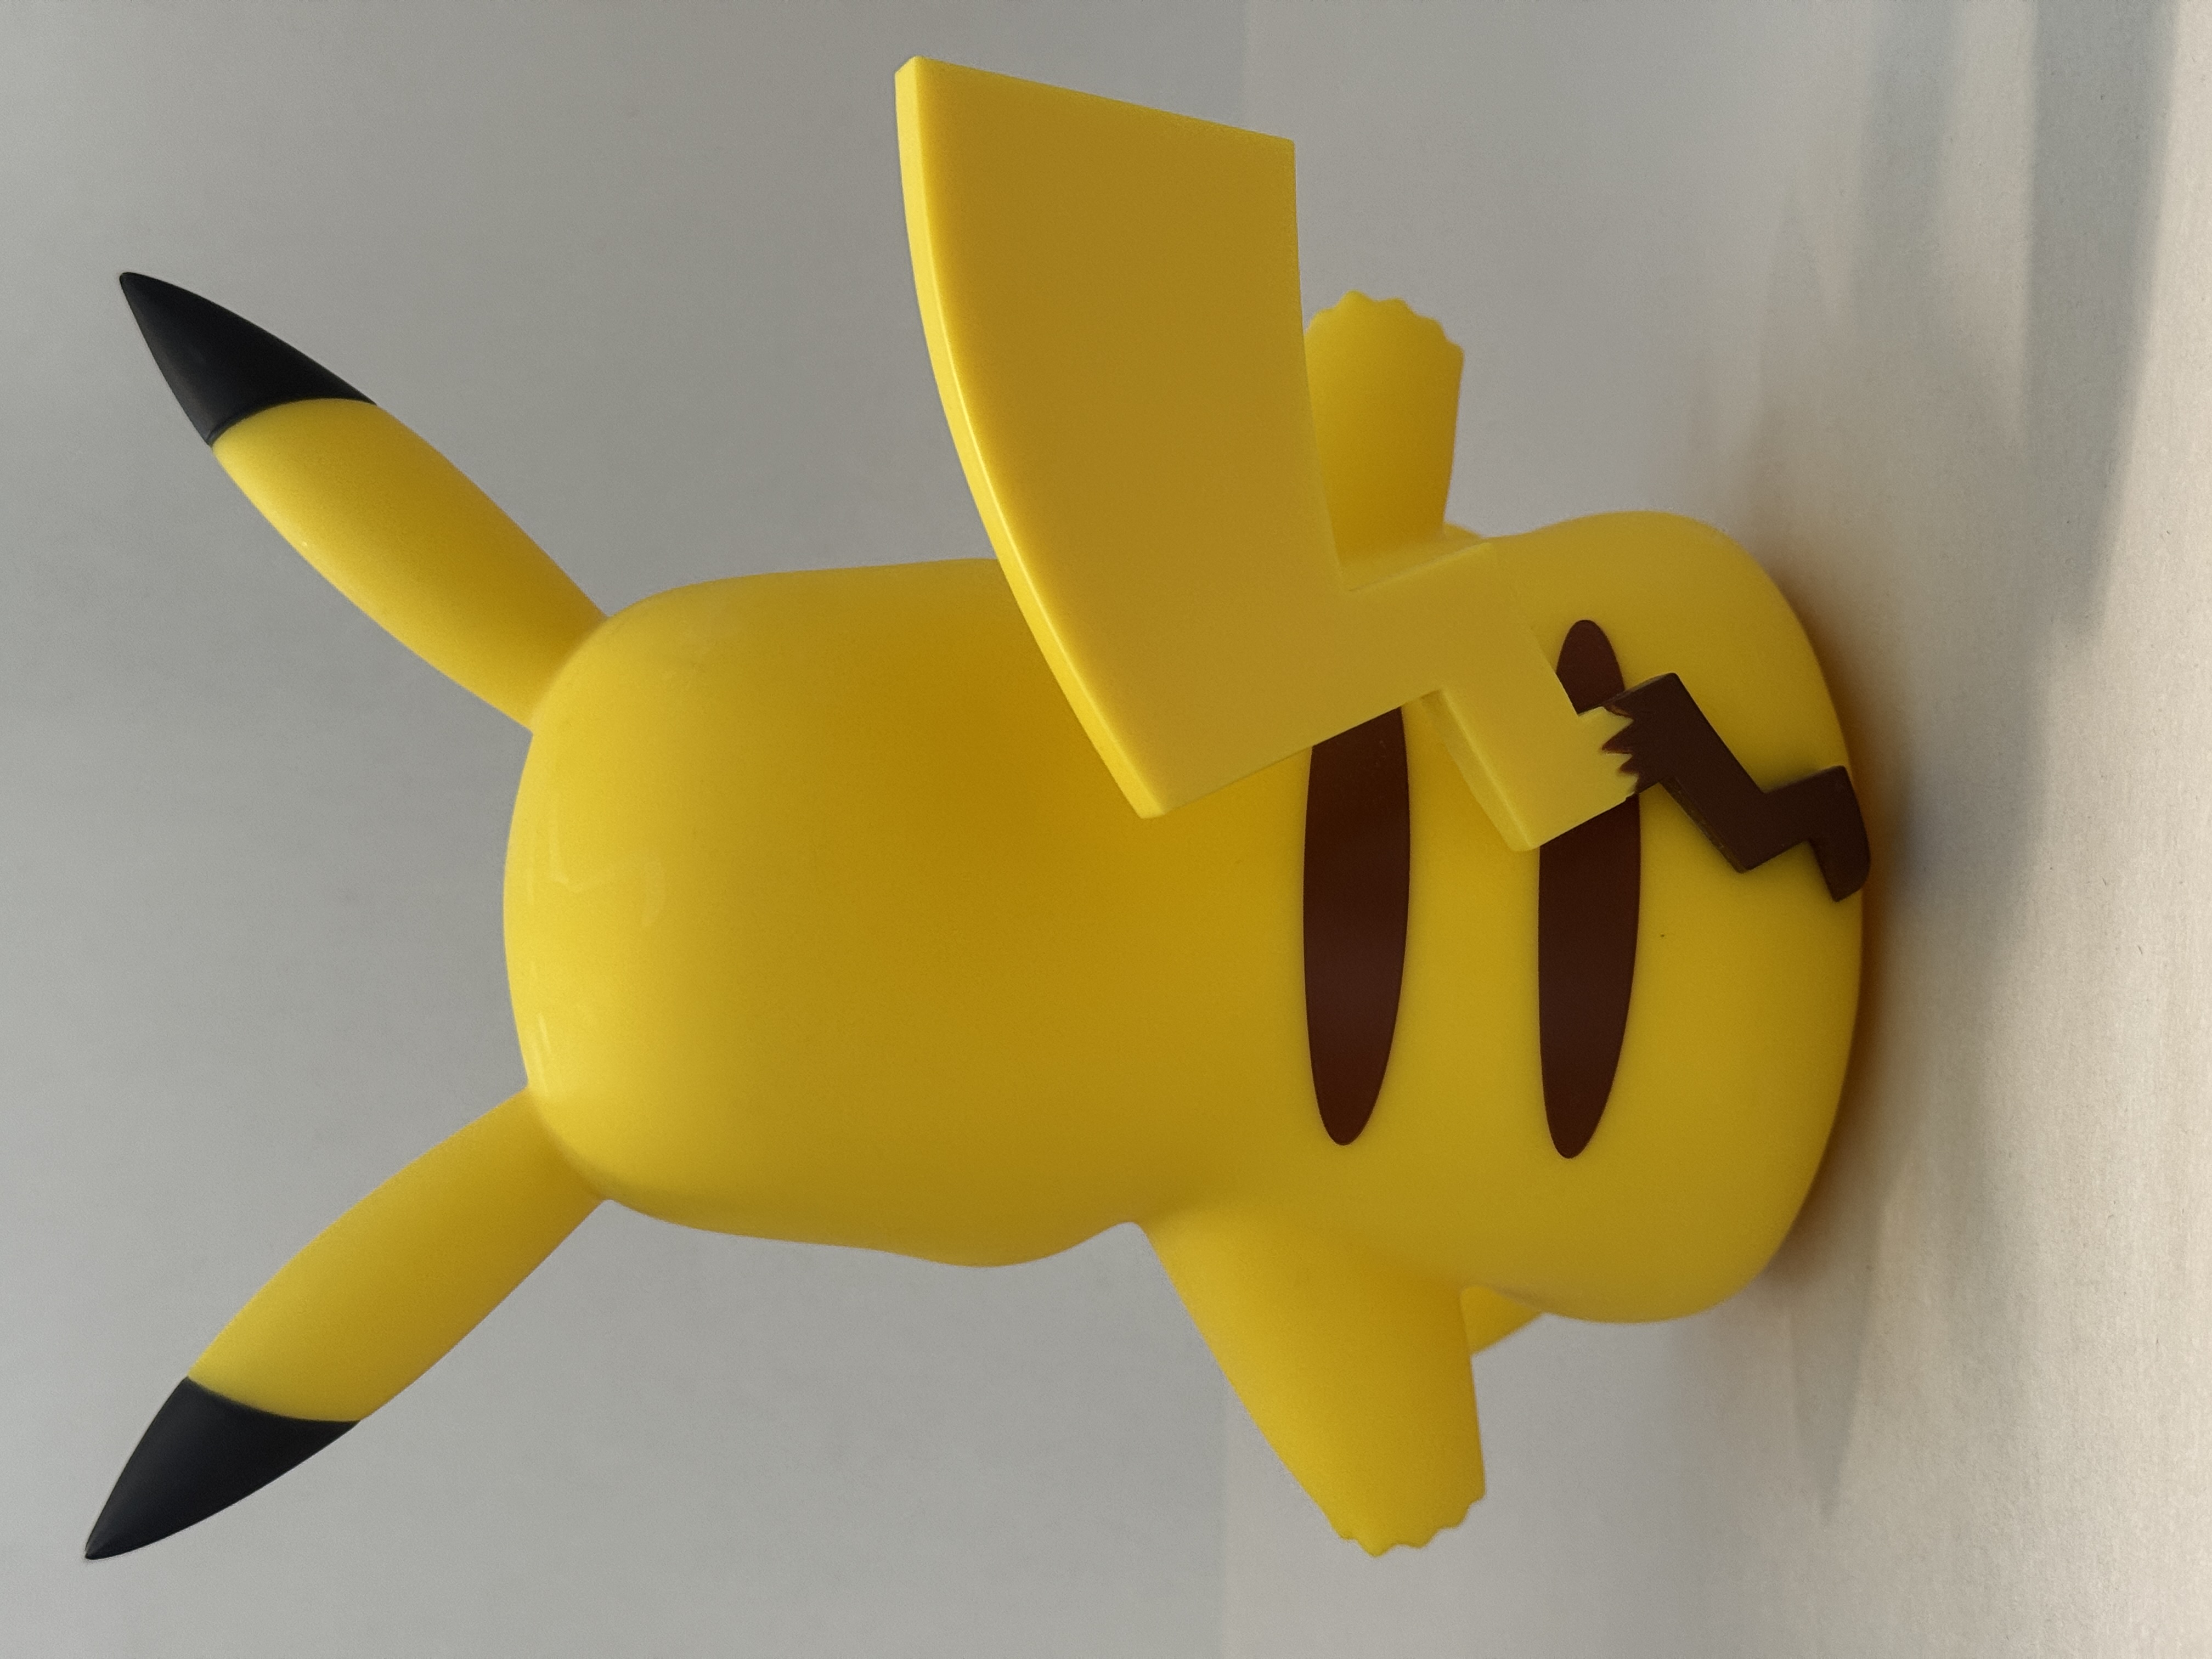
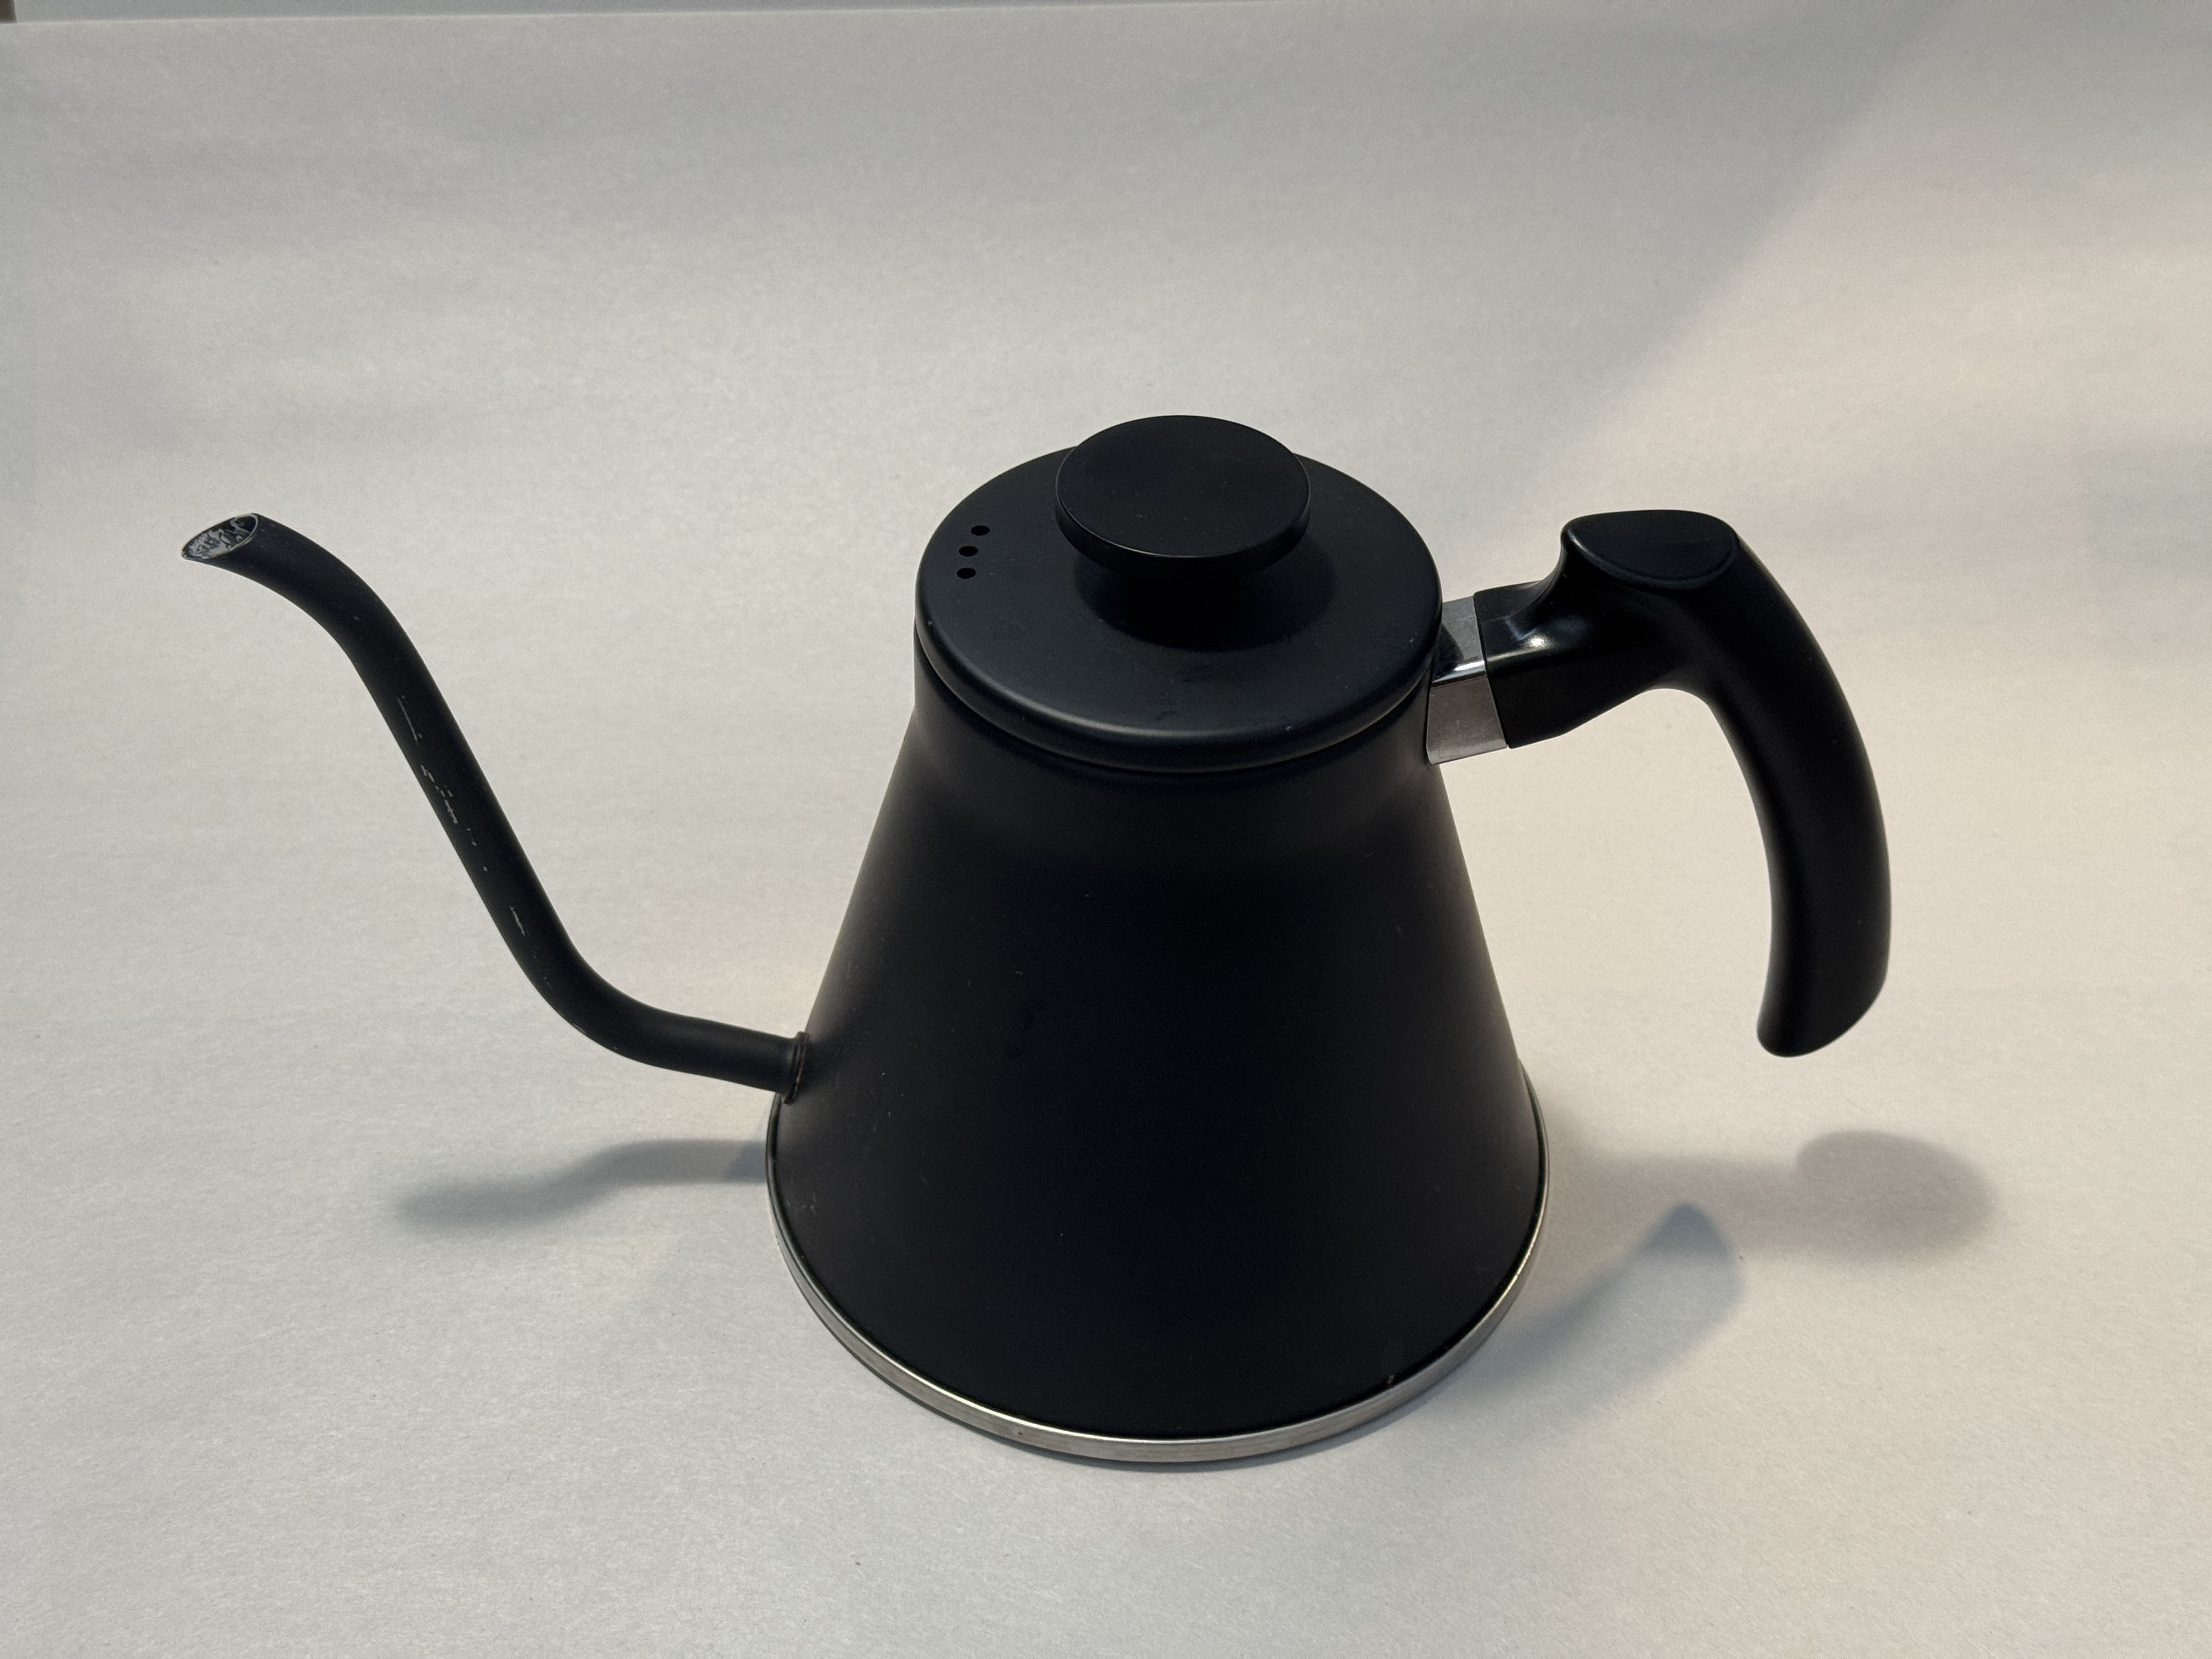
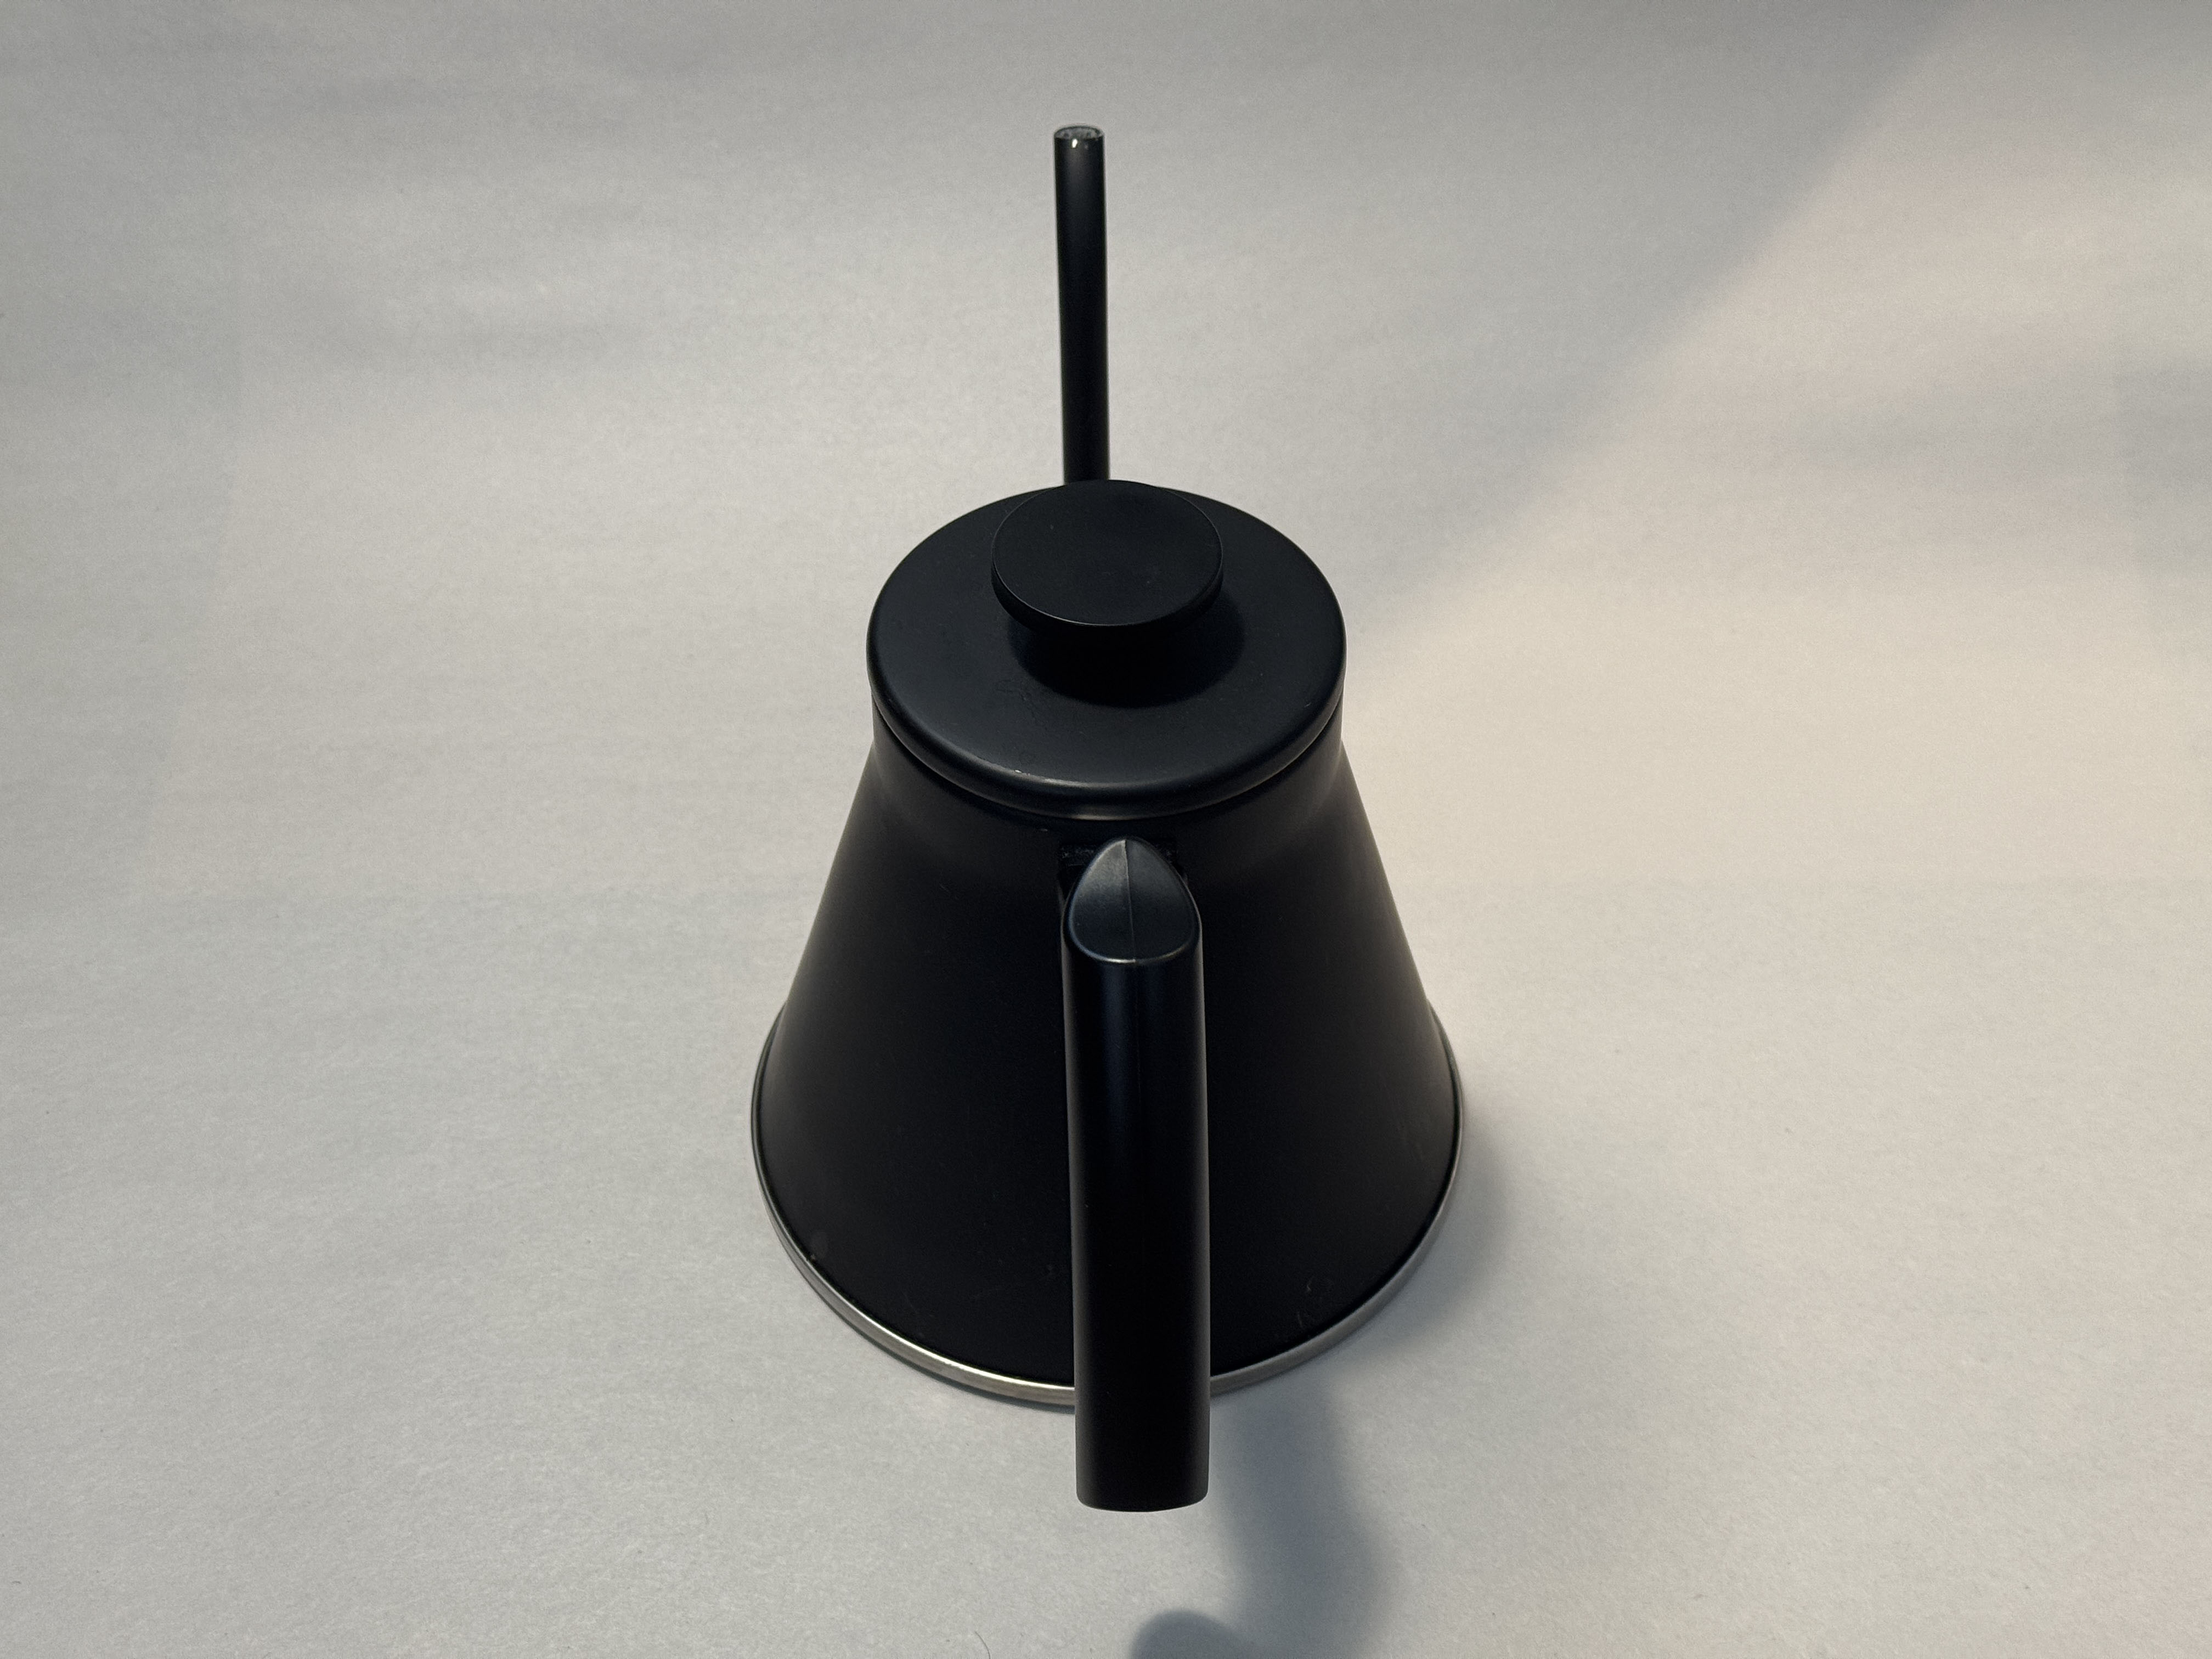
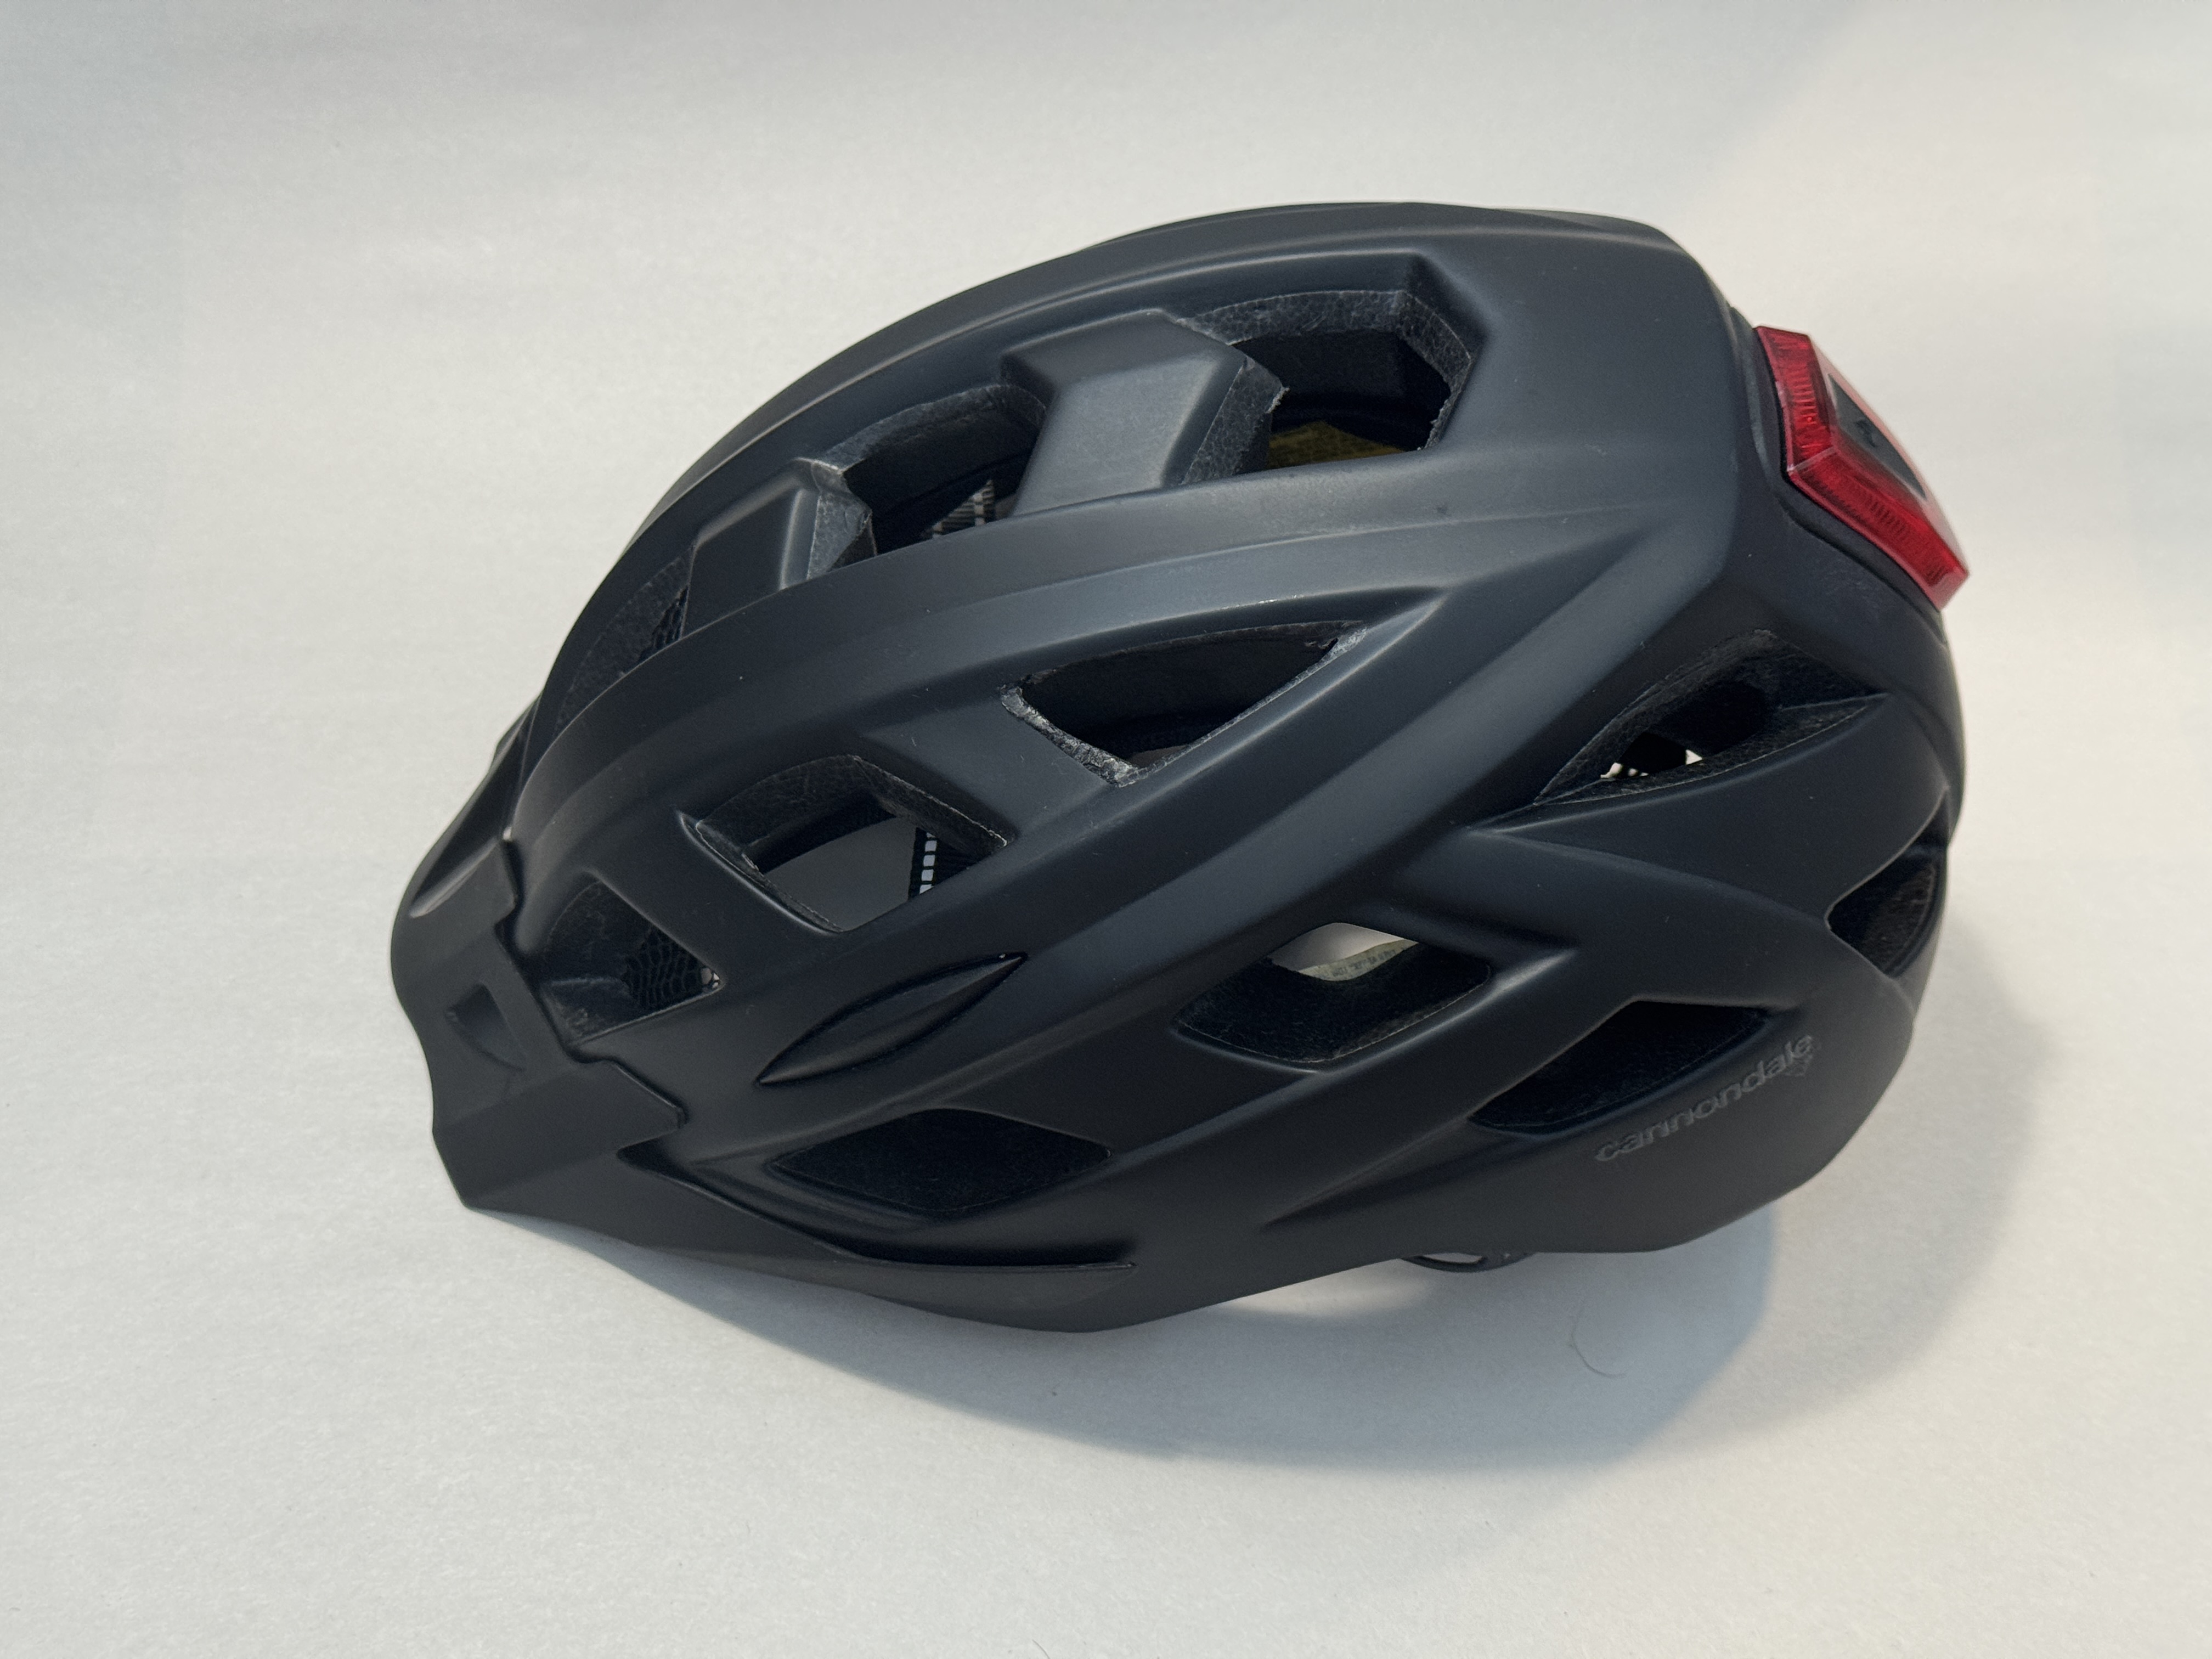
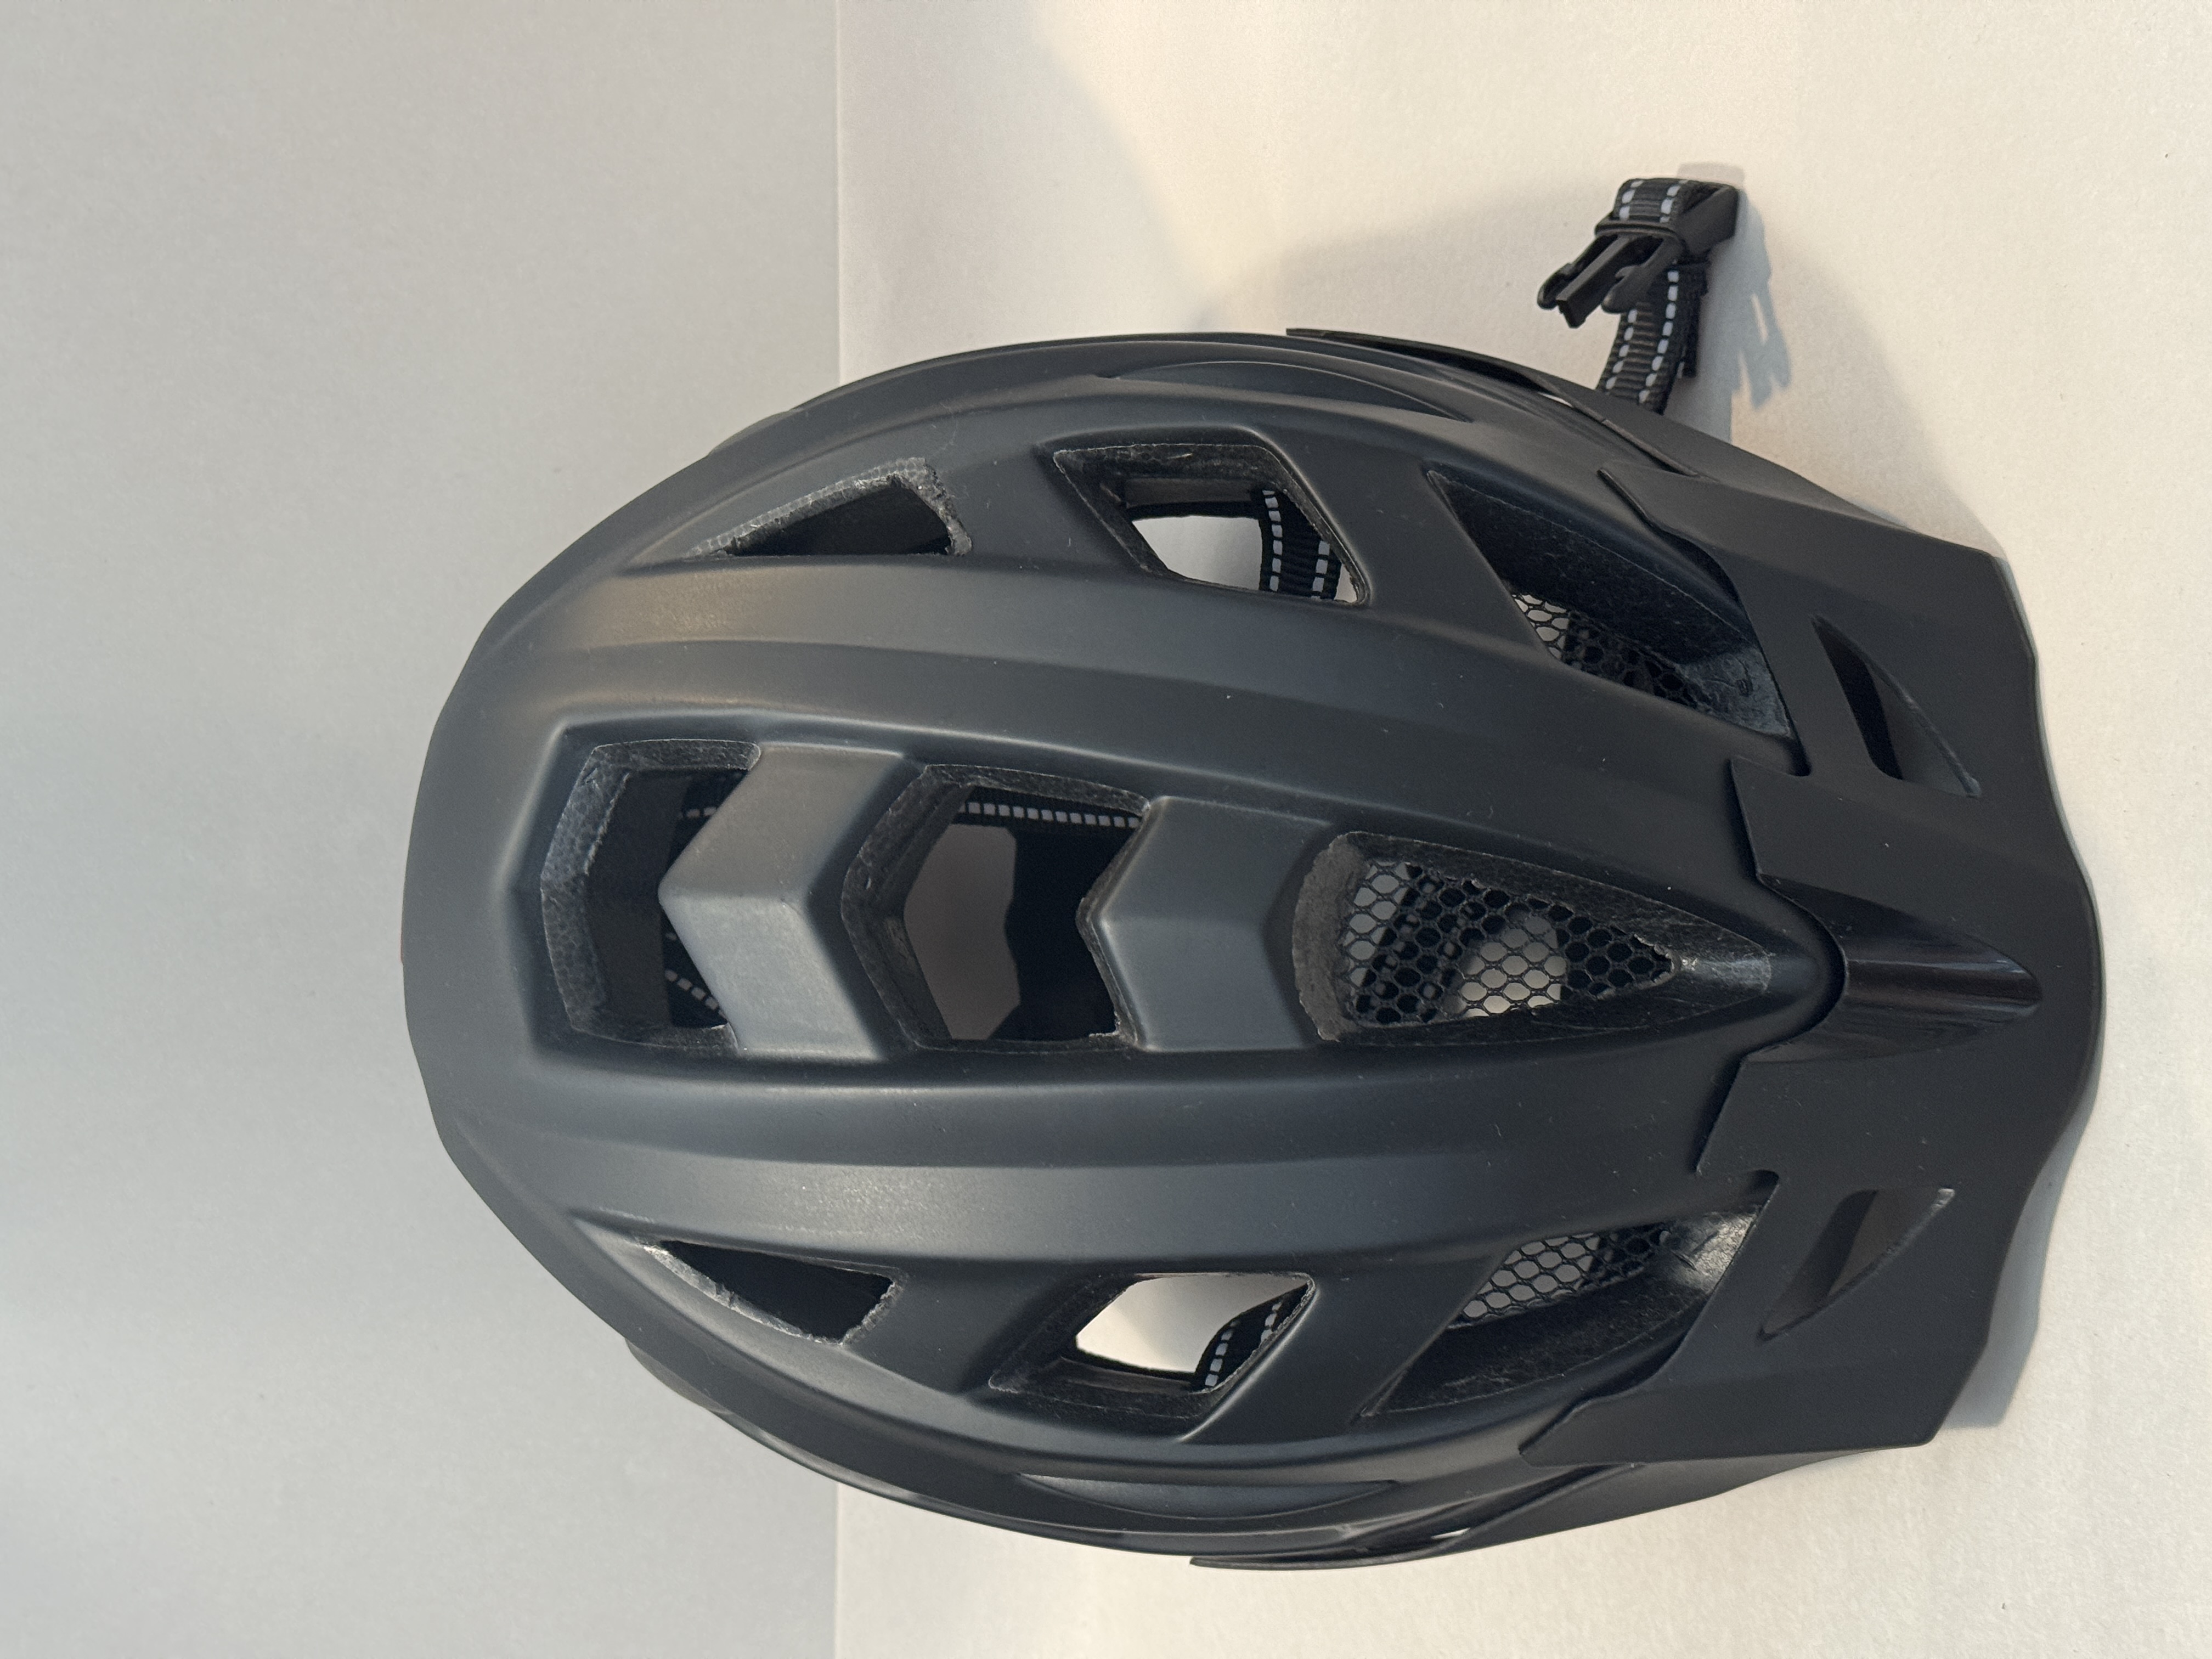
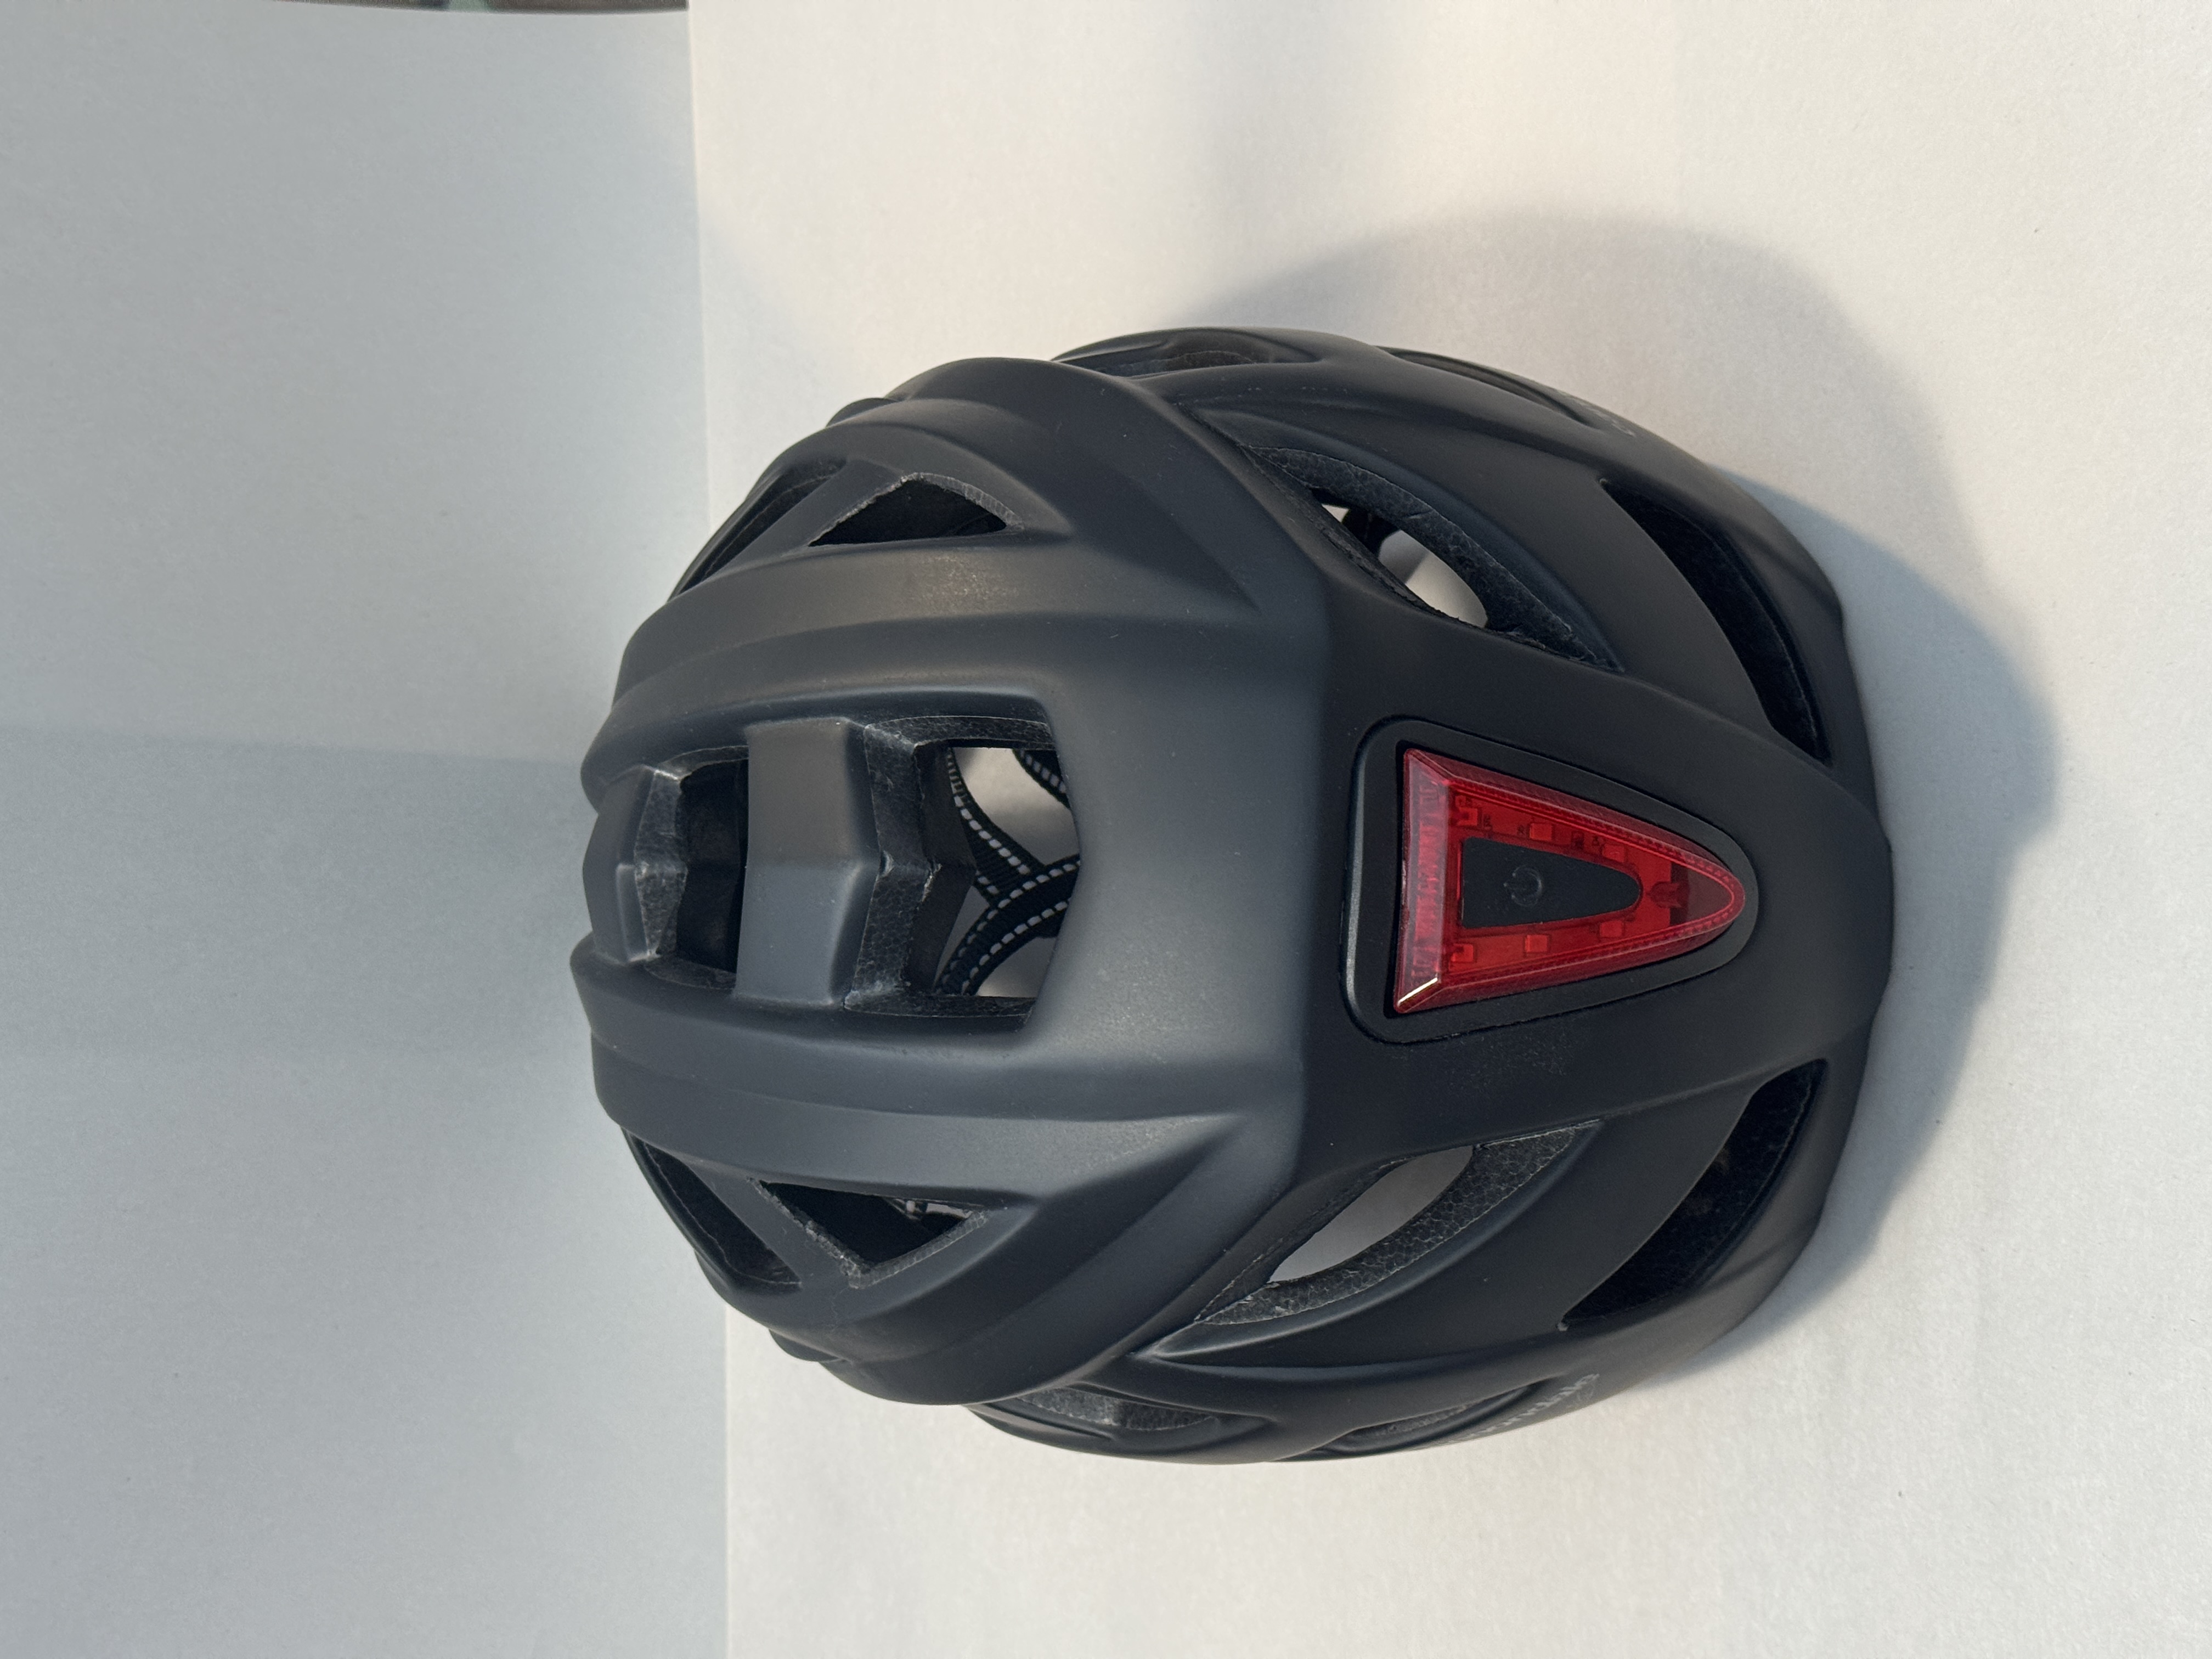
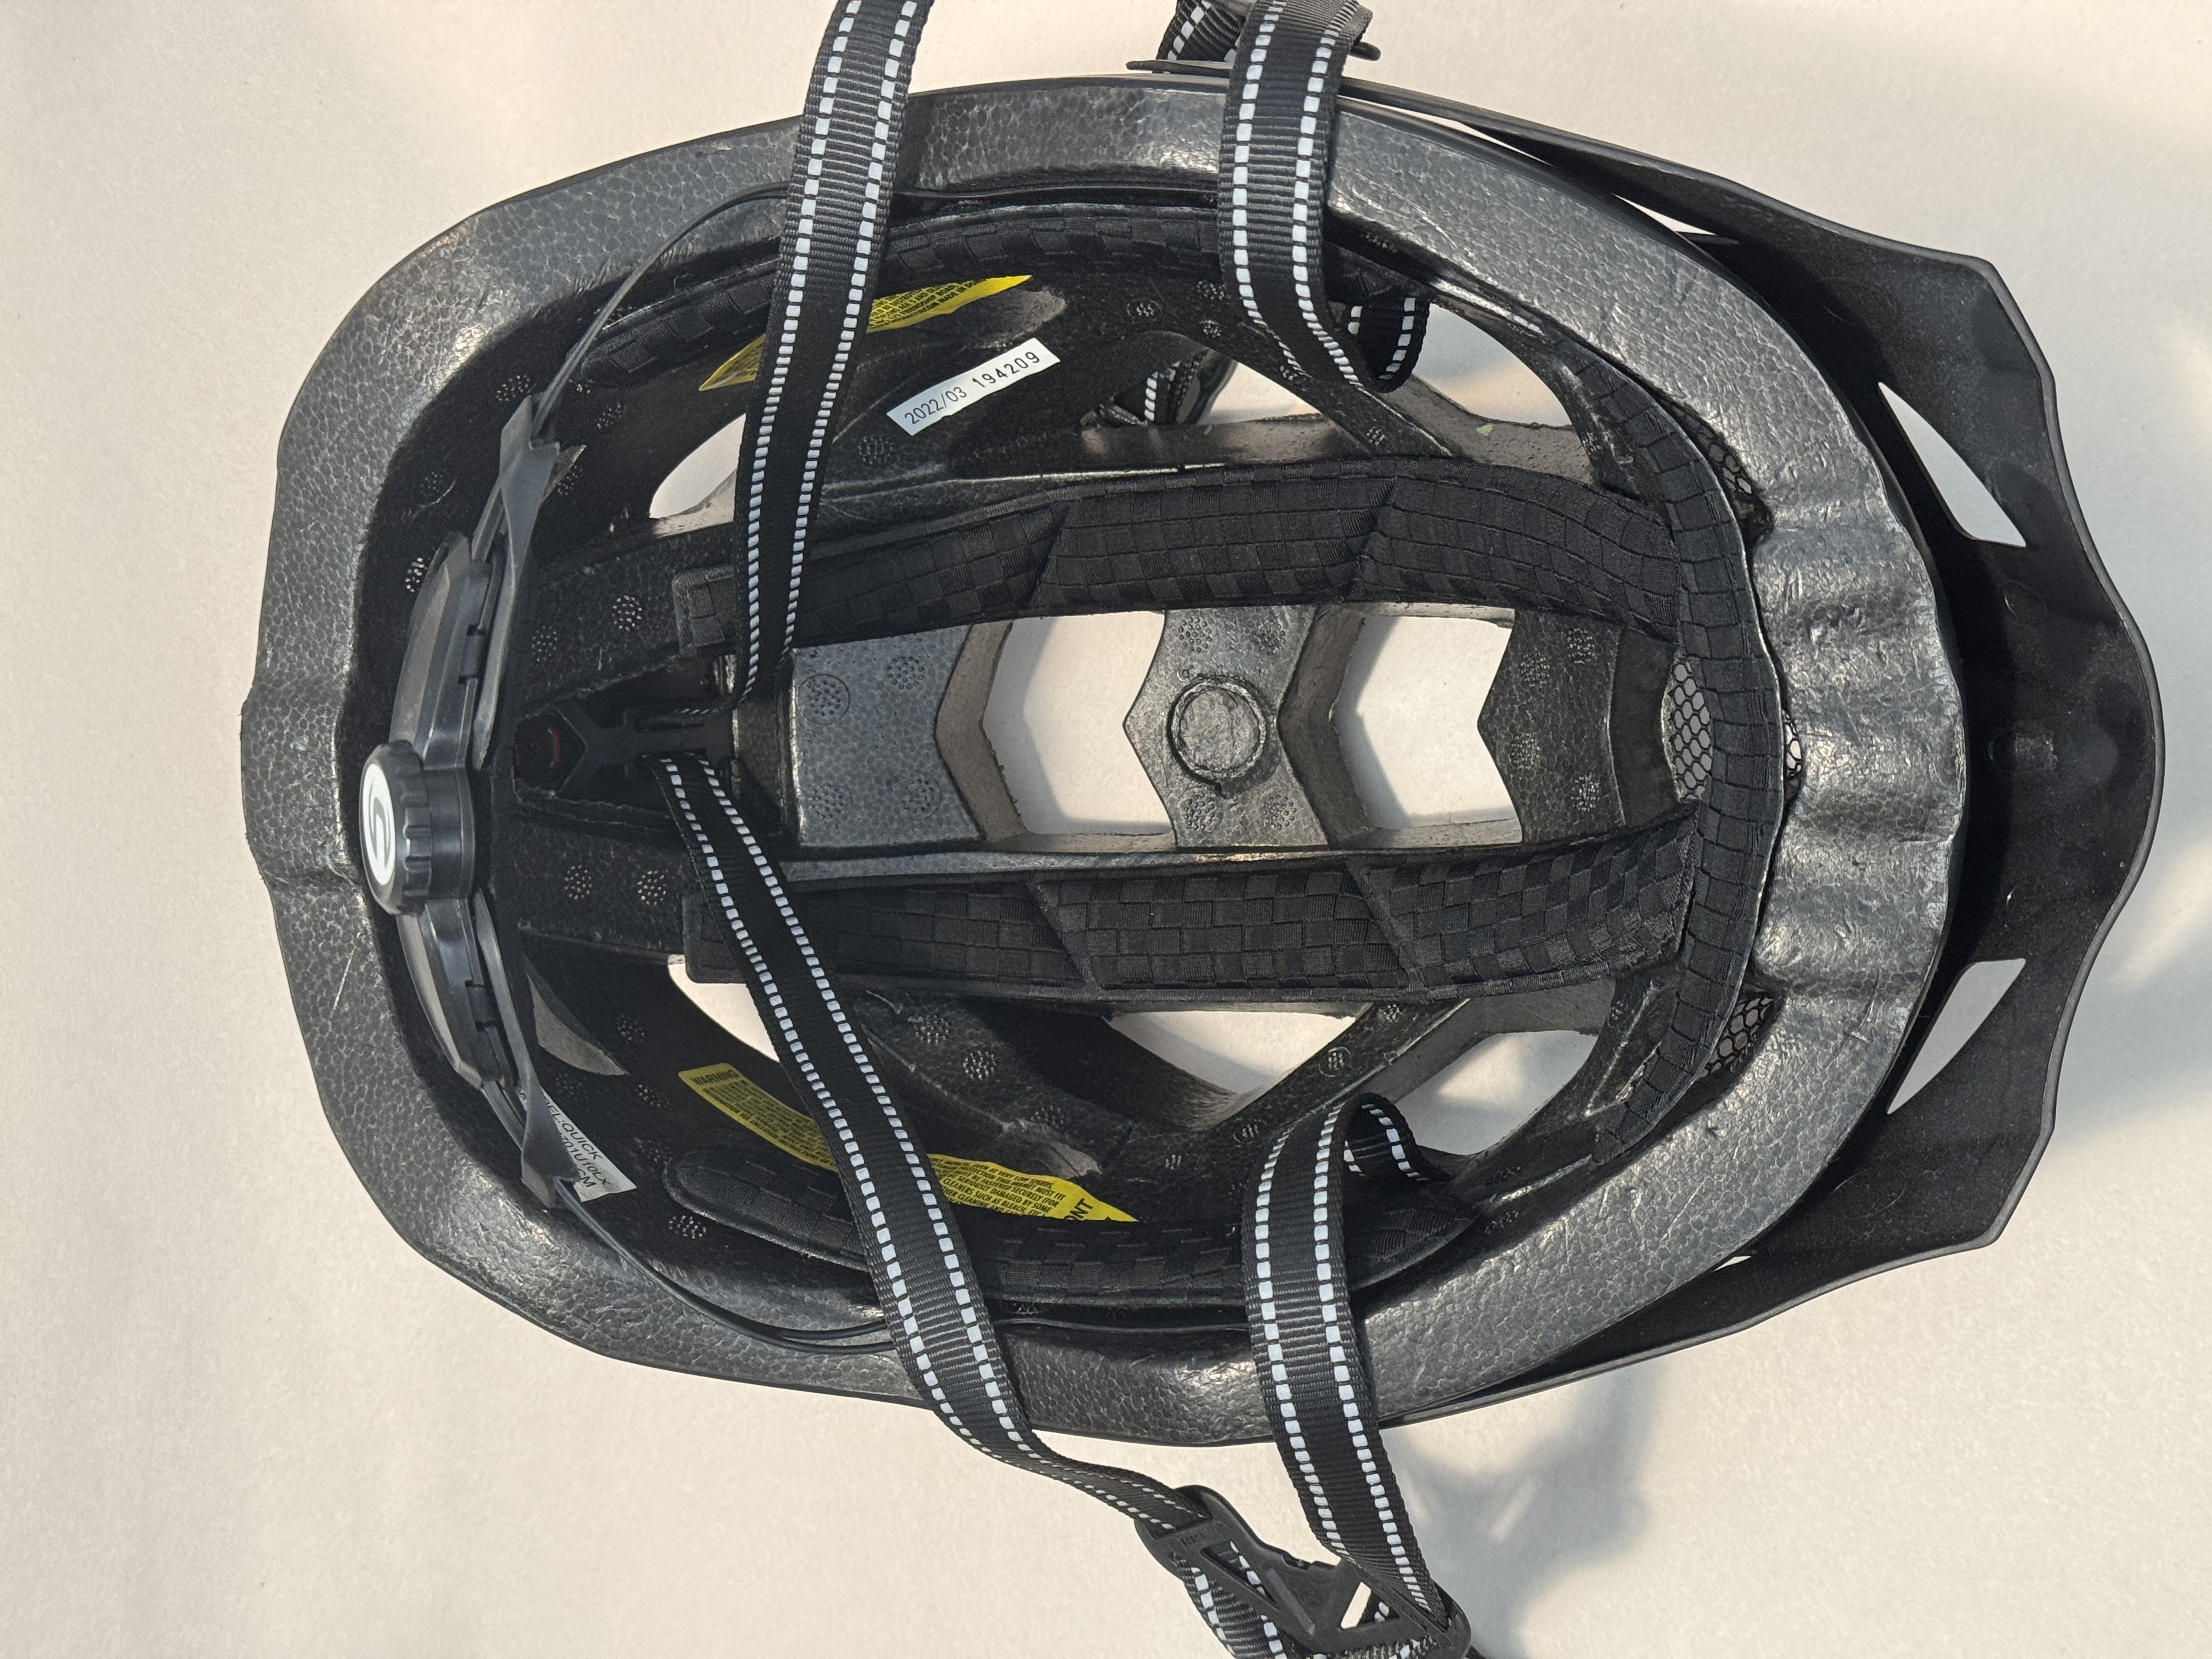
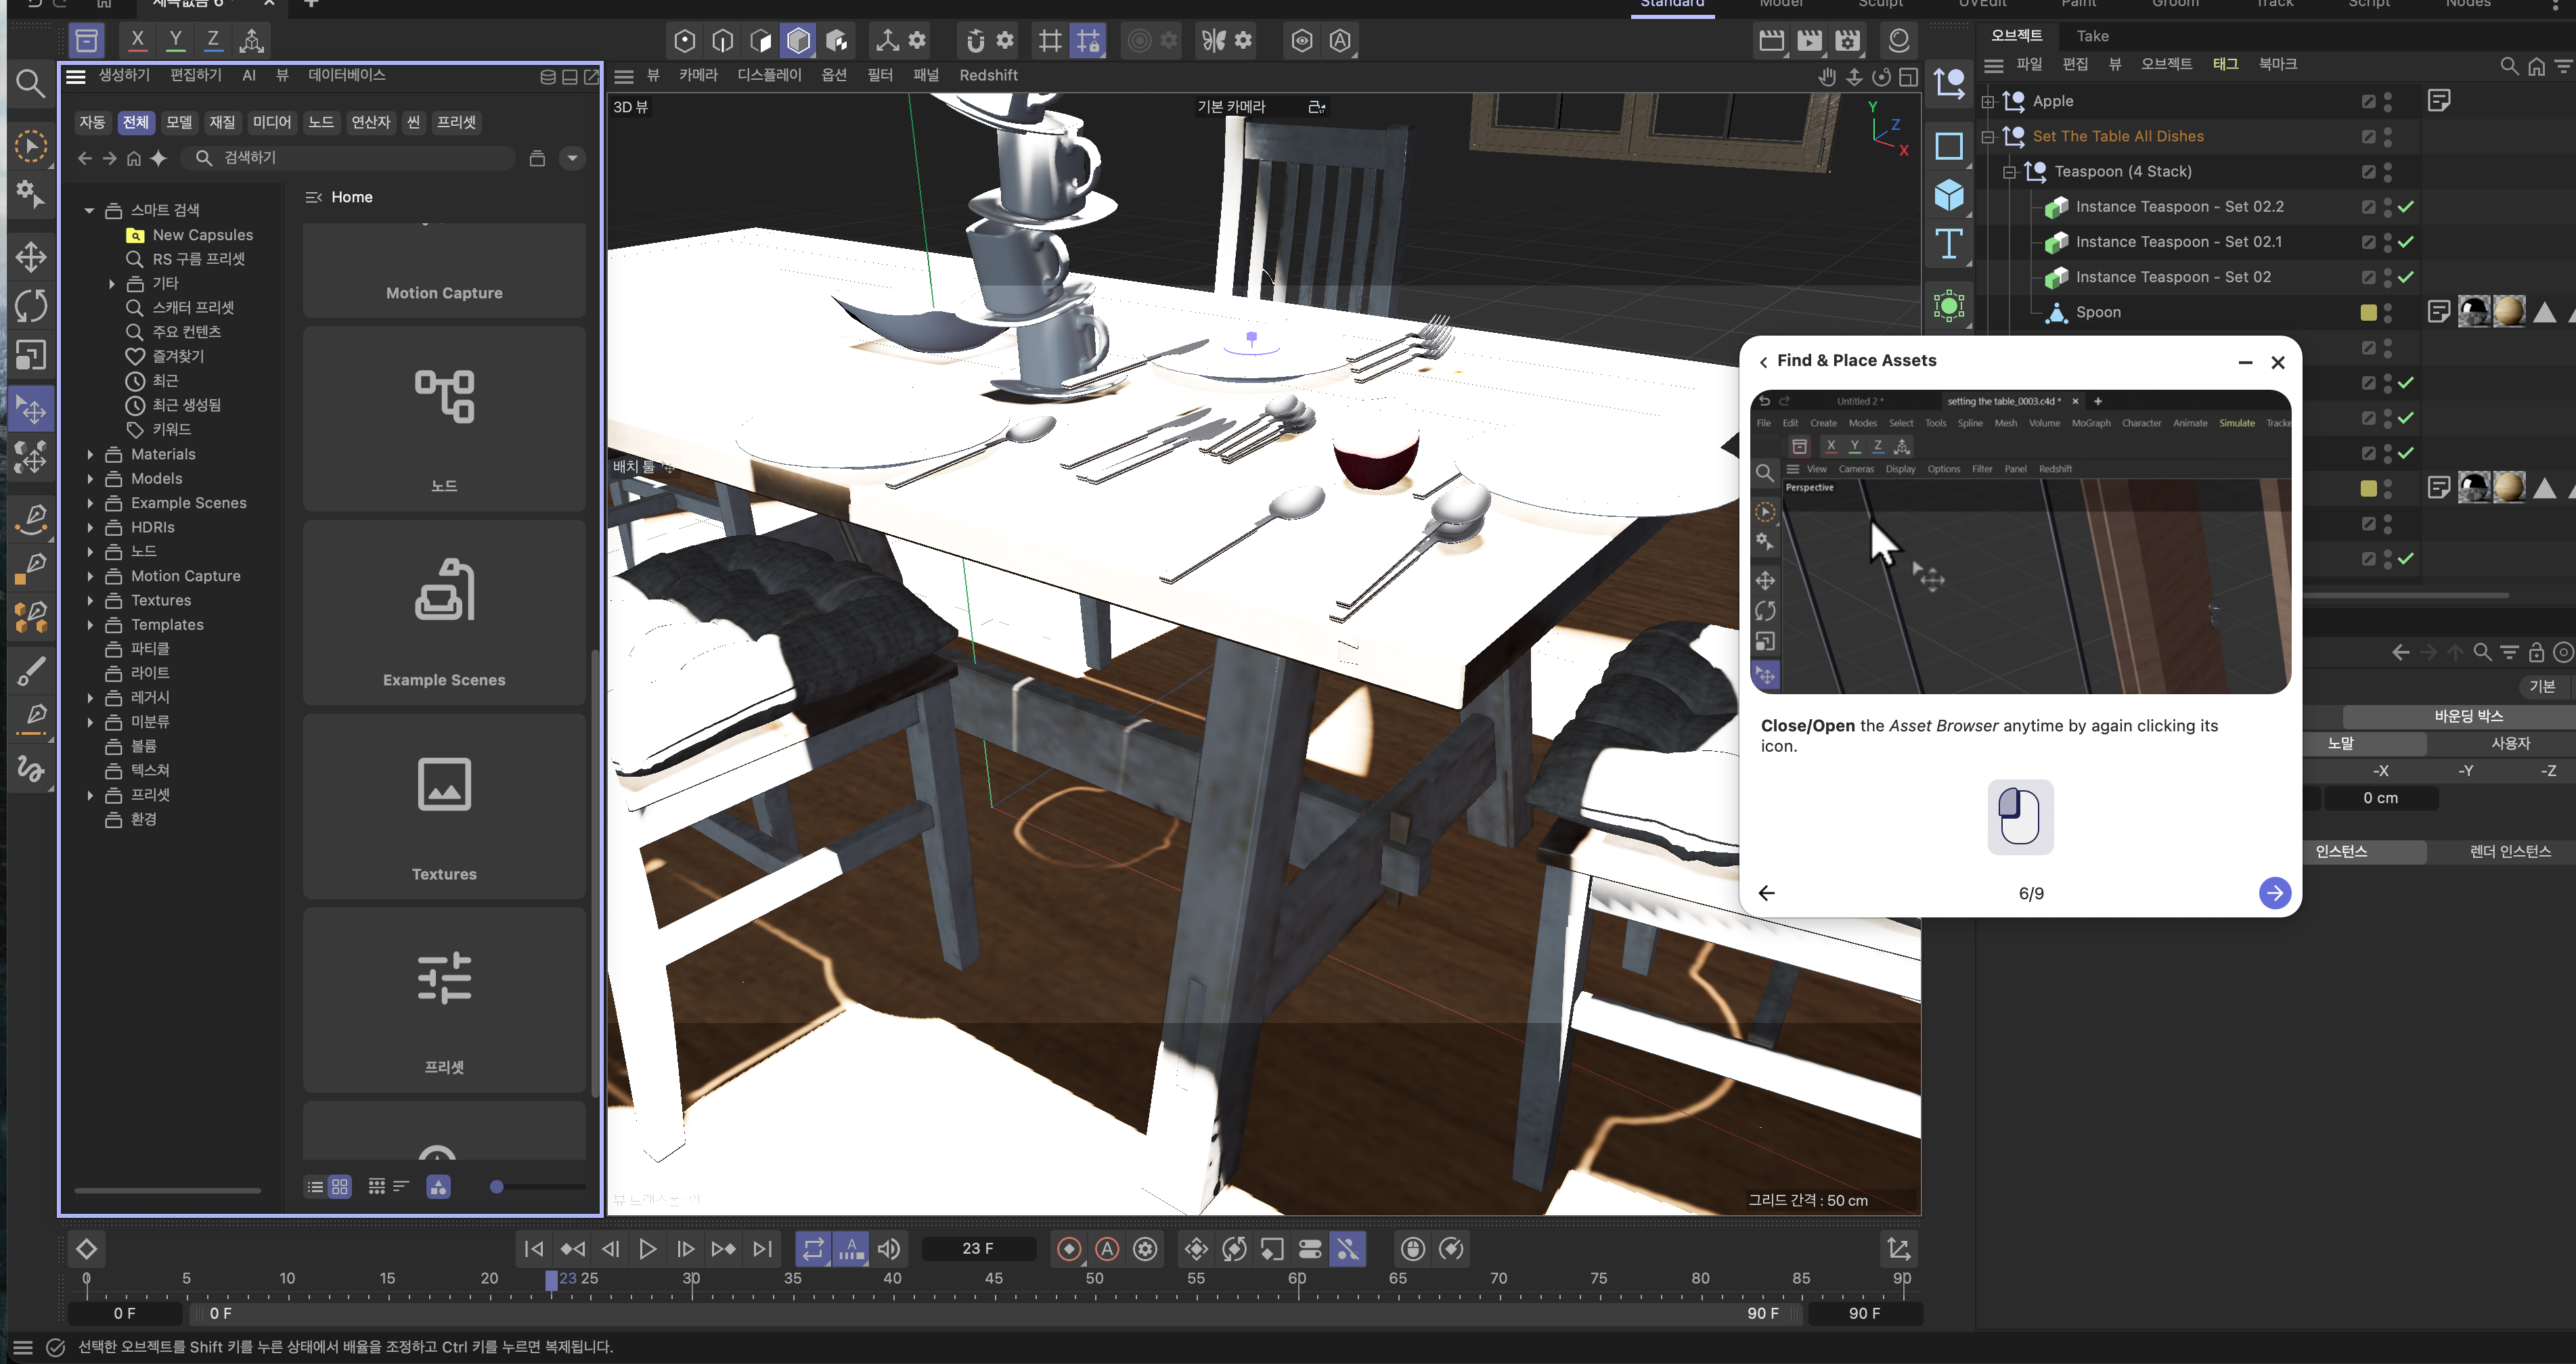
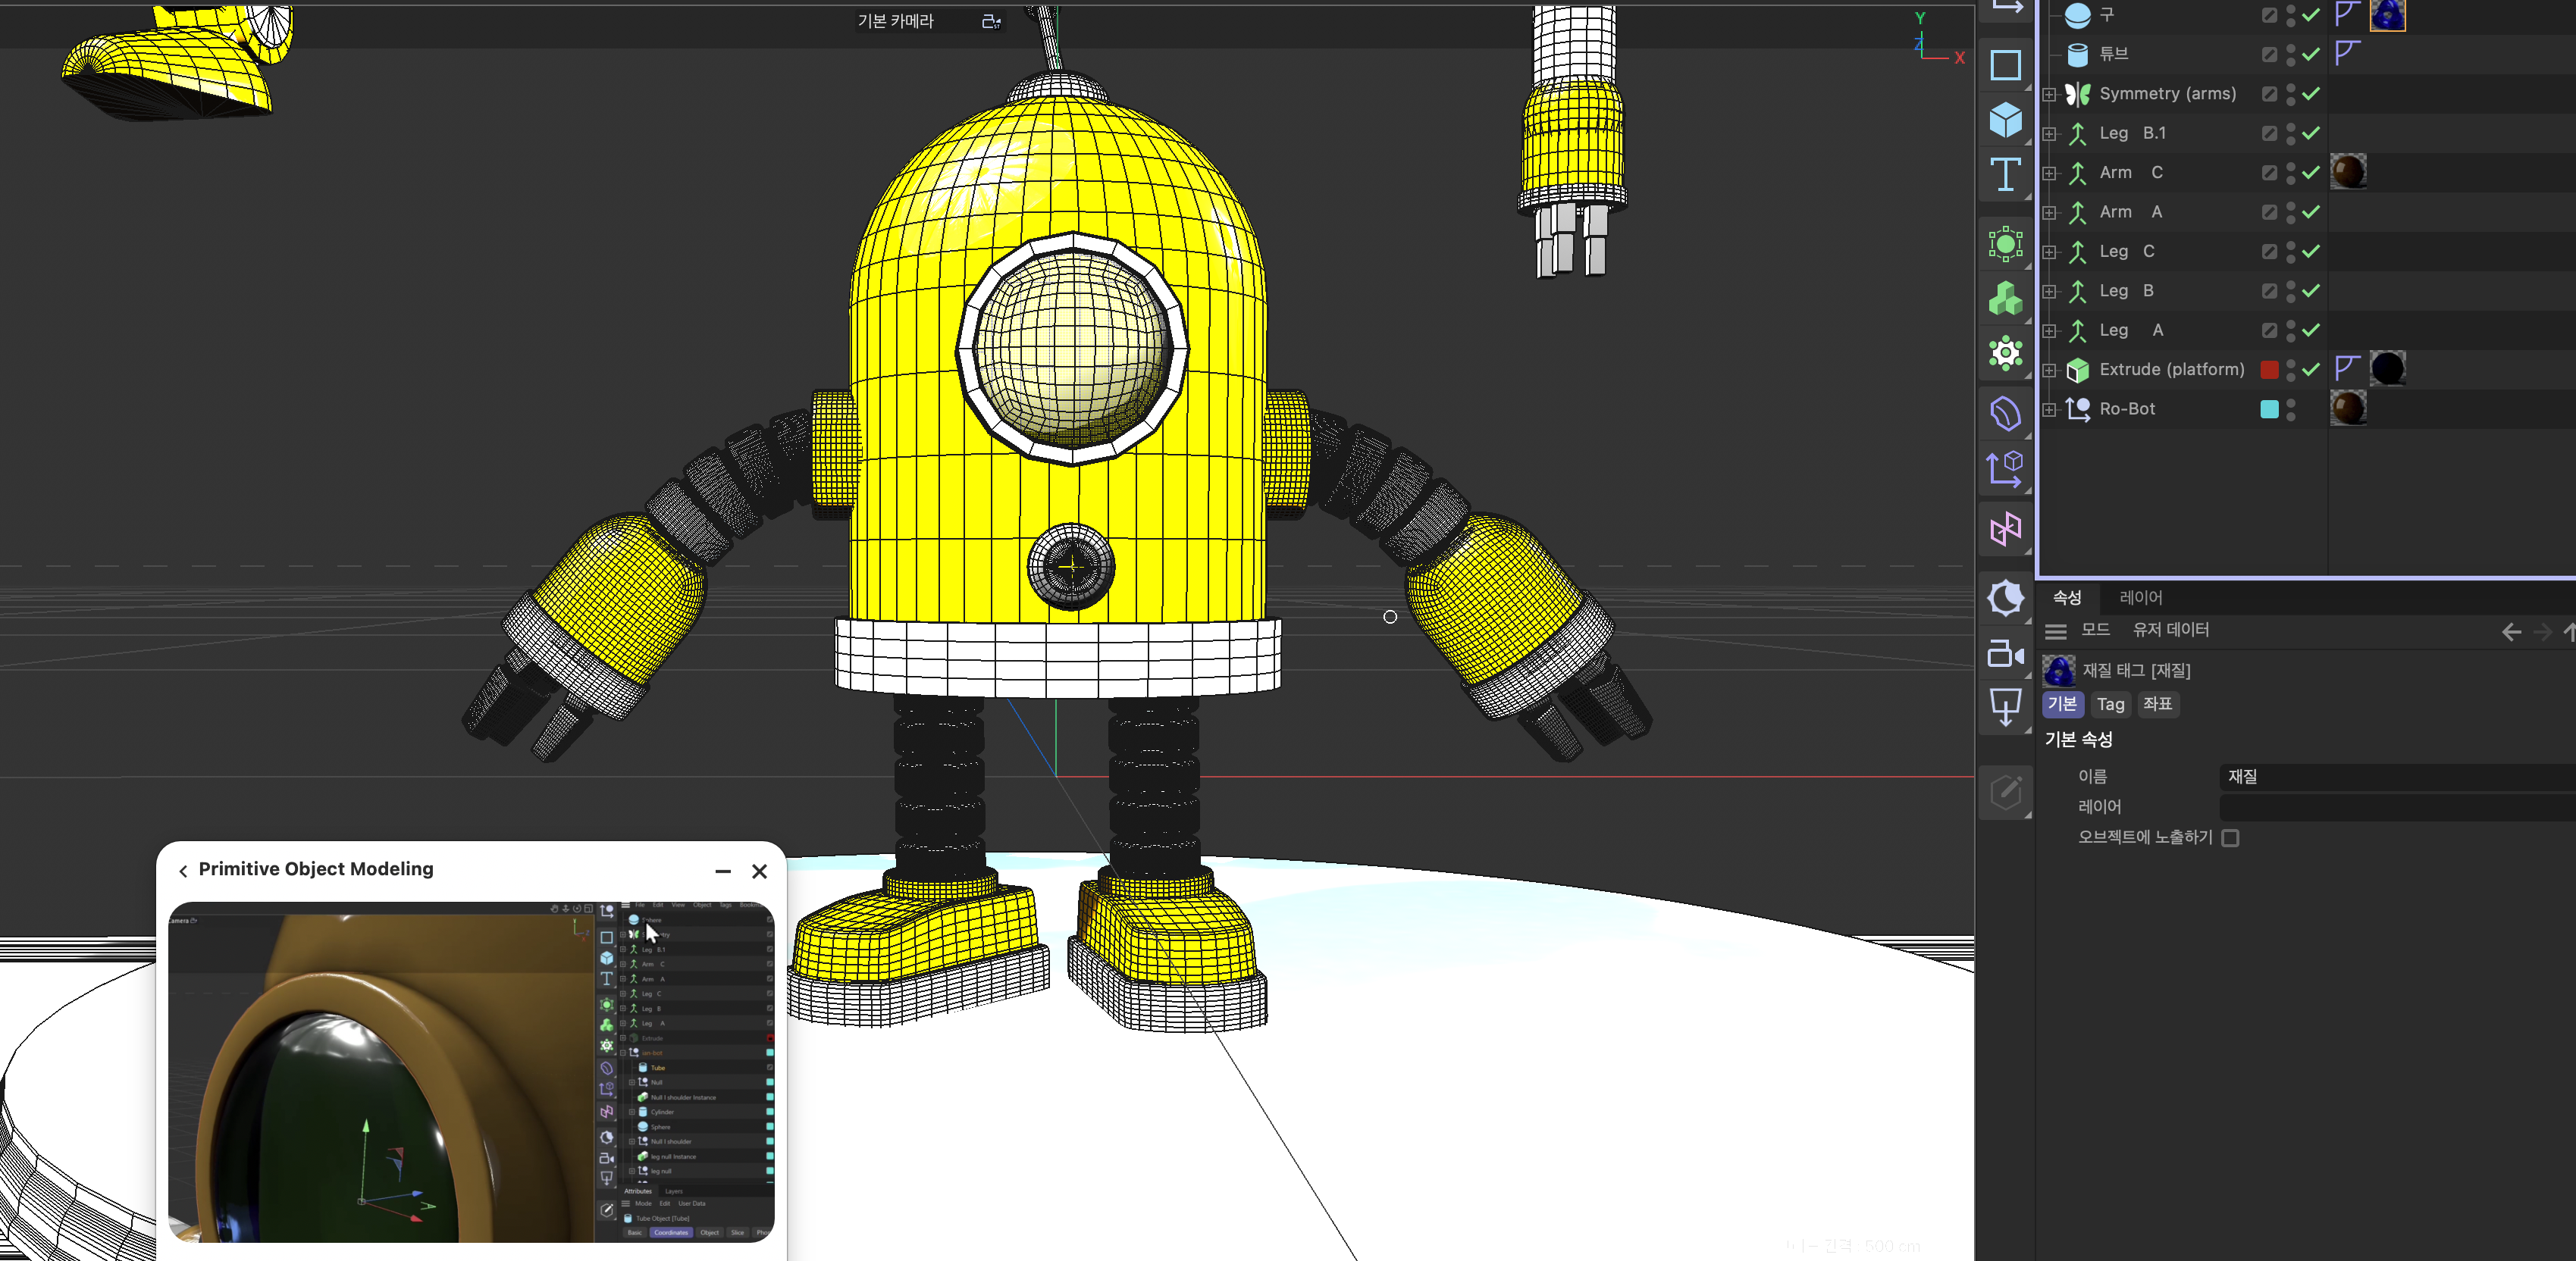
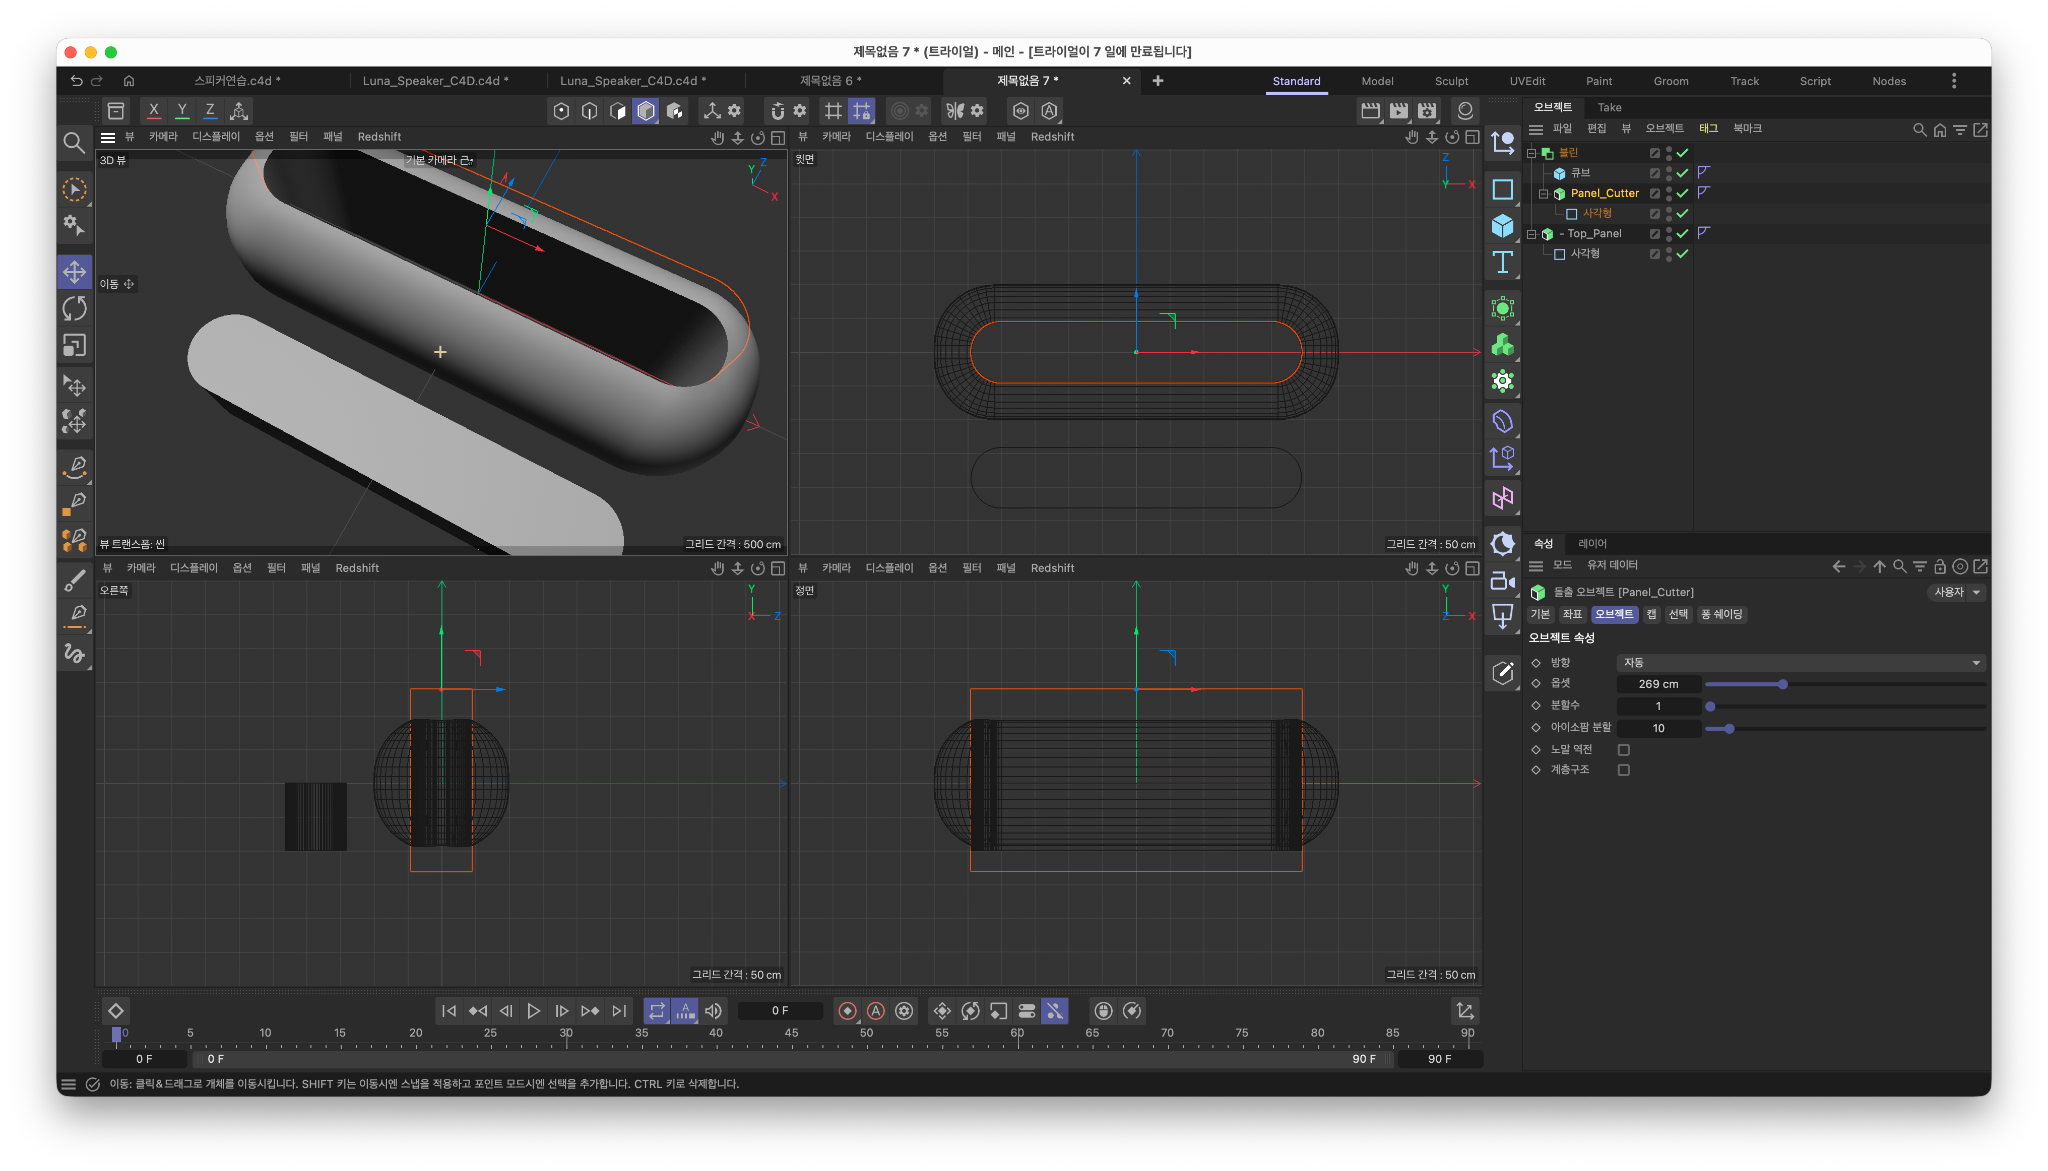
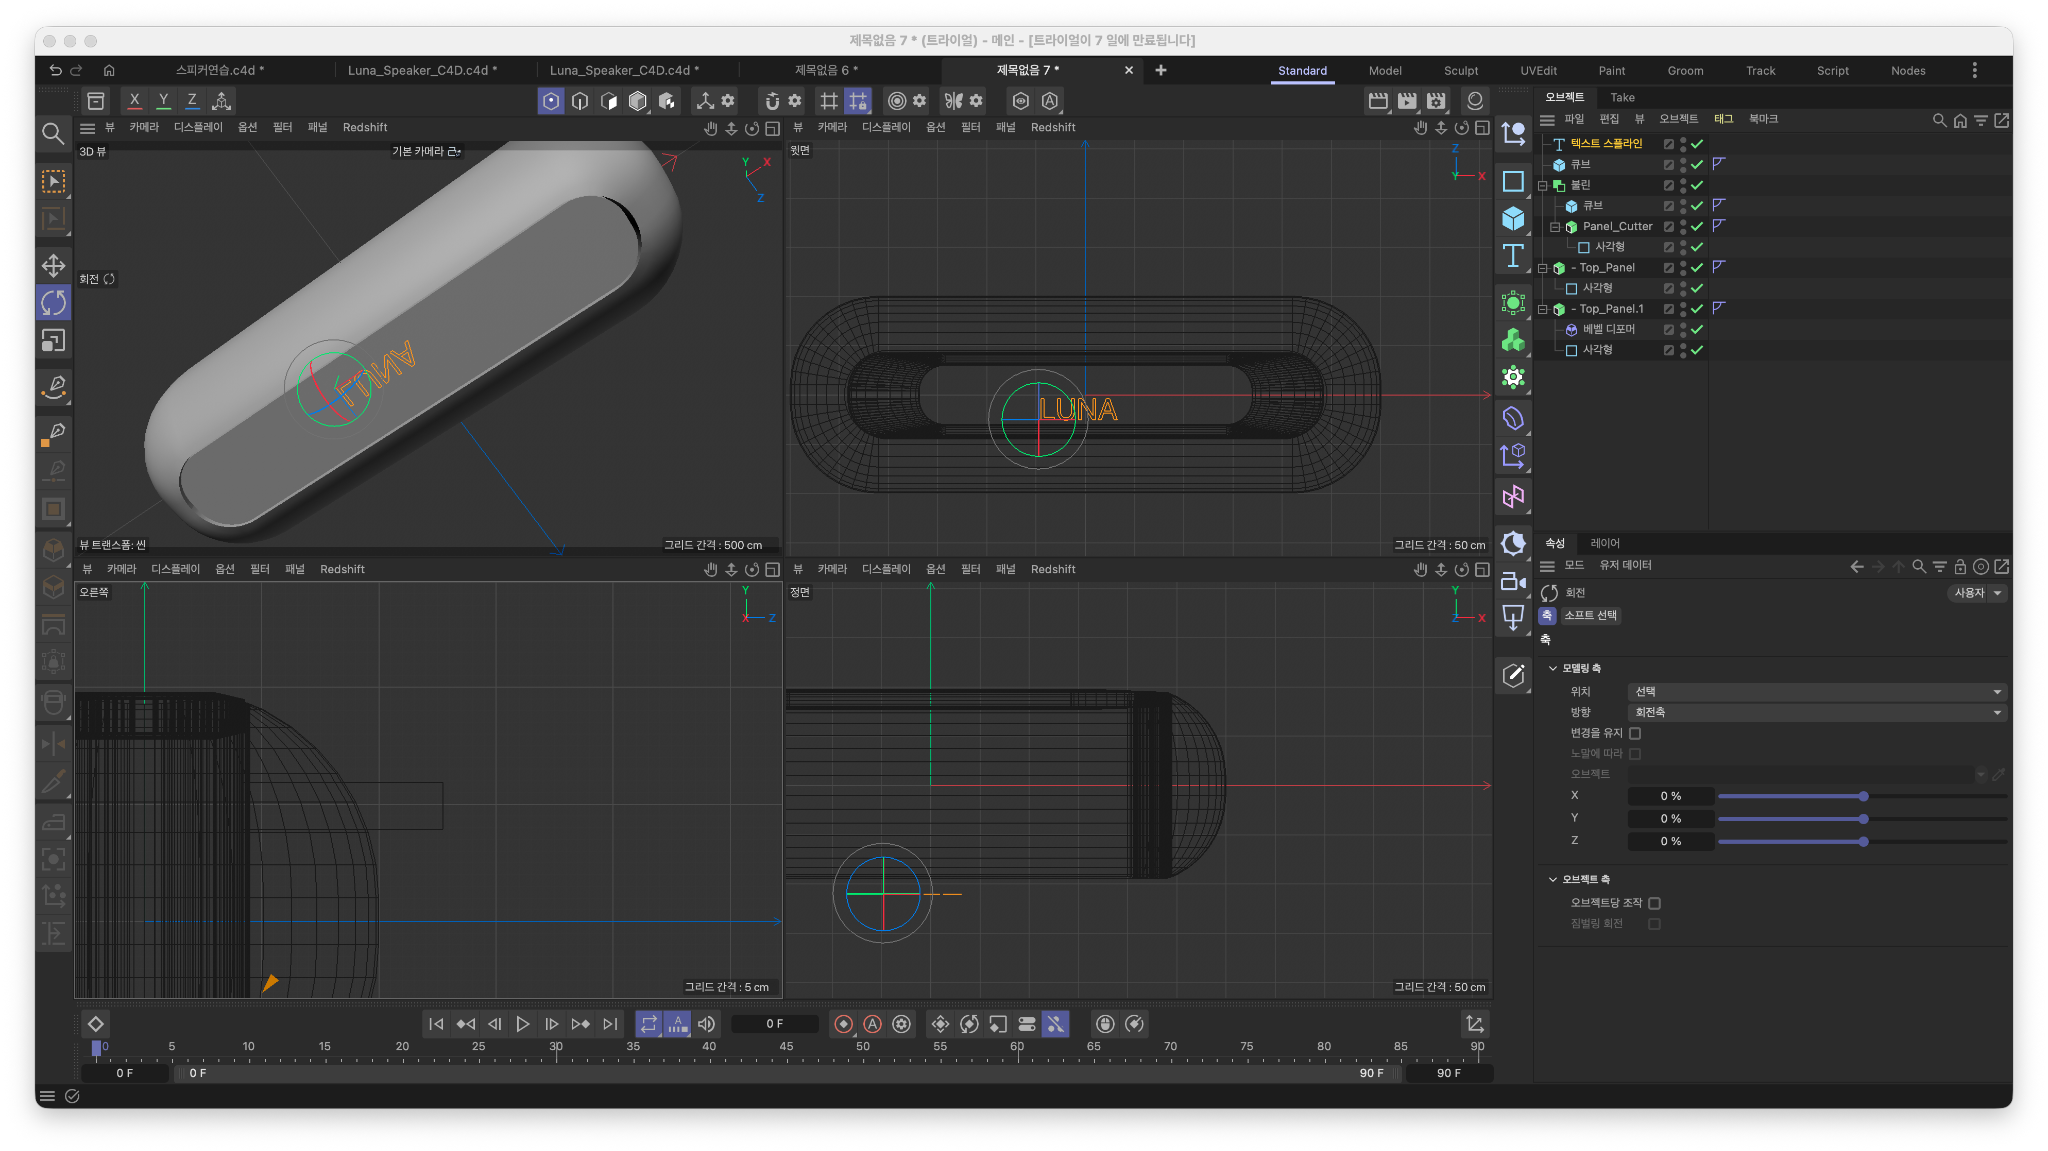
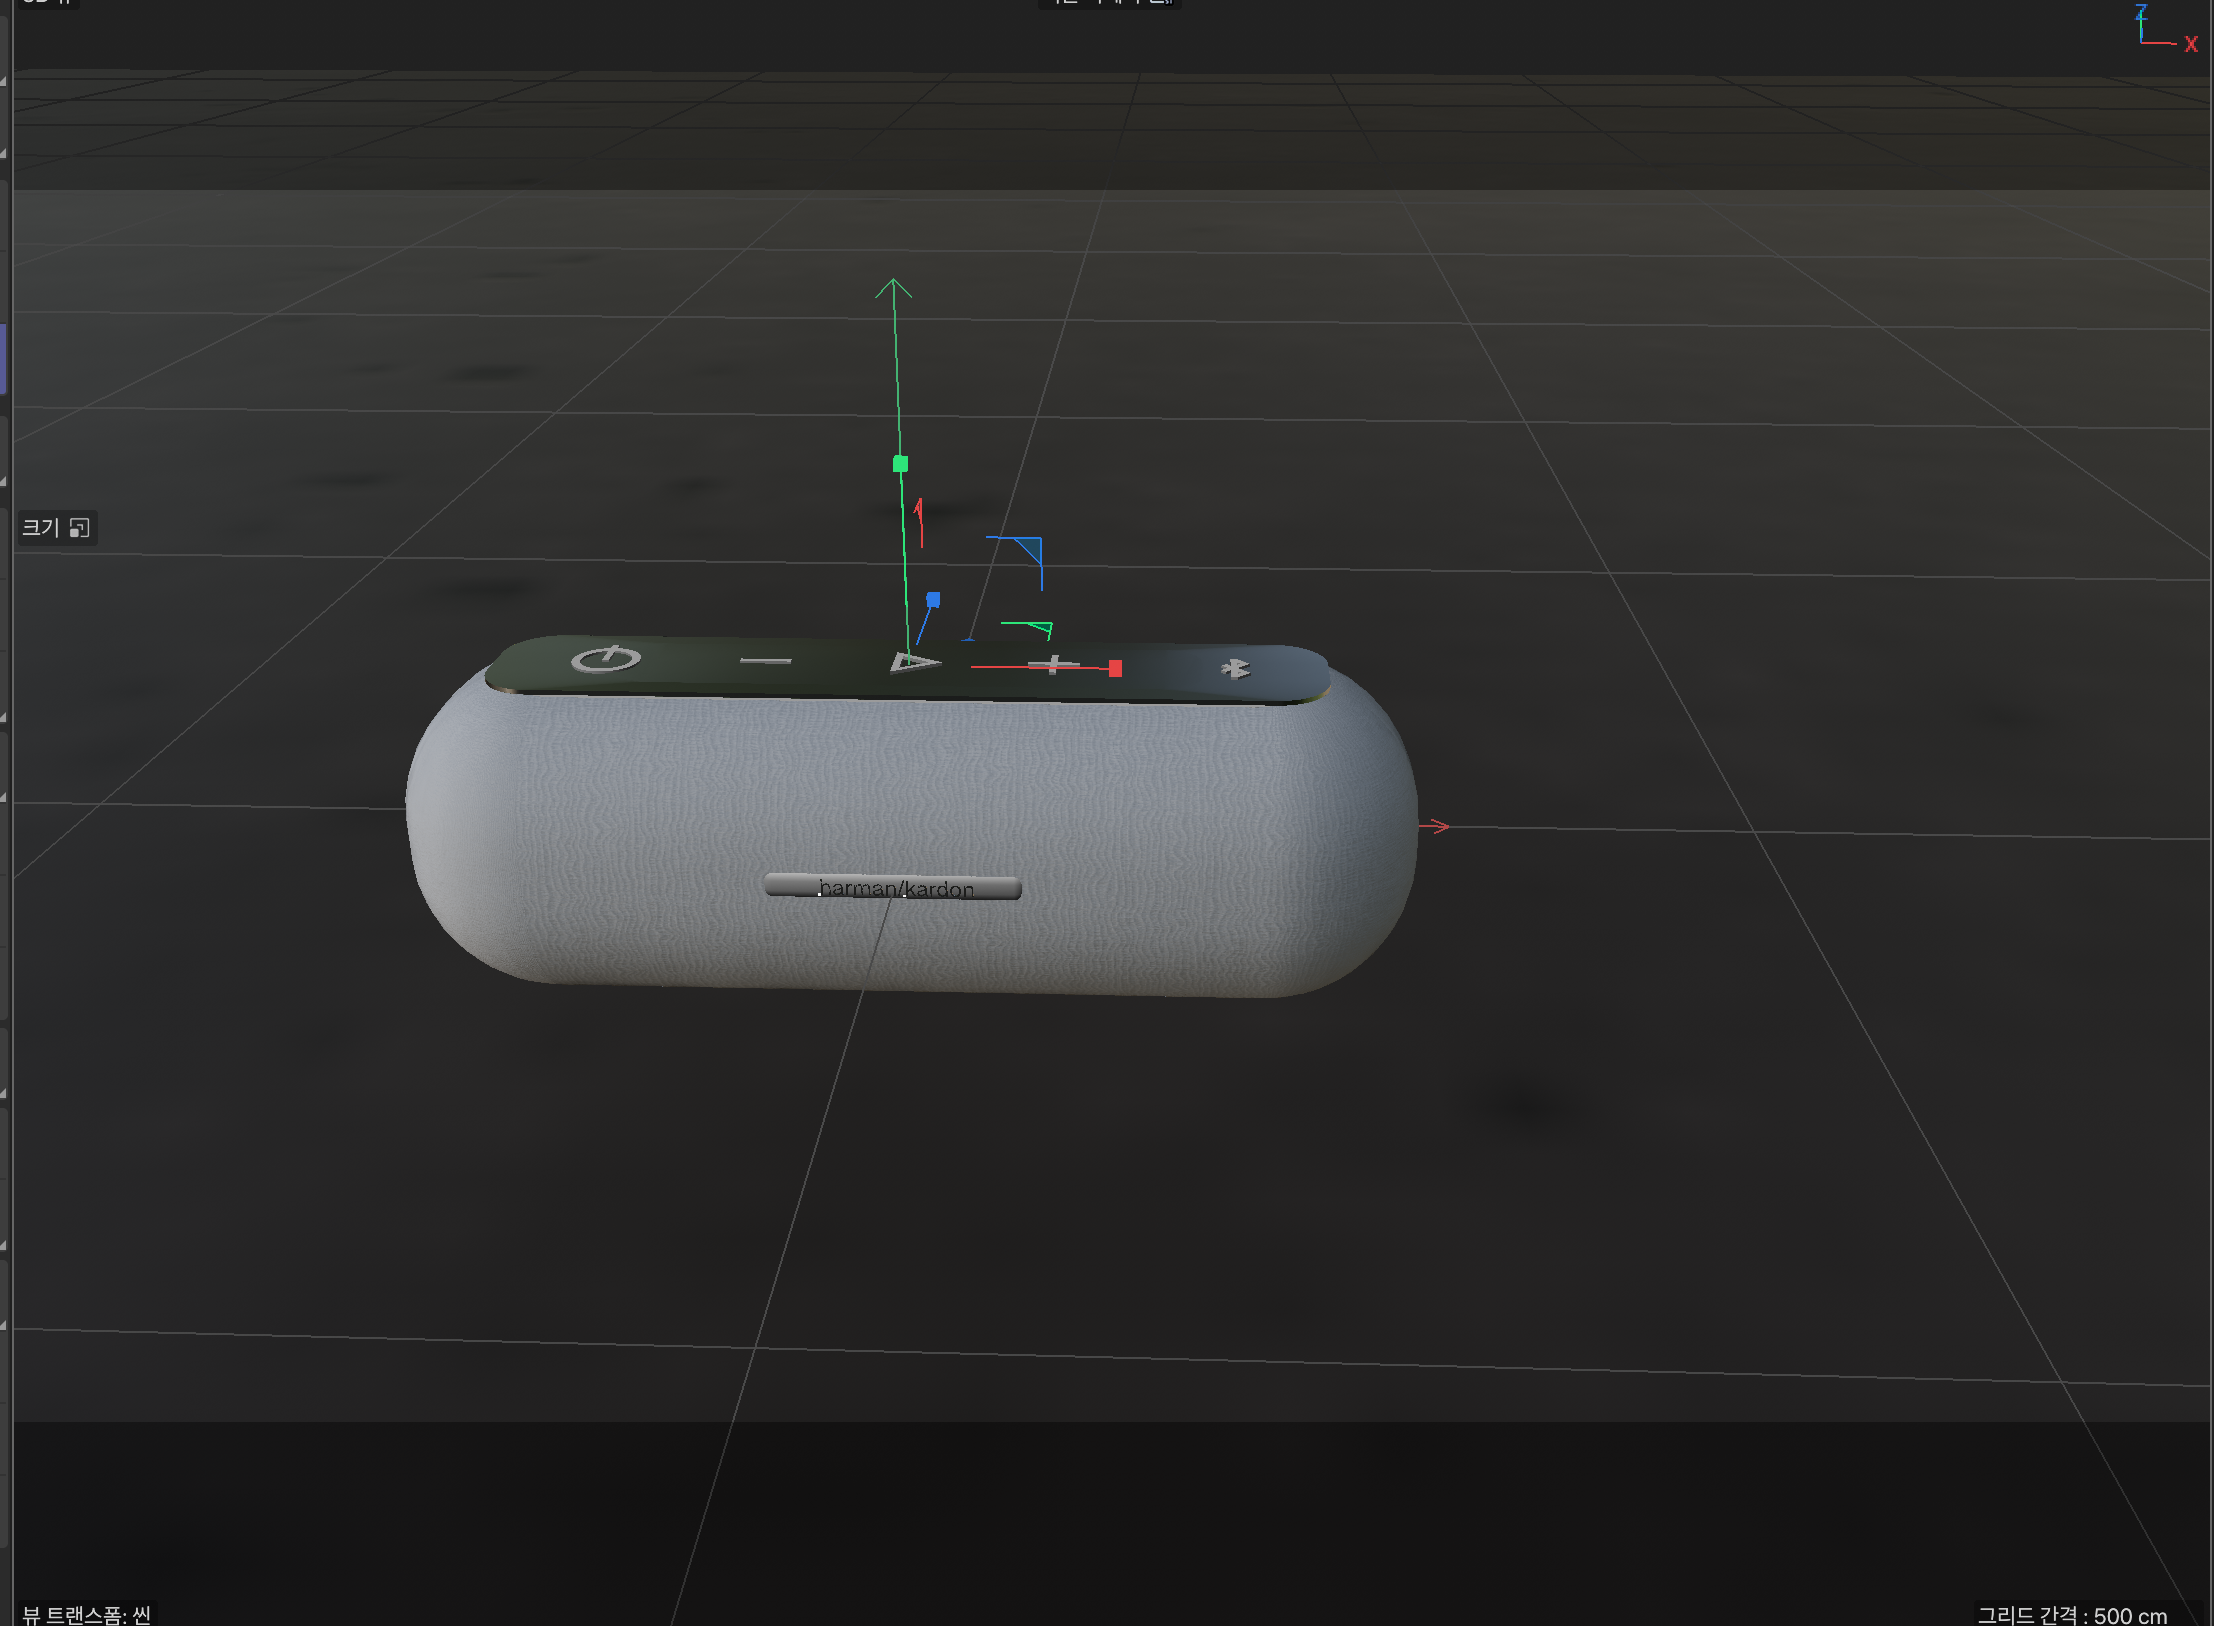
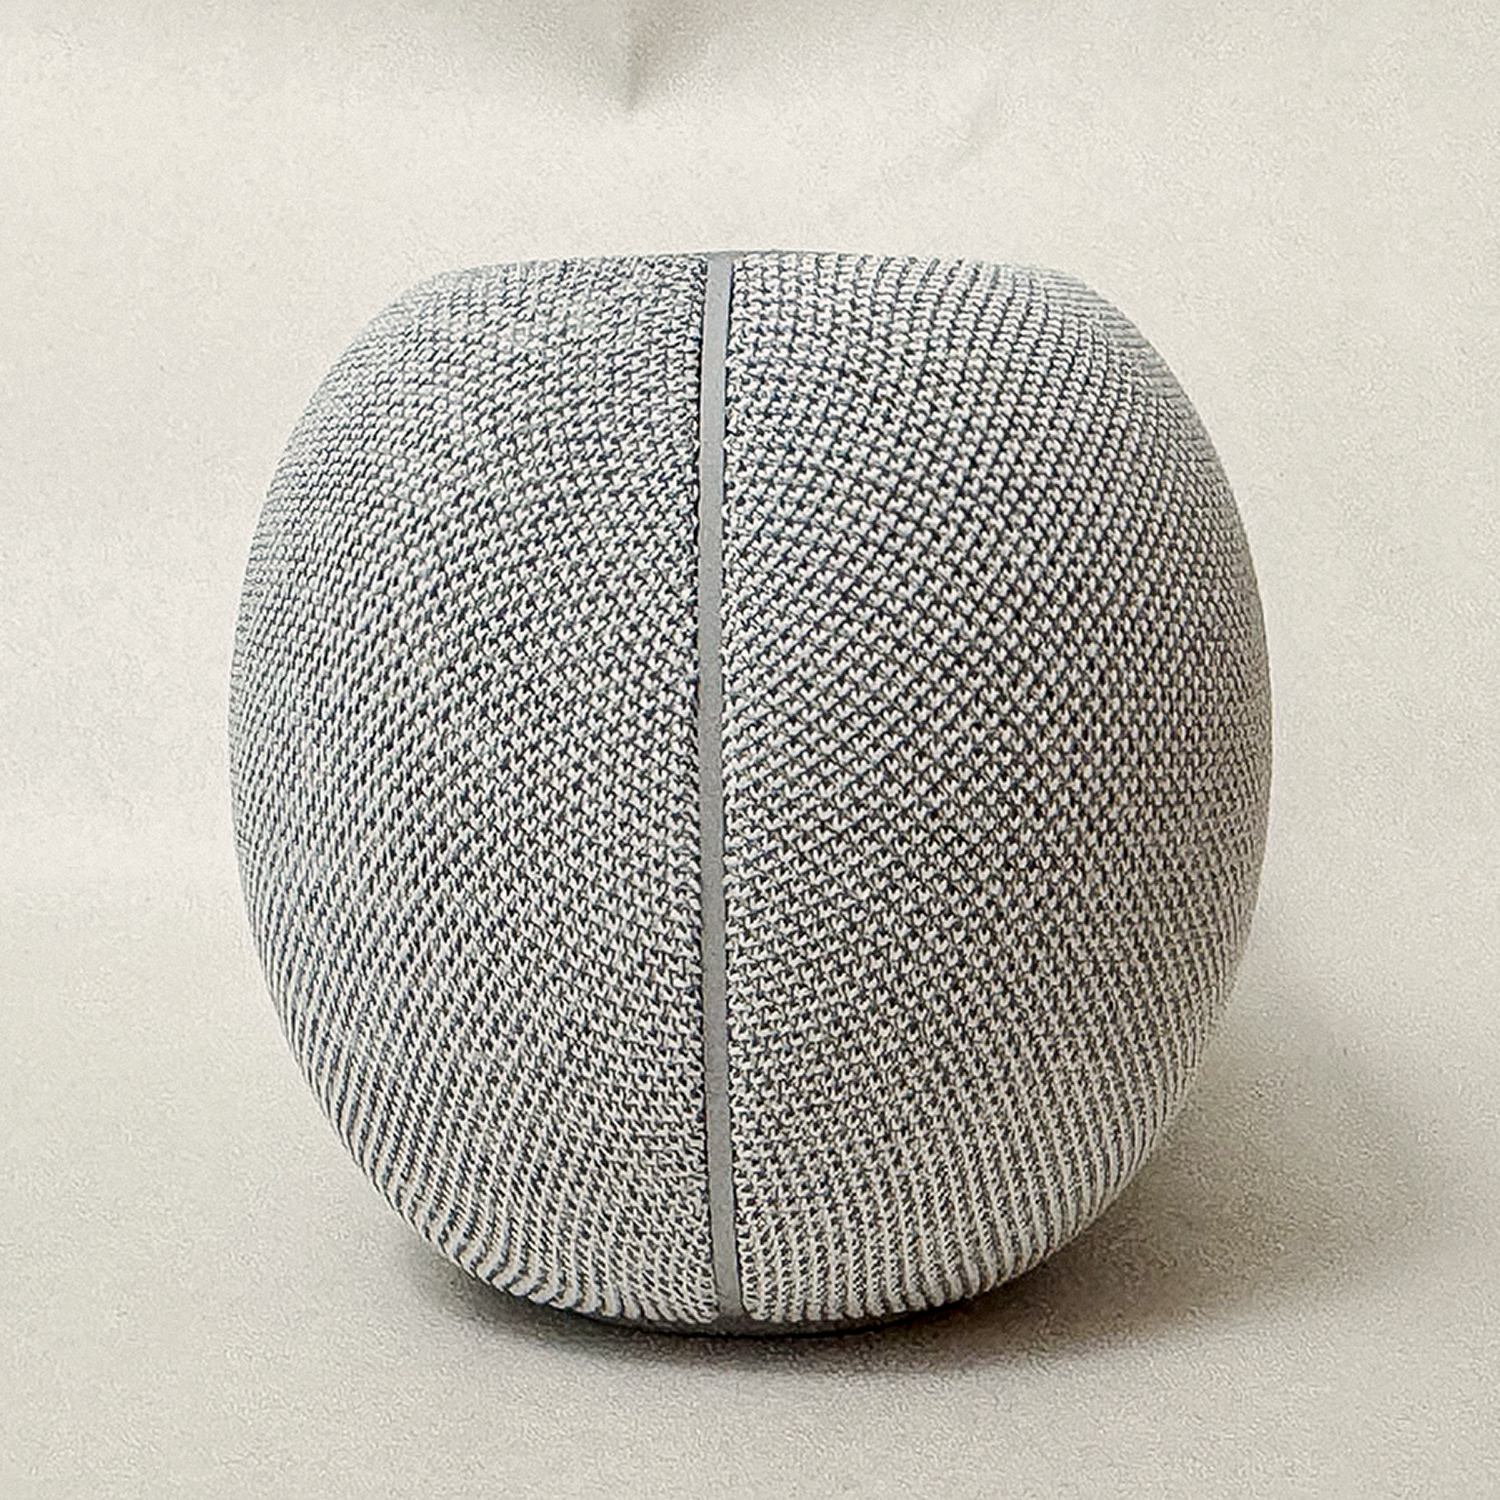
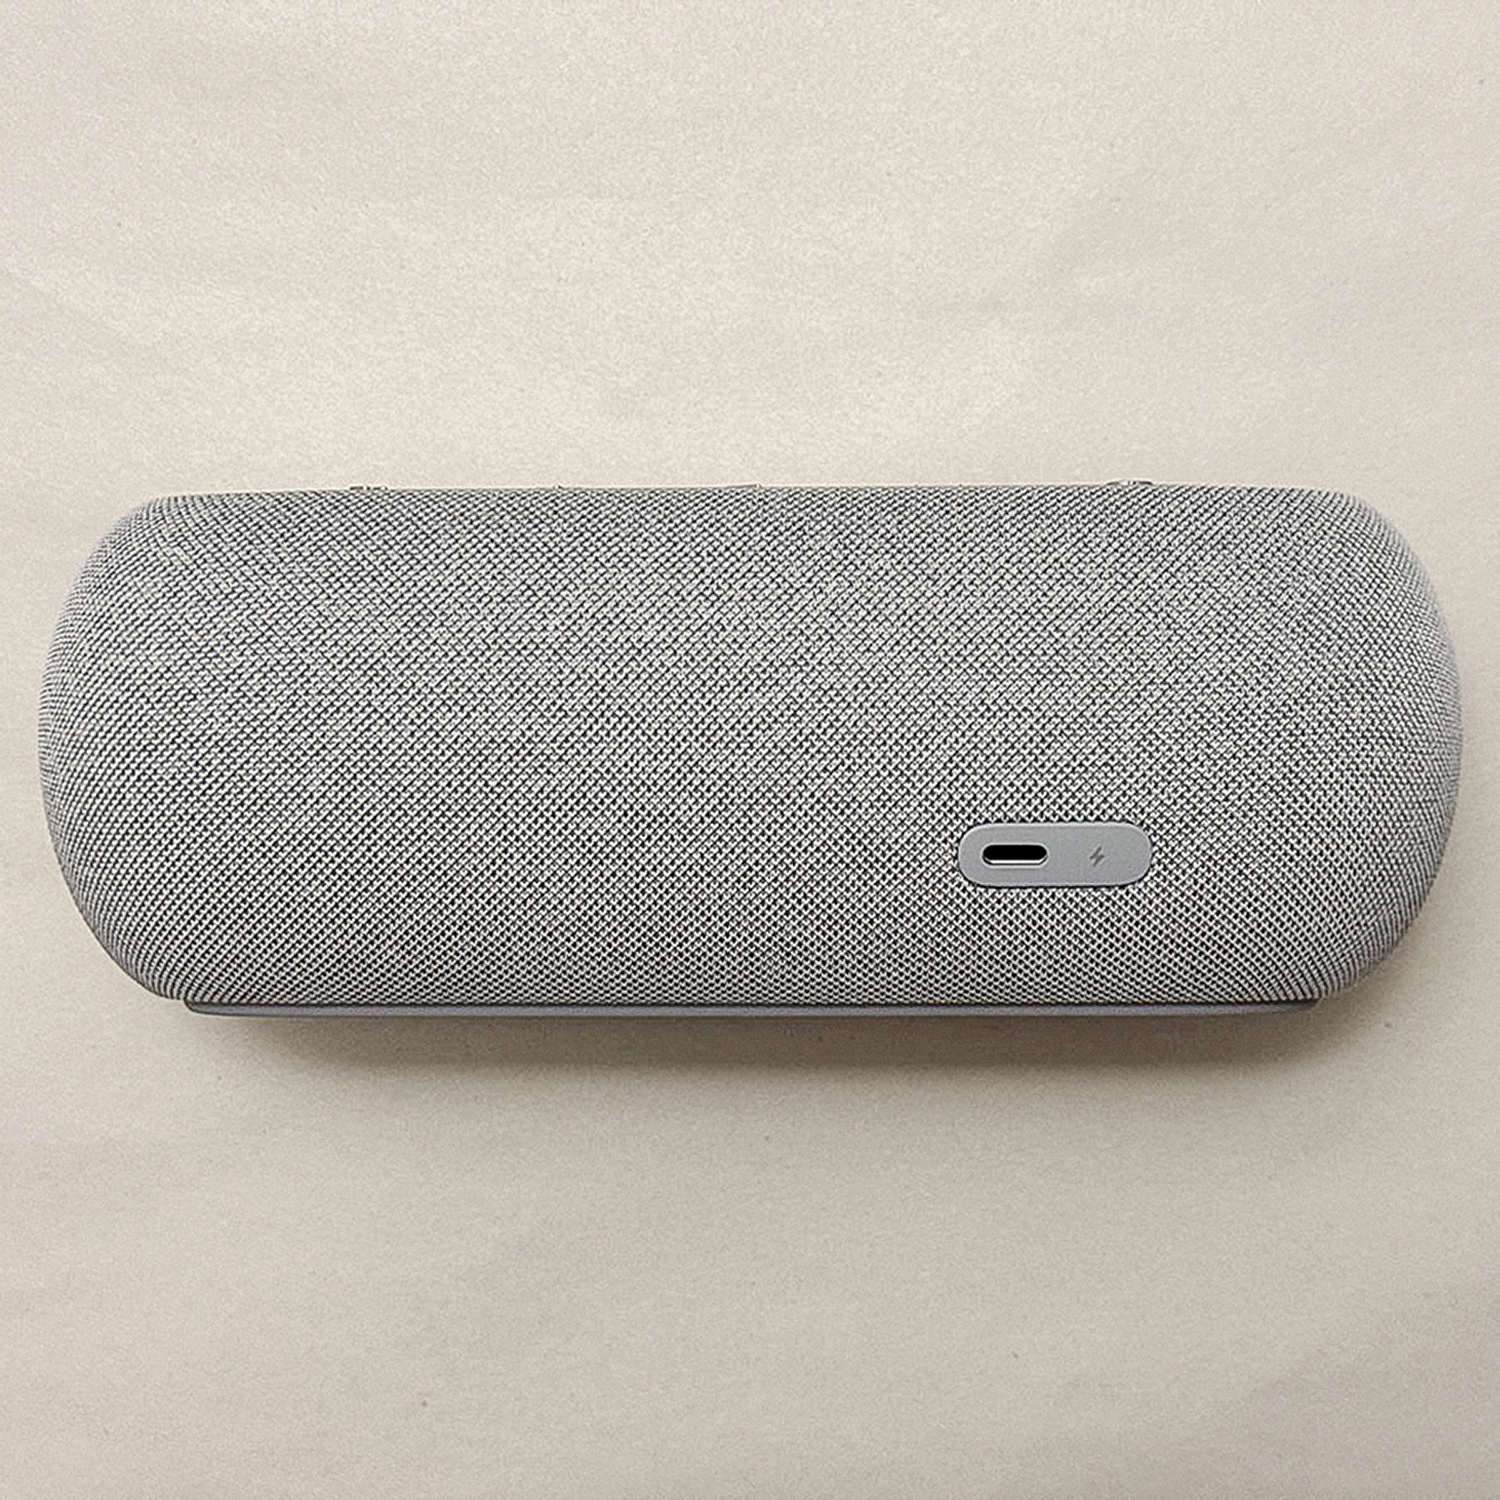
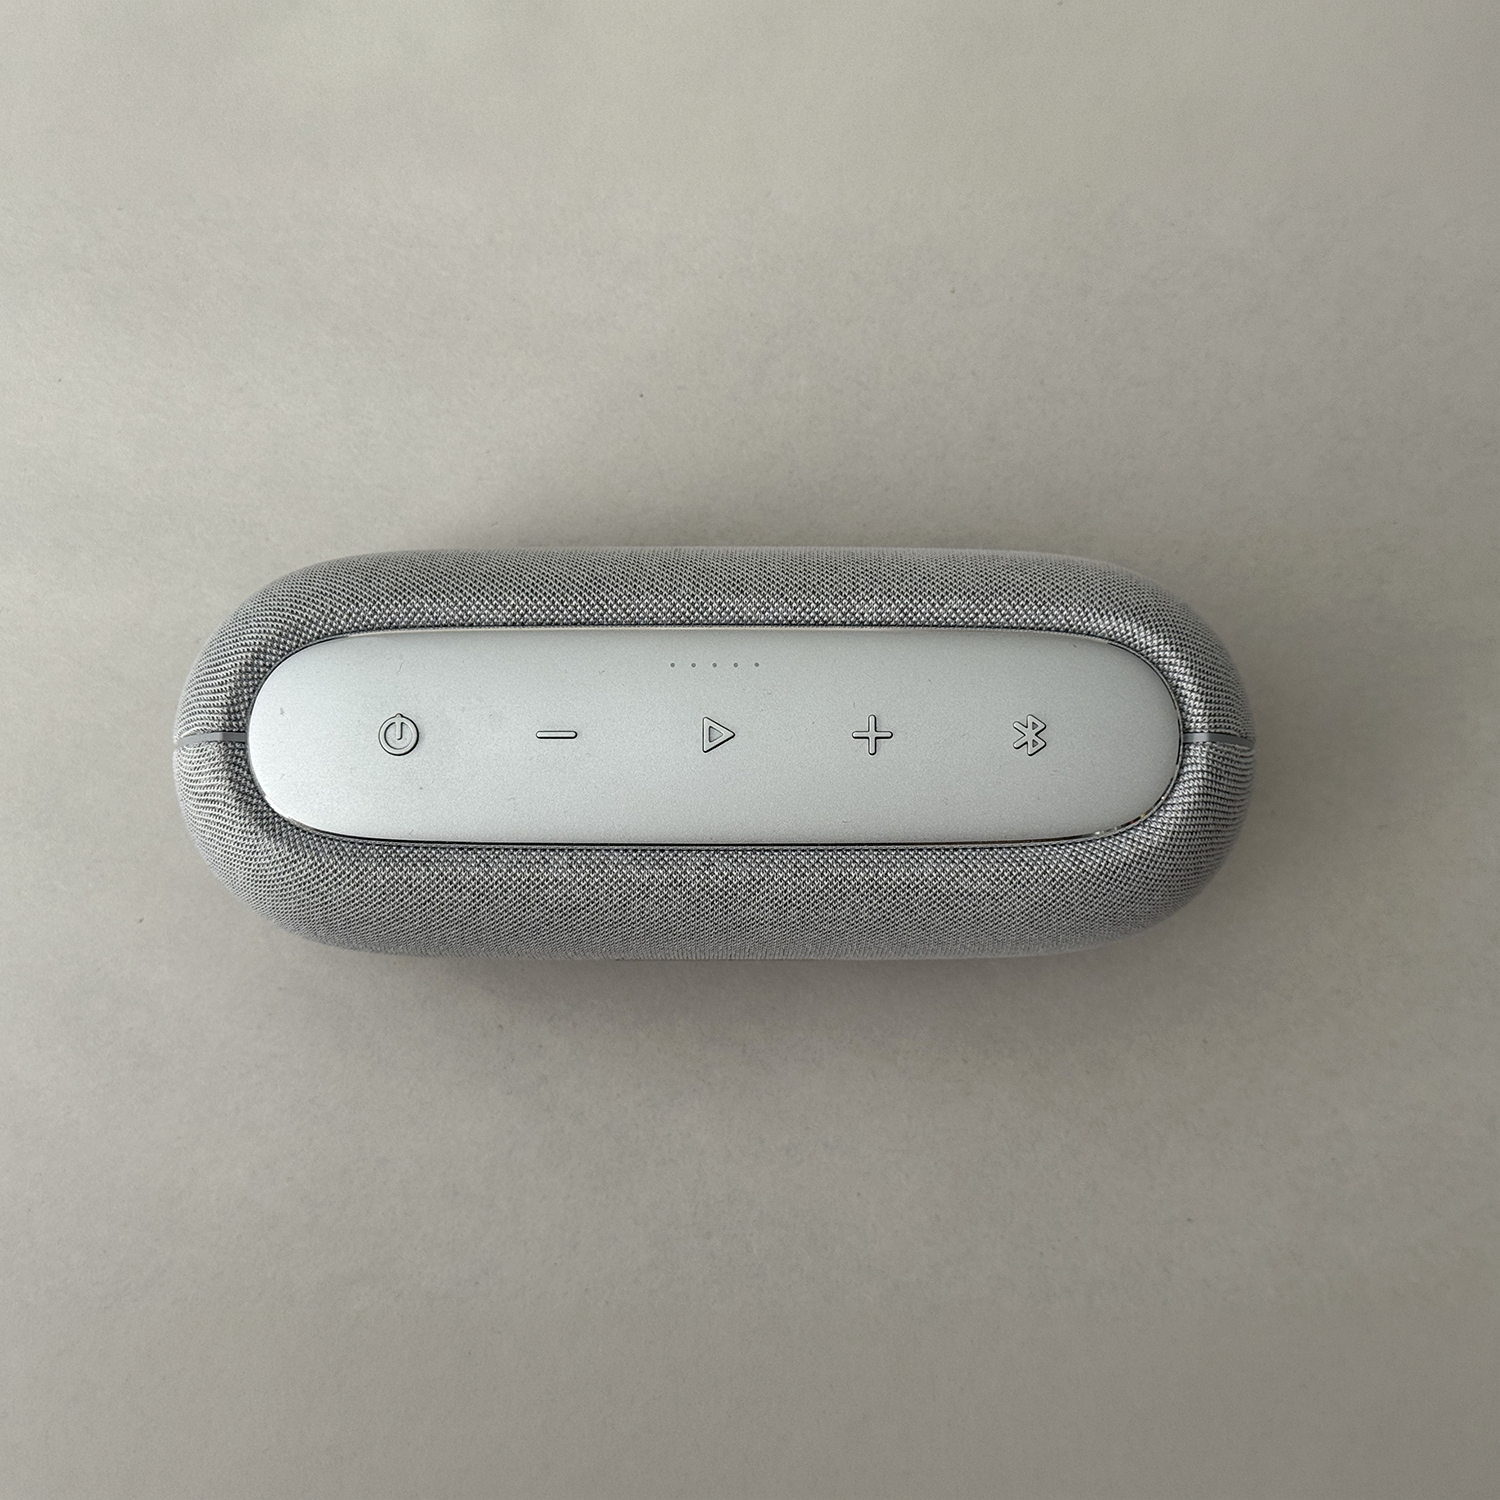
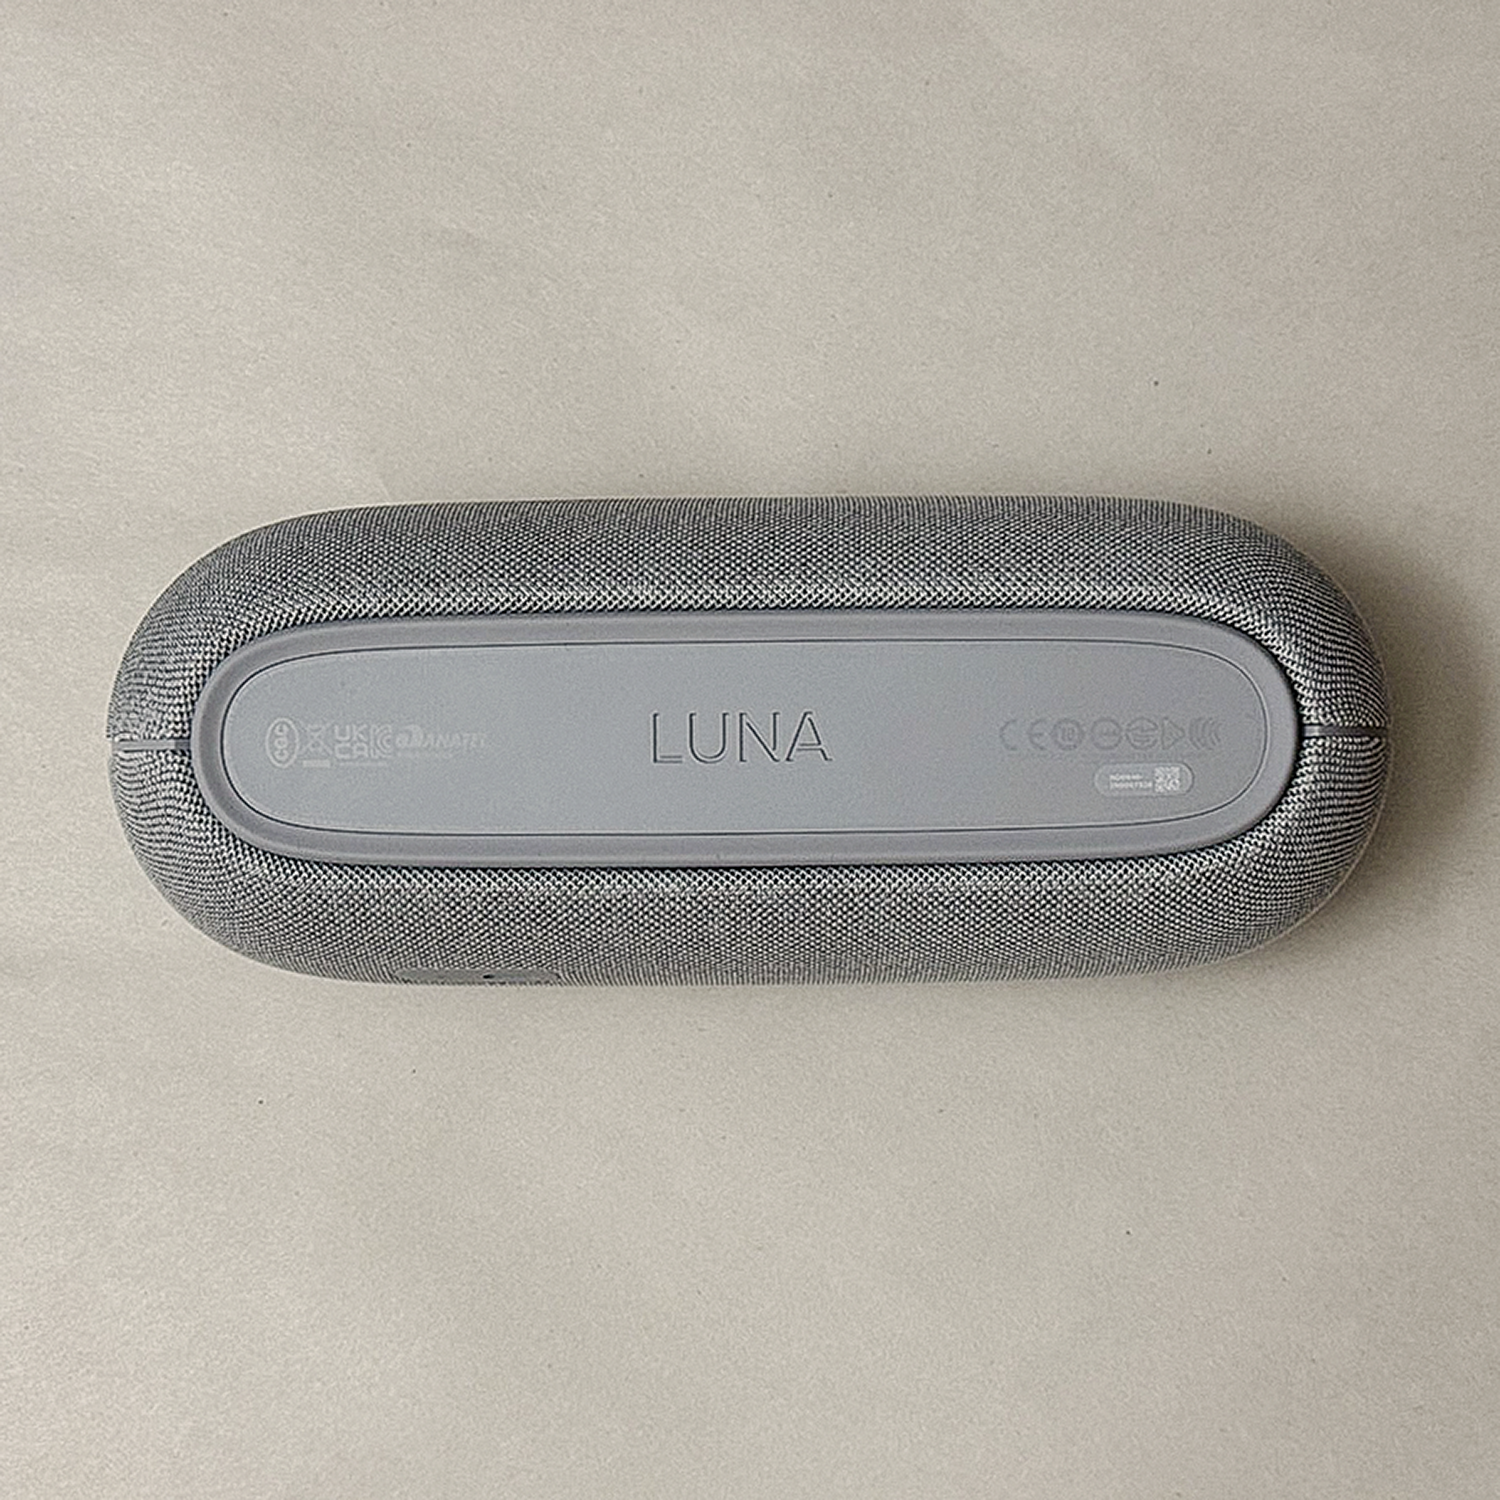
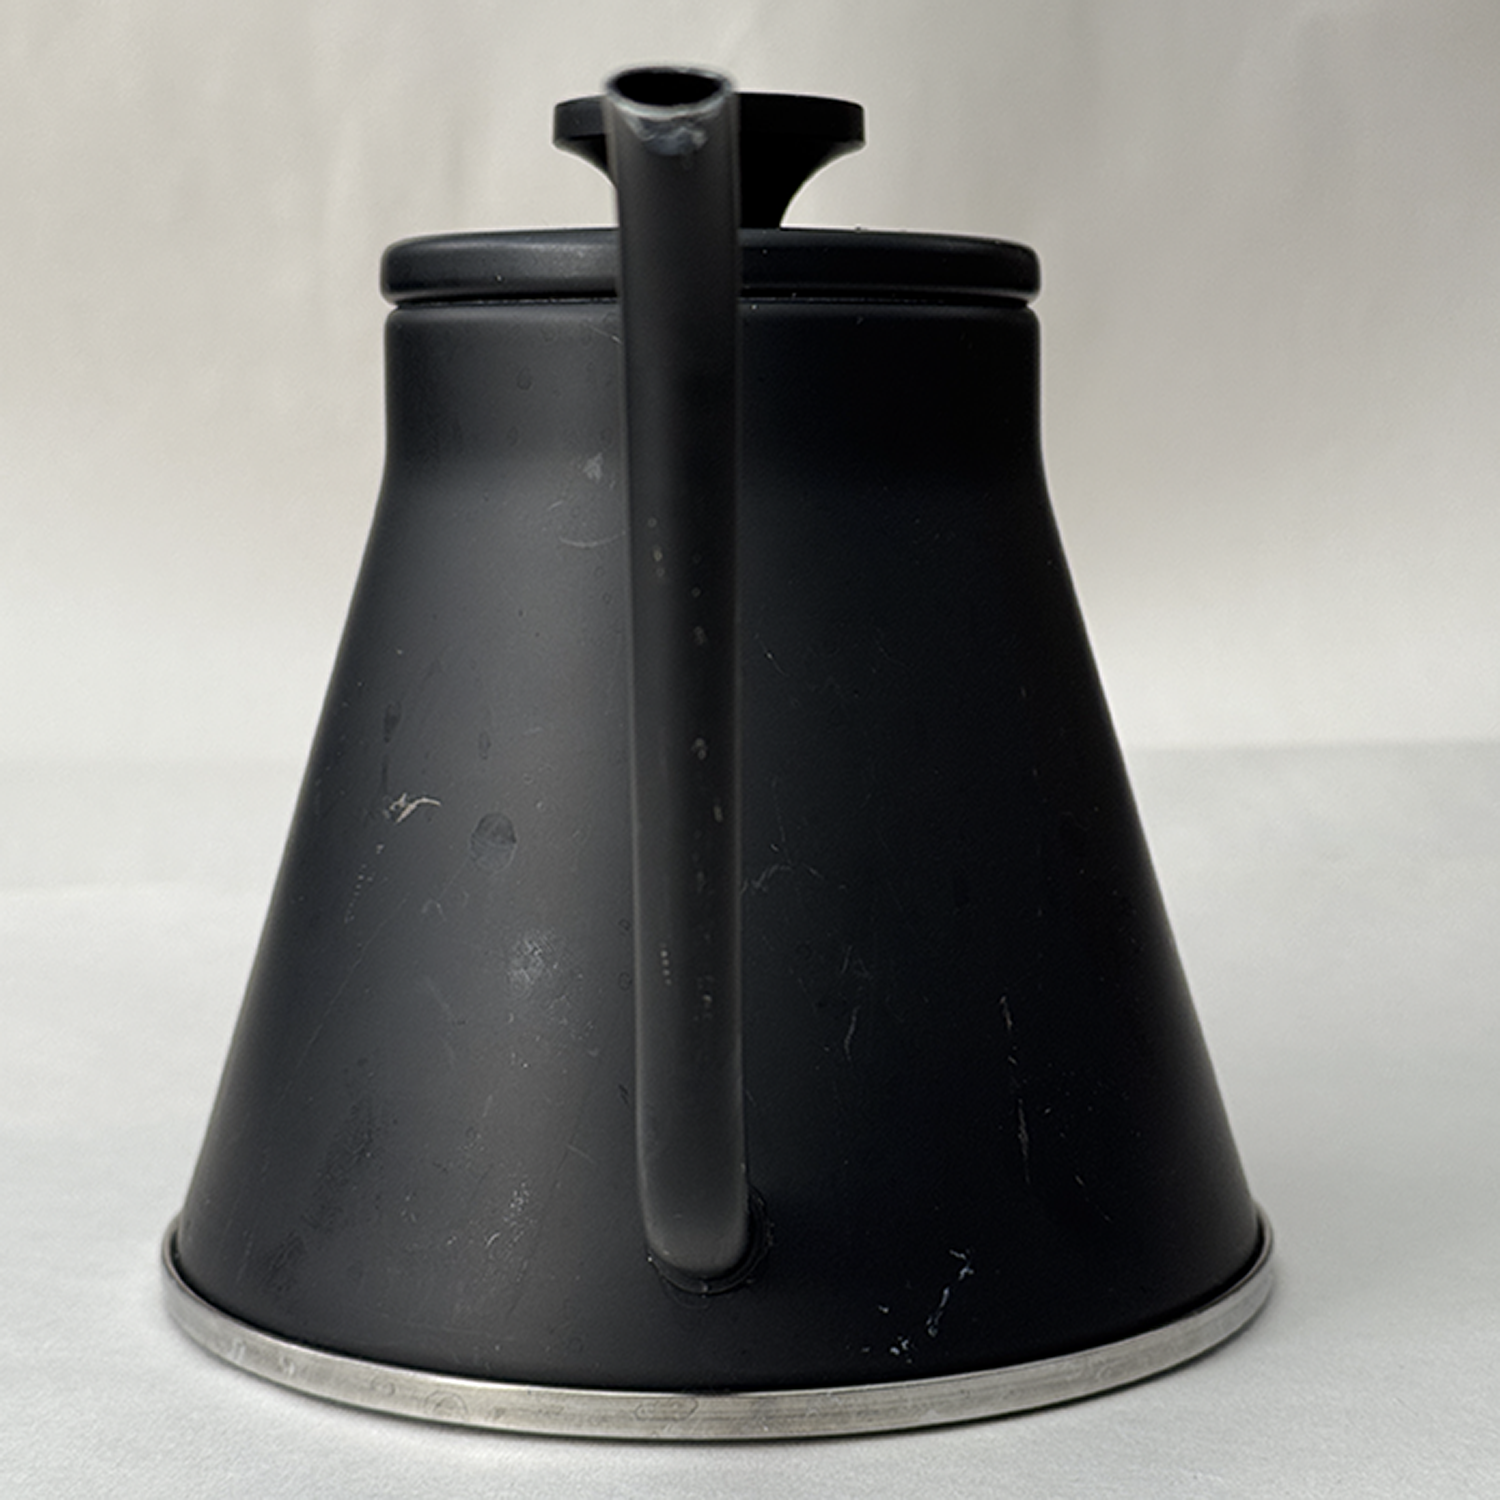
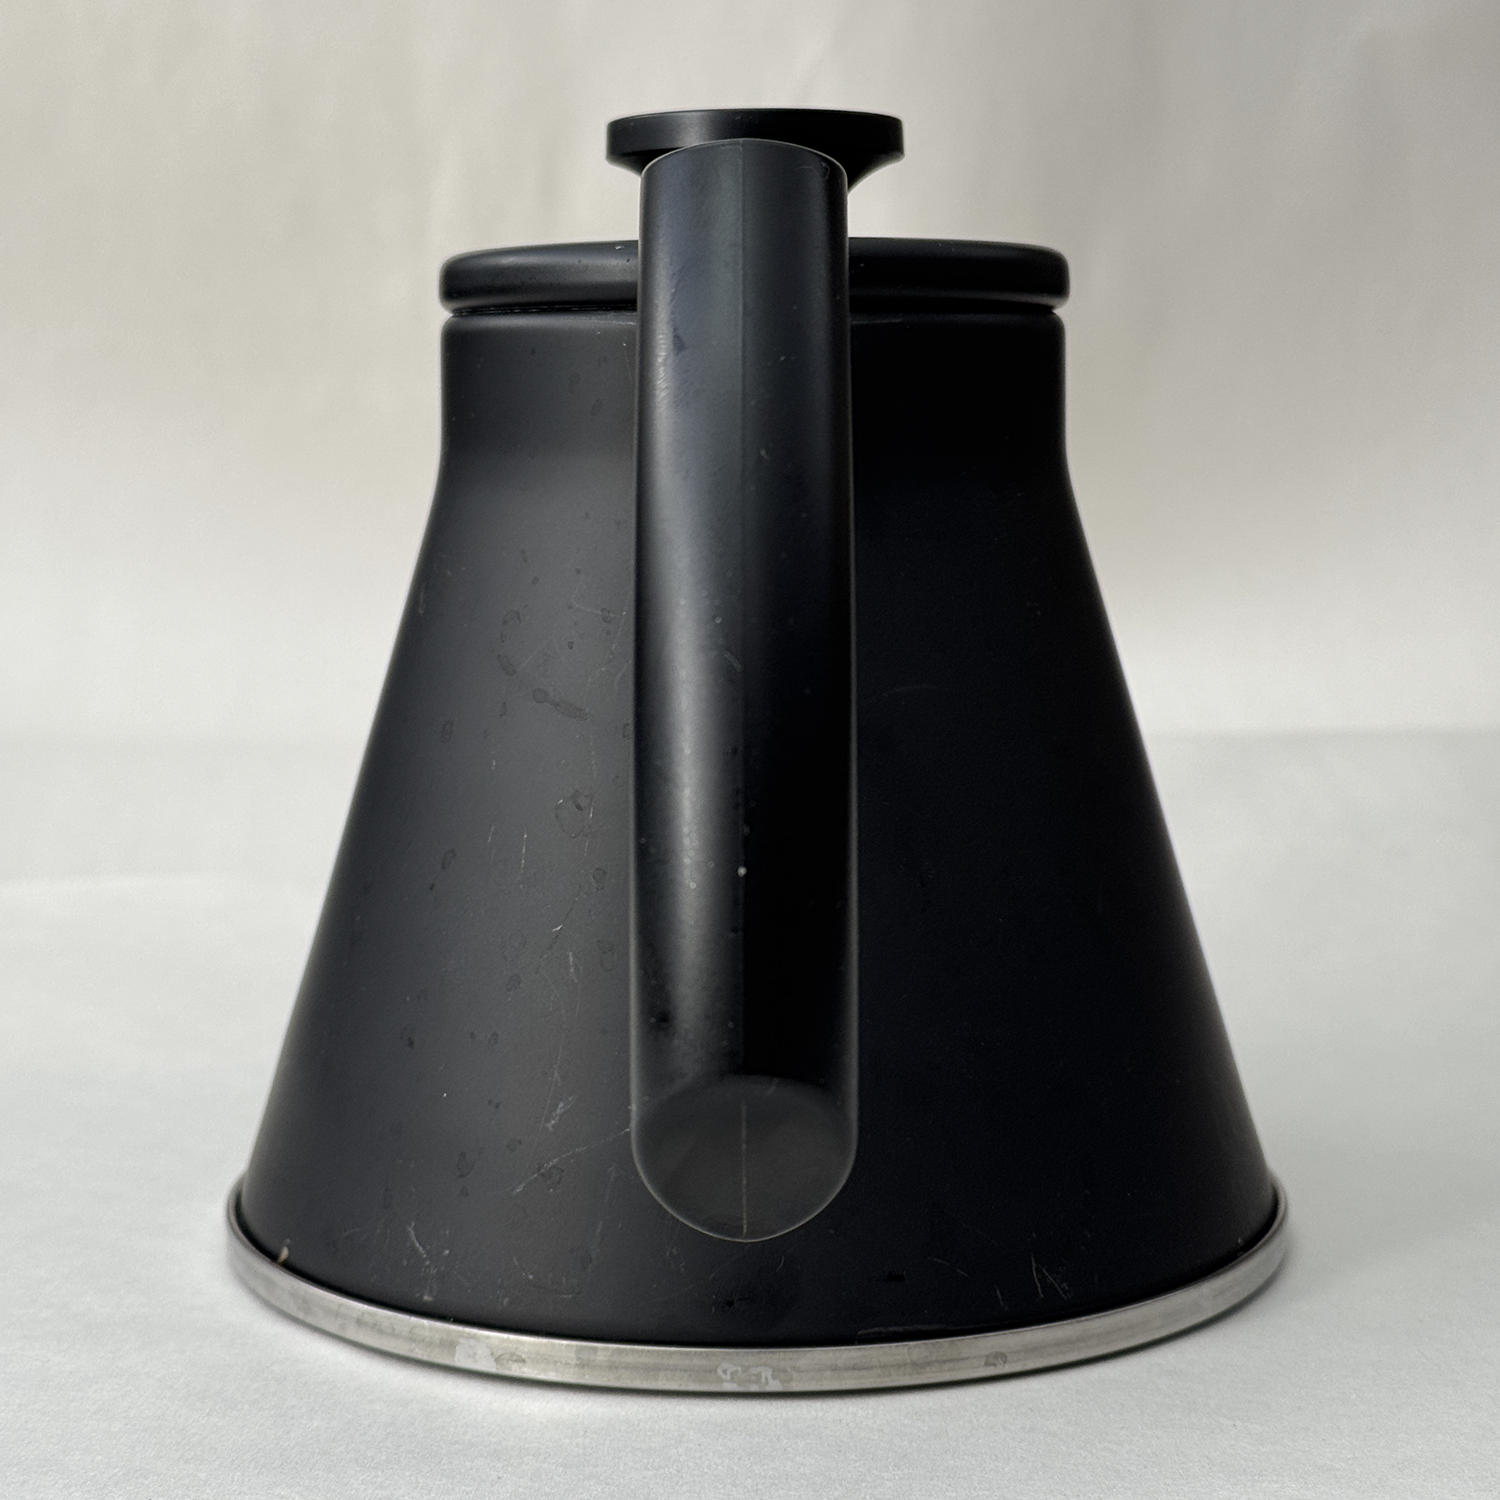
Front view of a red apple showing its round form, textured skin, stem, and shadow. Top view showing the apple’s circular shape and recessed stem area. Front three-quarter view of the box showing its cube shape, folds, handle, and graphics.  Top view showing the box’s interlocking flaps, handle, tabs, and fold lines. Side view showing the box’s rectangular face, folded edges, handle, and graphics. Side view of the foam roller showing its cylinder shape and repeating texture. Top view showing the foam roller’s opening, hollow interior, and textured surface. Front view showing movement through raised arms and bent legs.  Rear three-quarter view showing the figure’s rounded torso, limbs, and joints. Front view of a compact speaker with a rounded body, fabric surface, and top controls. Rear view showing the speaker’s curved fabric body, top panel, and charging port. Front view of Pikachu showing its long ears, rounded body, arms, and feet. Side view showing the depth and overlap of Pikachu’s ears, limbs, and tail. Rear view highlighting Pikachu’s zigzag tail, back markings, and ears. Side Bird’s-eye view of the kettle showing its conical body, curved spout, lid, and handle. Rear Bird’s-eye view showing the centered handle and overlapping spout. Side three-quarter view showing the helmet’s curved shell, vents, and rear detail. Front view showing the helmet’s symmetry and ventilation openings. Bird’s-eye rear view showing the helmet’s curved shell, vents, and rear light. Interior view showing the helmet’s foam liner, straps, adjuster, and air channels. I followed a Cinema 4D tutorial to build a dining-table scene with the Asset Browser. This view shows how tableware were placed and arranged. I practiced fitting the pre-built robot parts together in Cinema 4D. This scene shows the tutorial step where I created and positioned the robot’s eye. Modeling process of the speaker in Cinema 4D, showing the rounded body and recessed top panel from multiple orthographic views. I created and positioned a text spline on the bottom panel of the speaker, then used it to engrave the “LUNA” name into the surface. The multi-view layout helped me check the text’s scale, alignment, depth, and placement from different angles. Completed 3D model of a compact speaker featuring a rounded fabric body, glossy control panel, buttons, Bluetooth symbol, and front logo.

Design Challenge 2
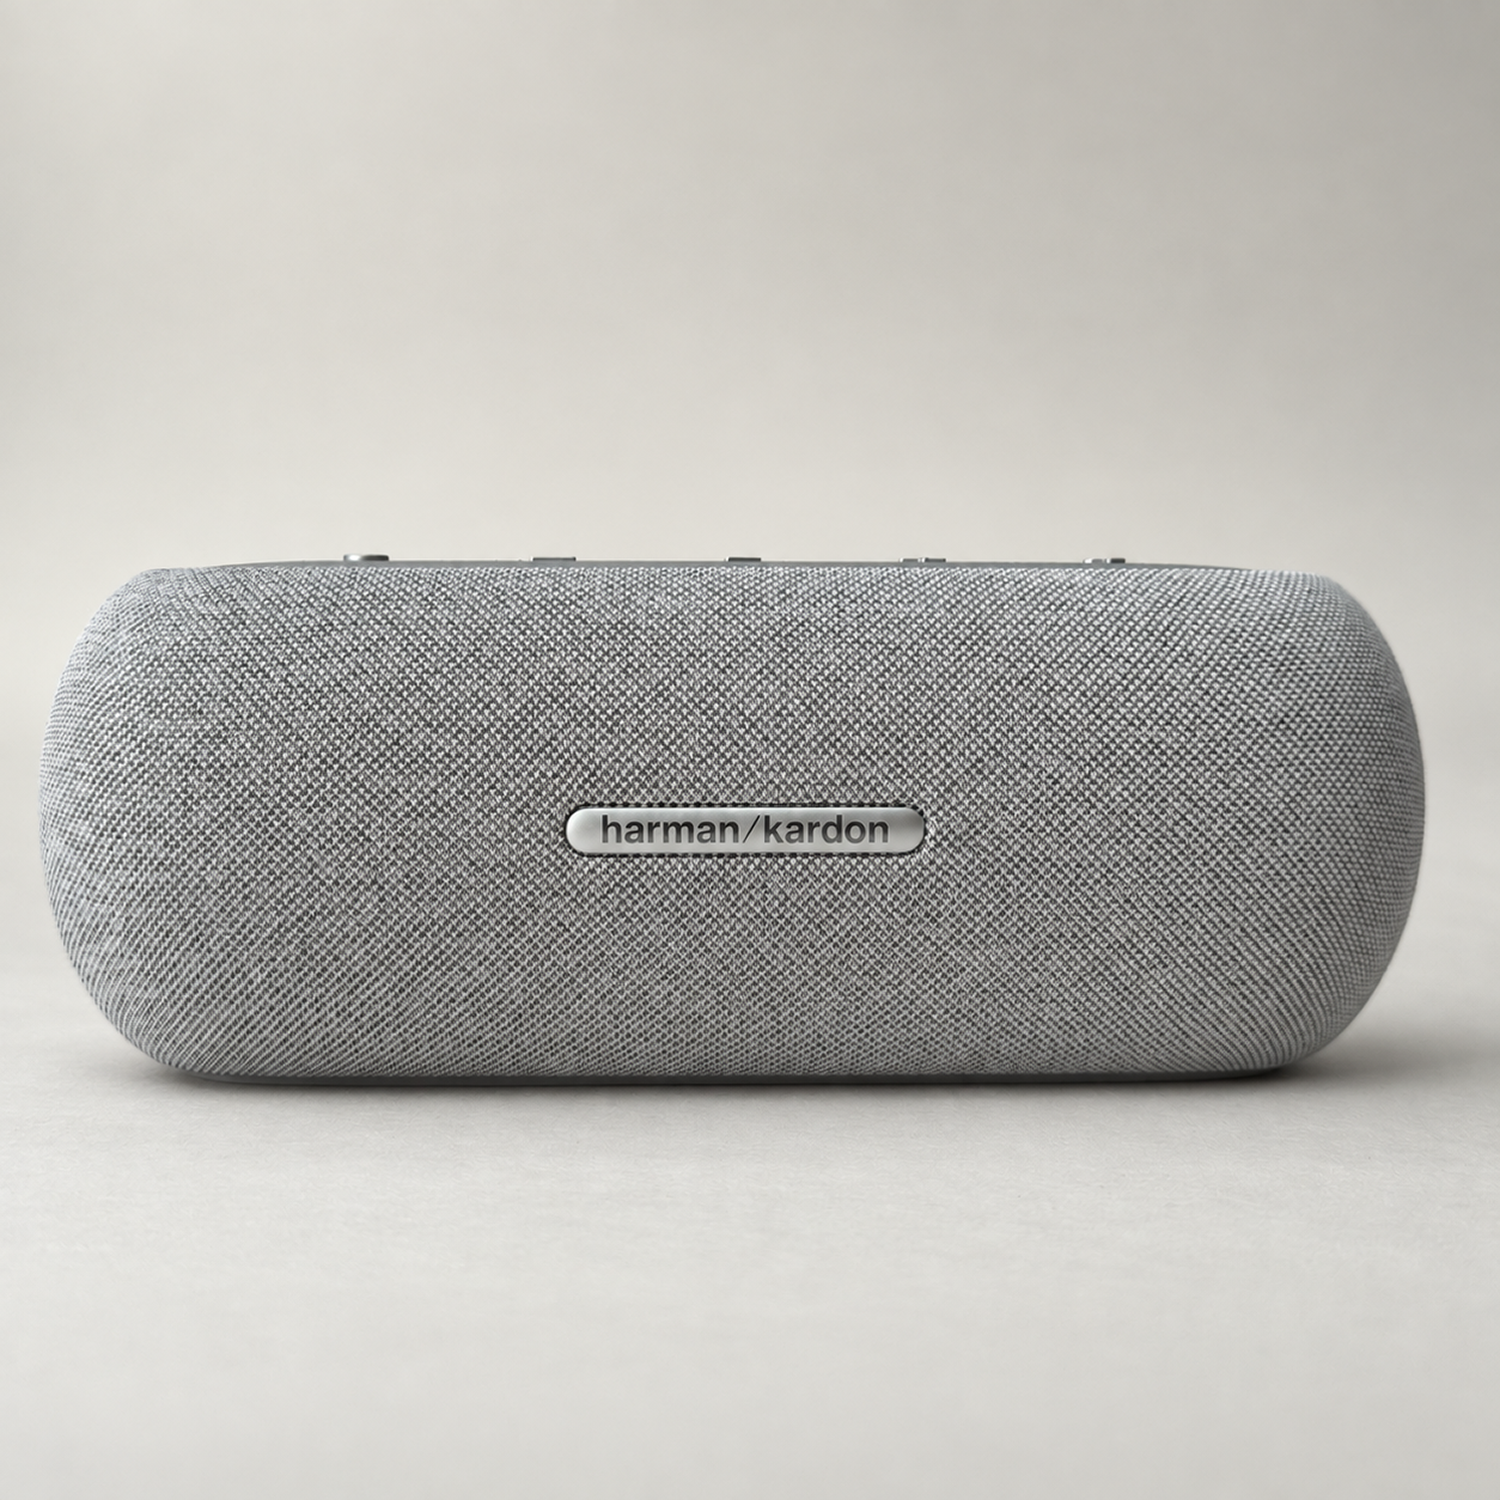
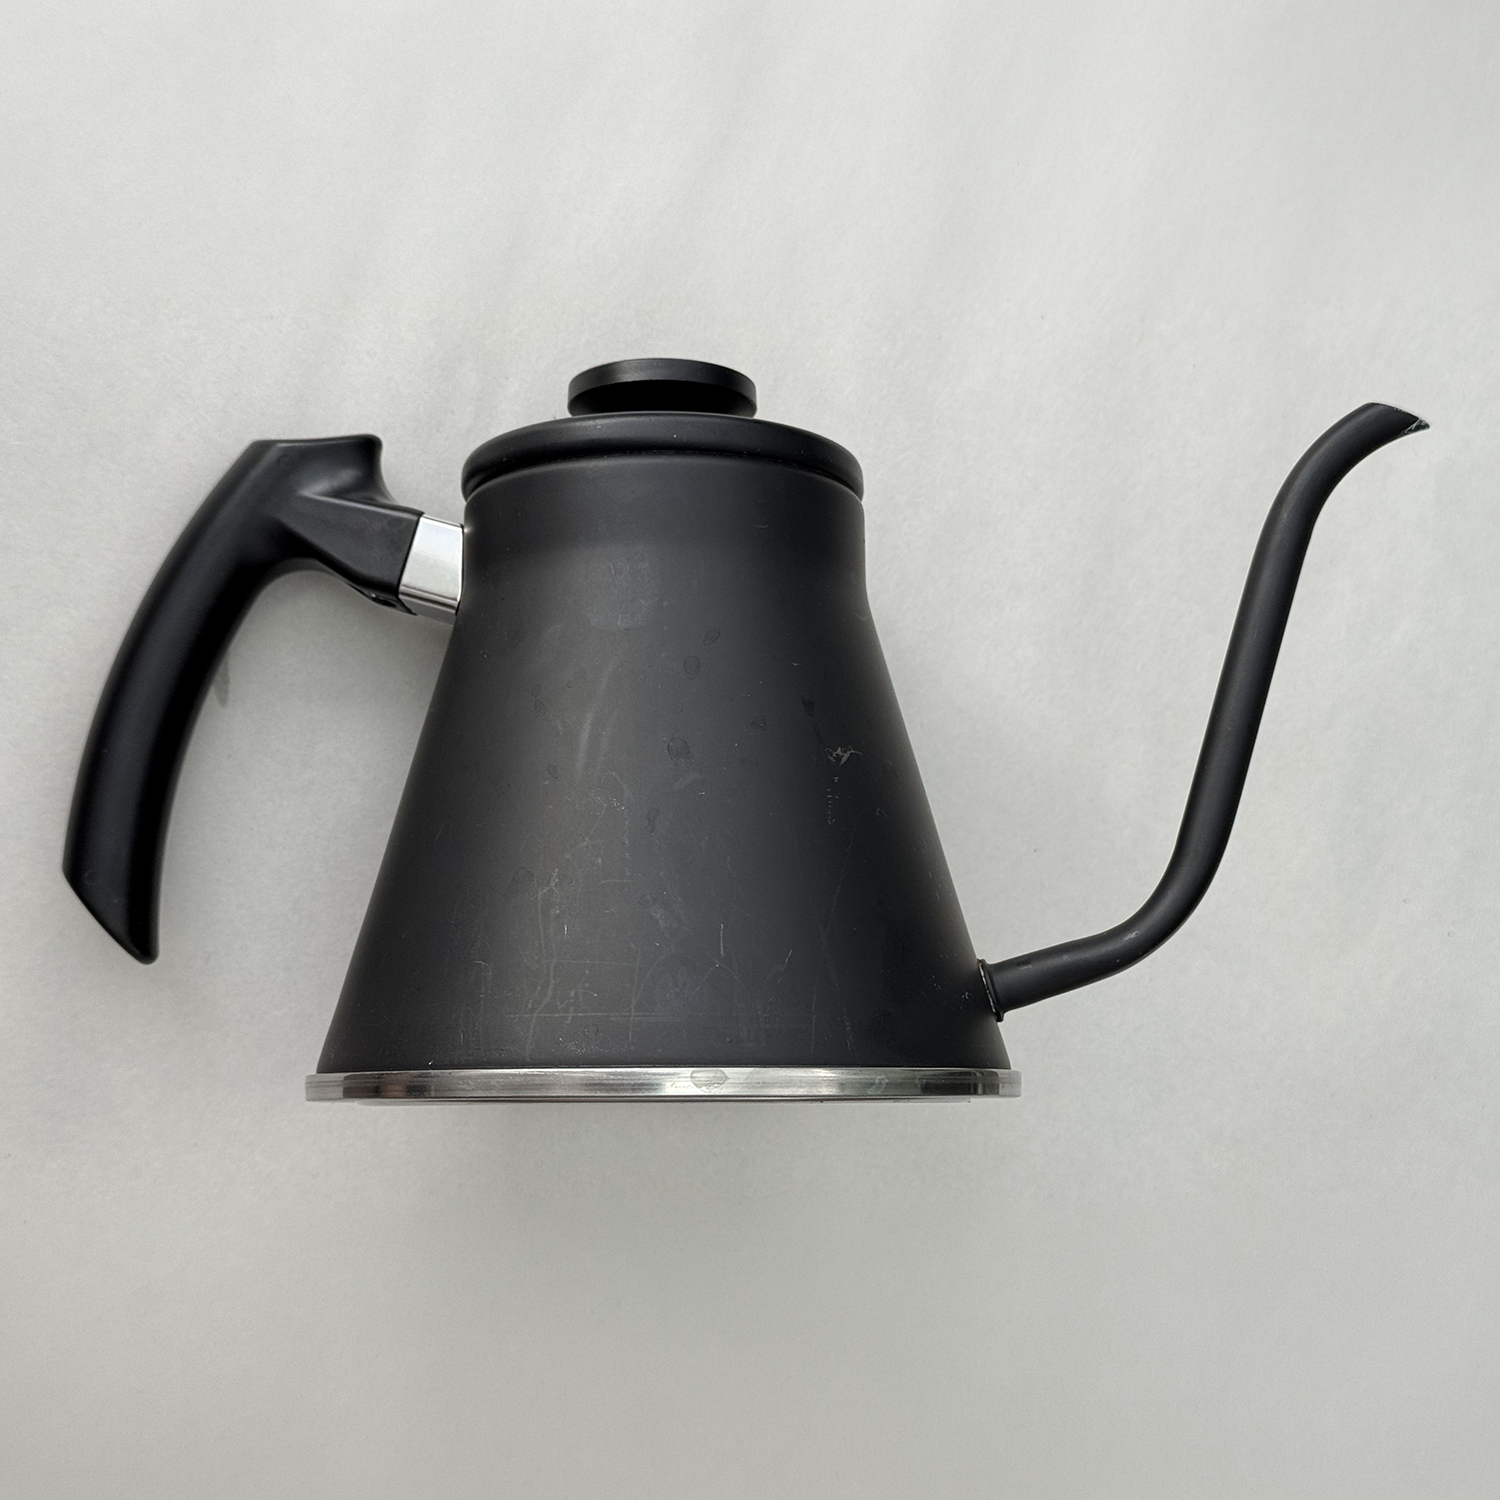
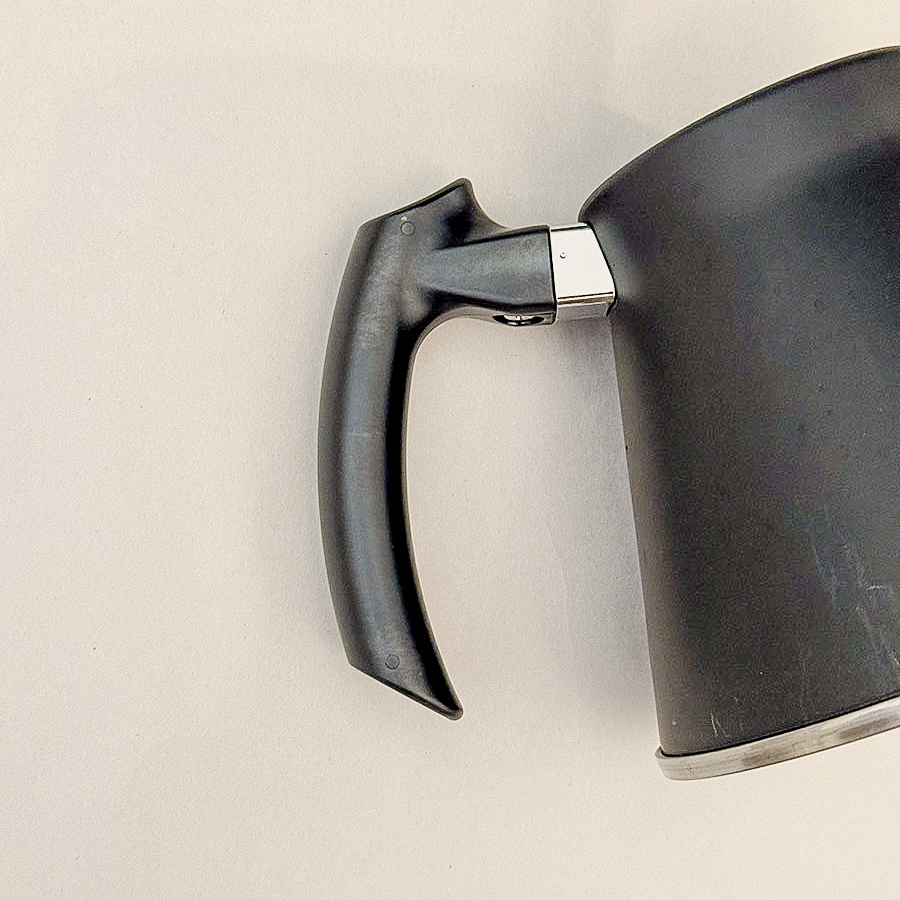
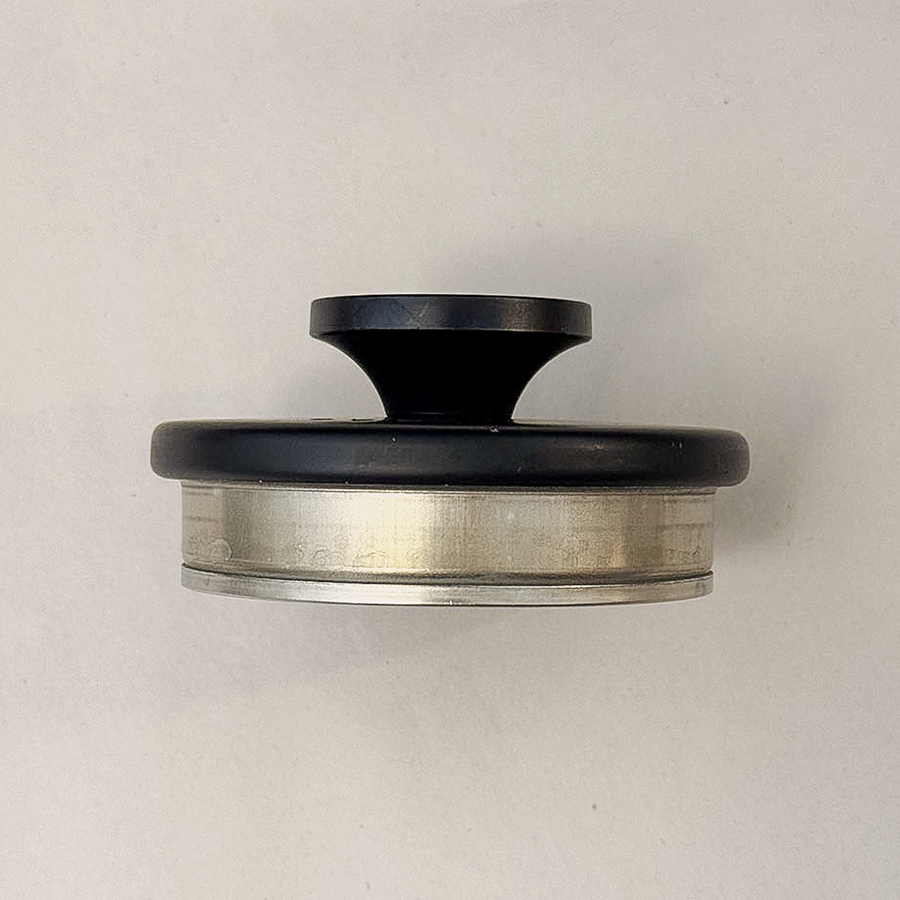
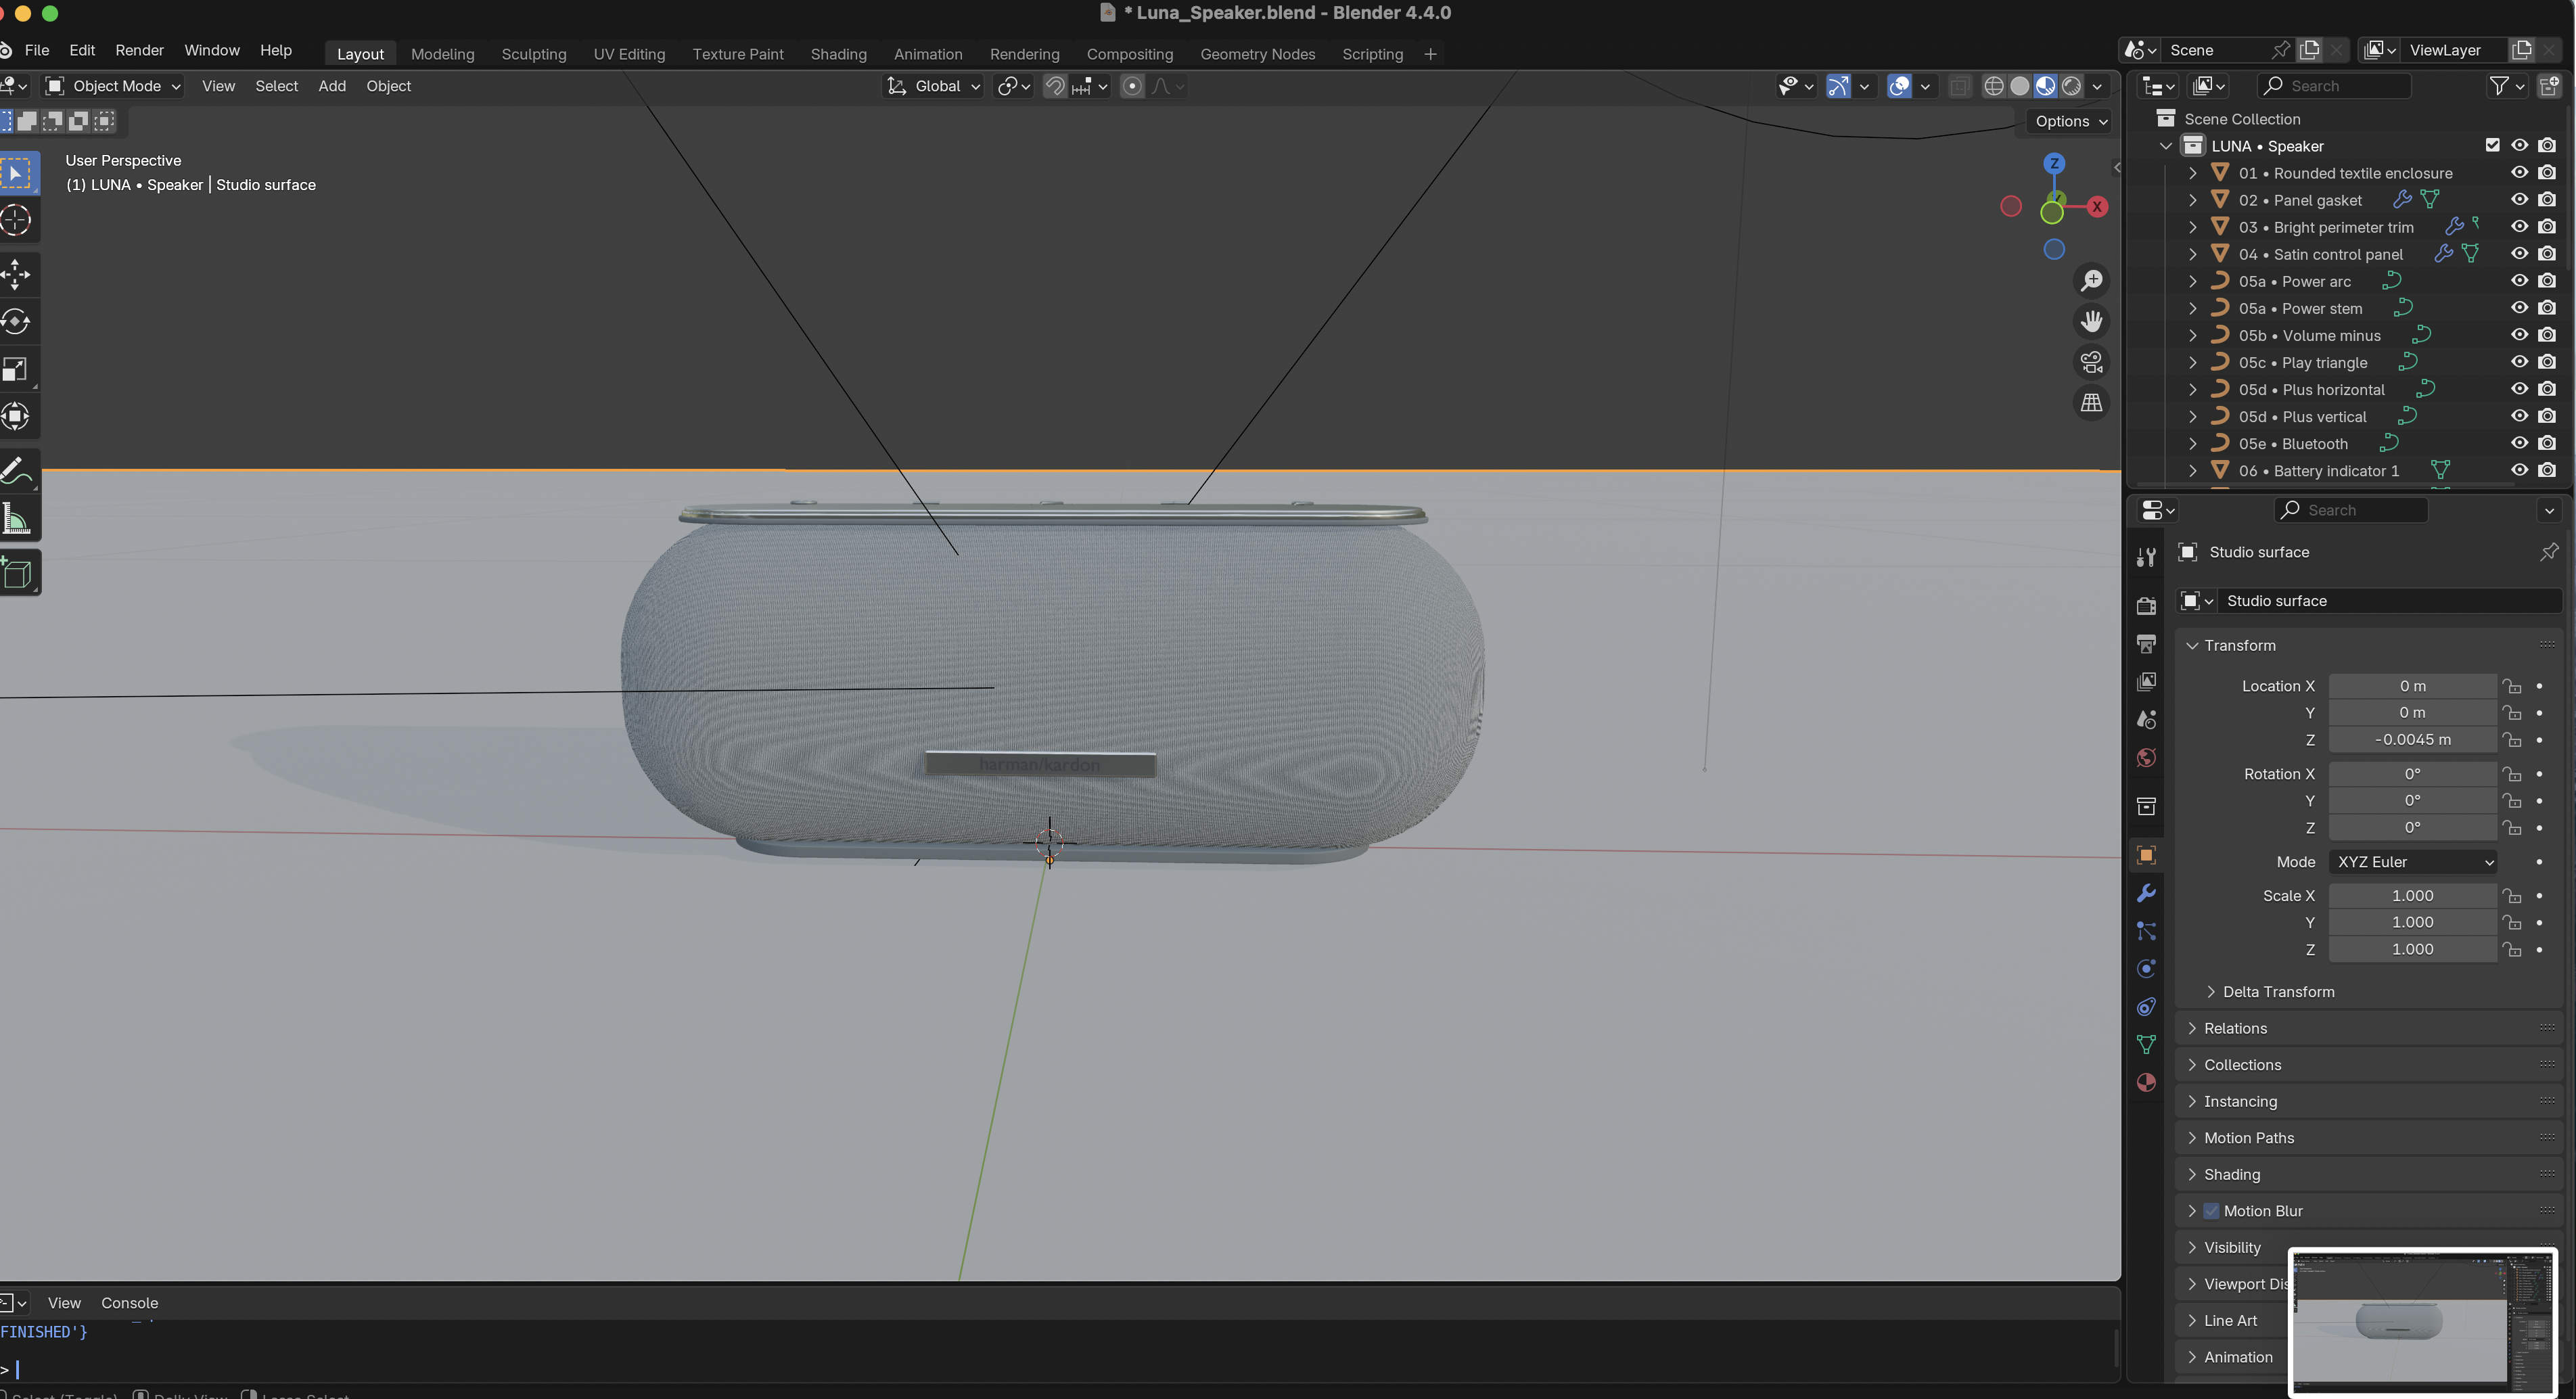
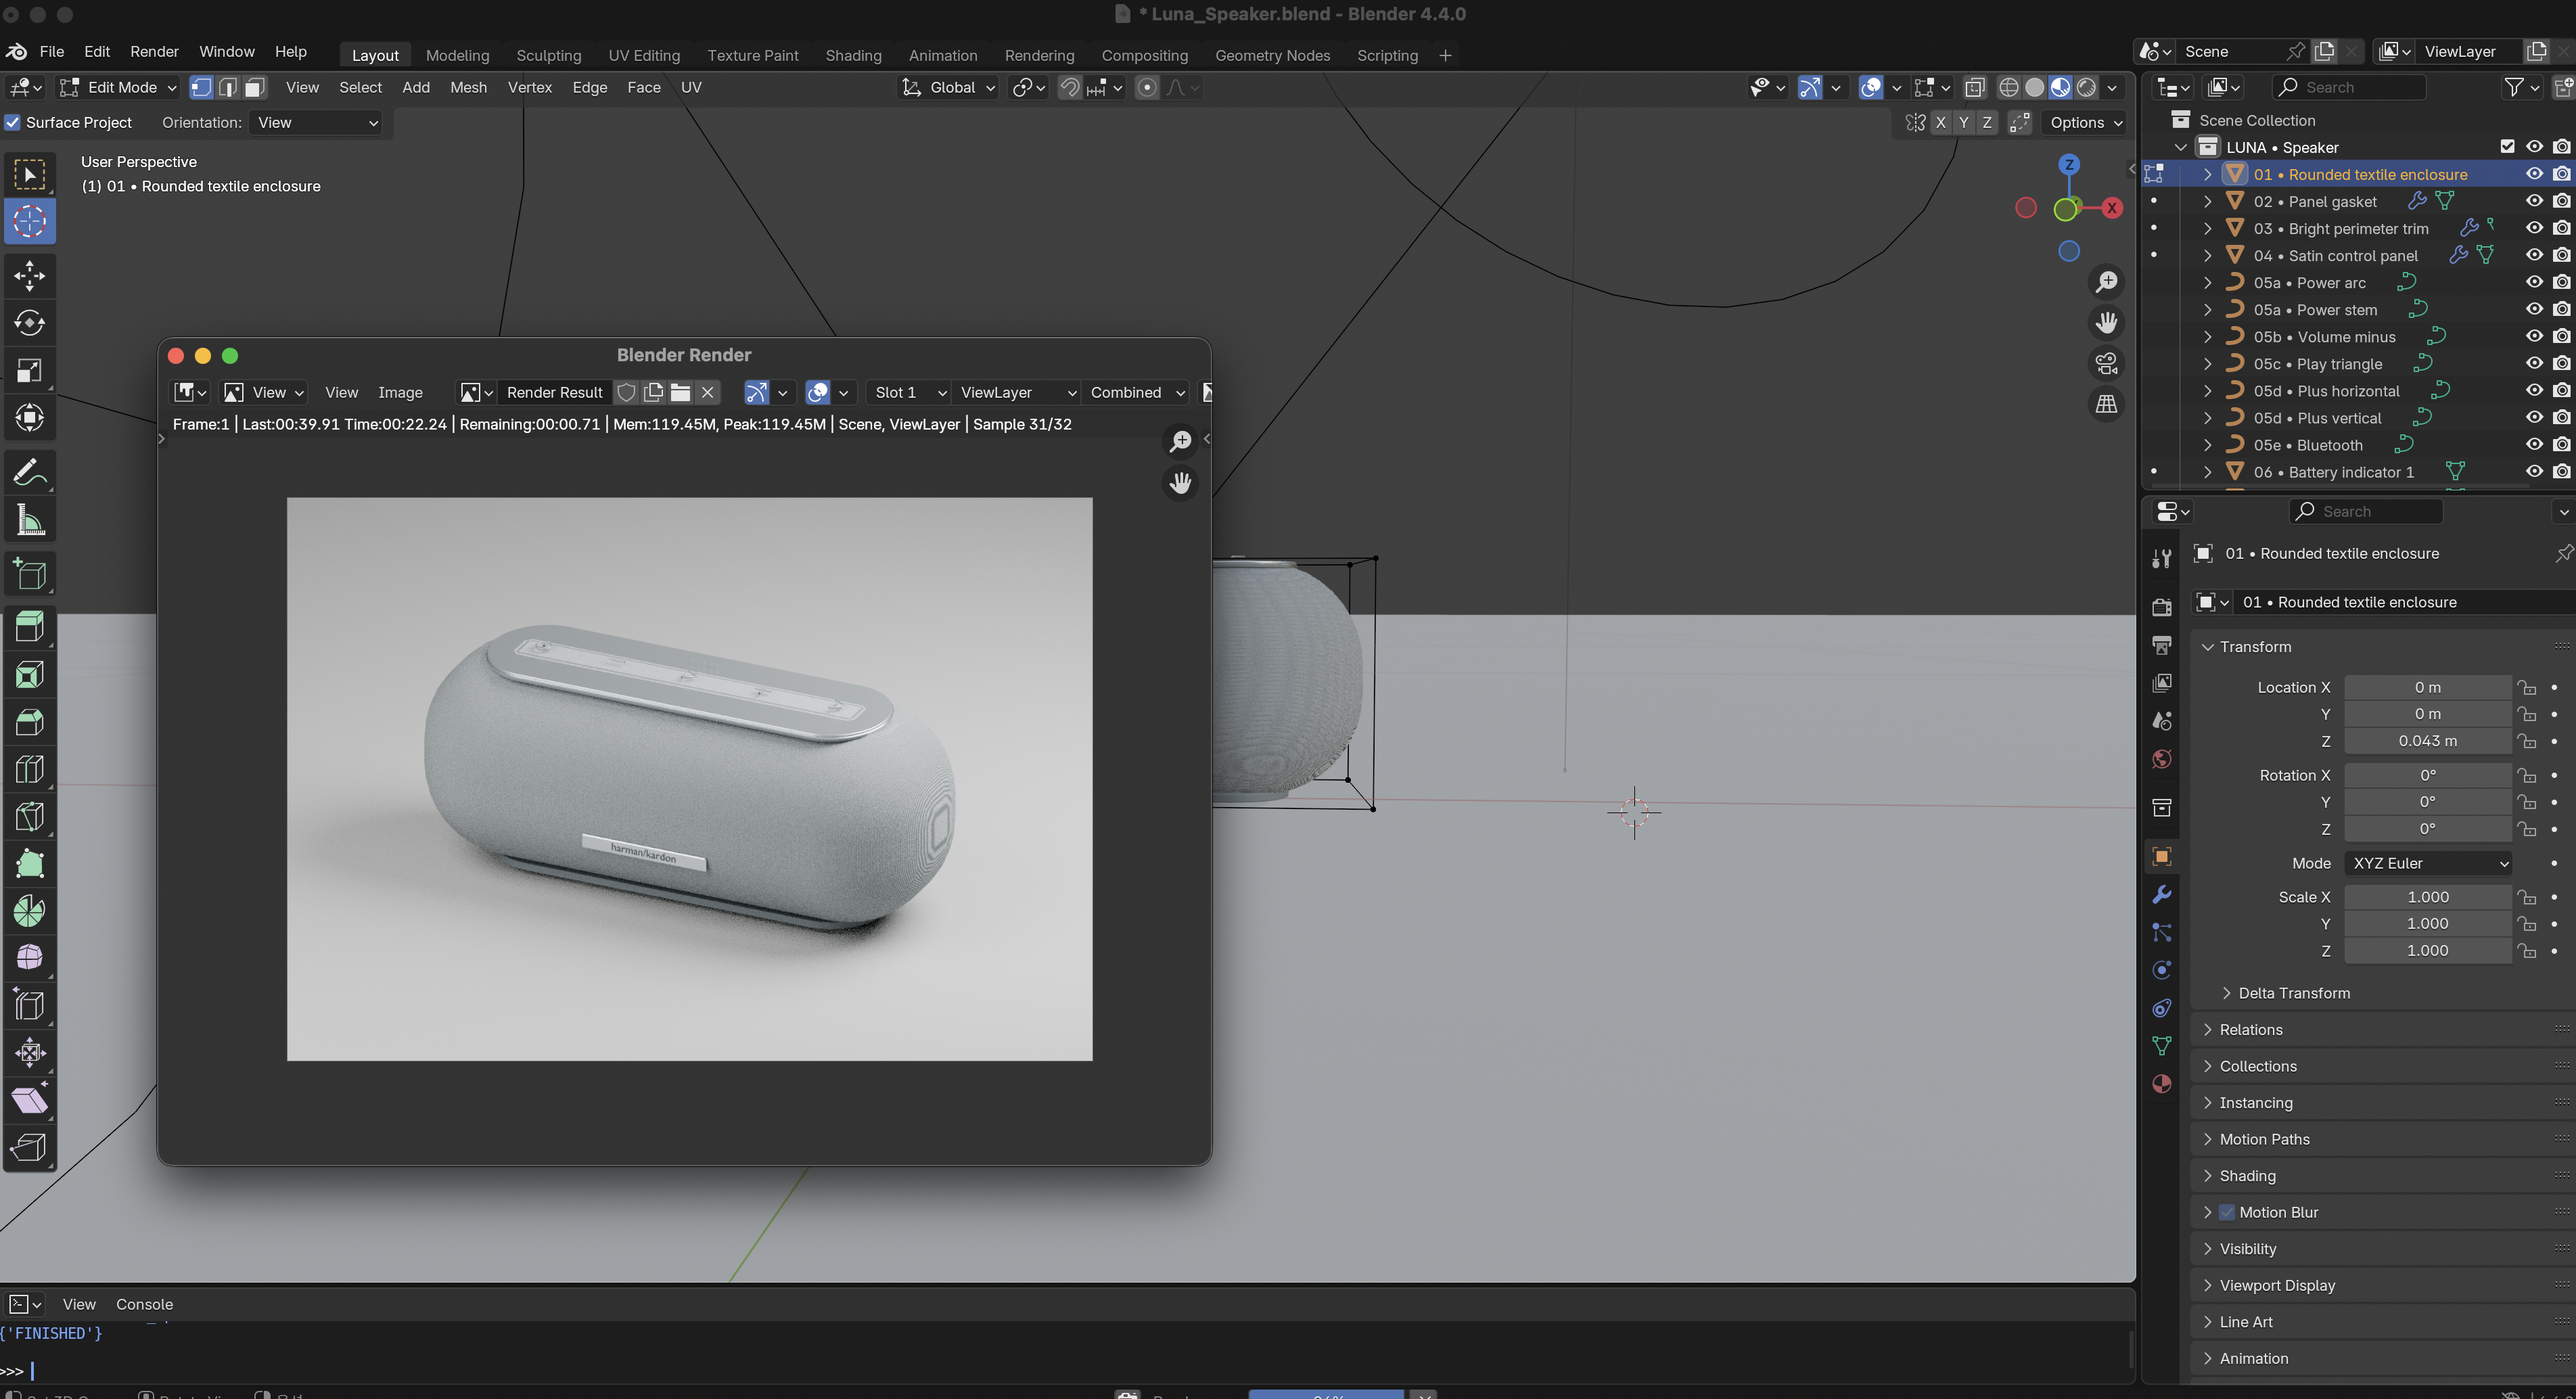
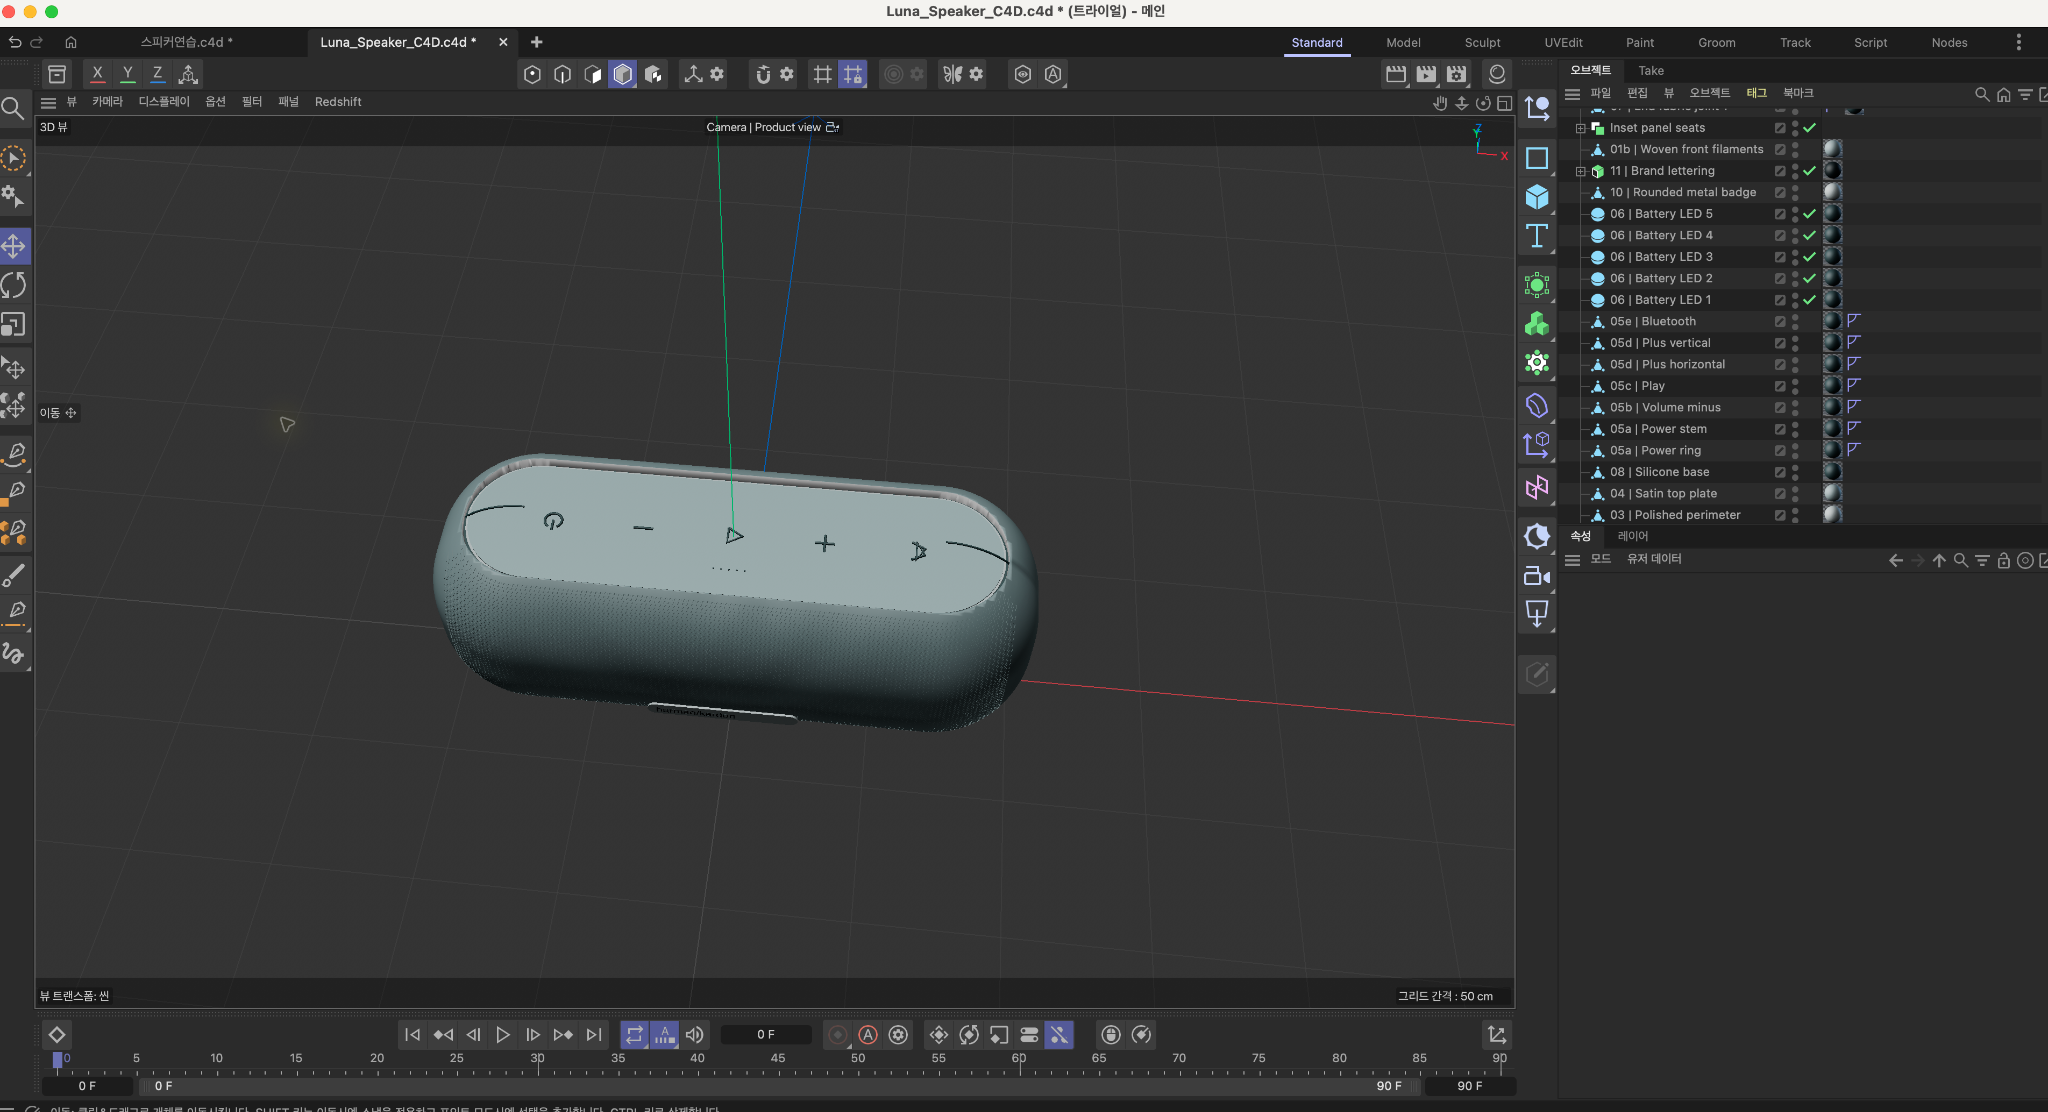
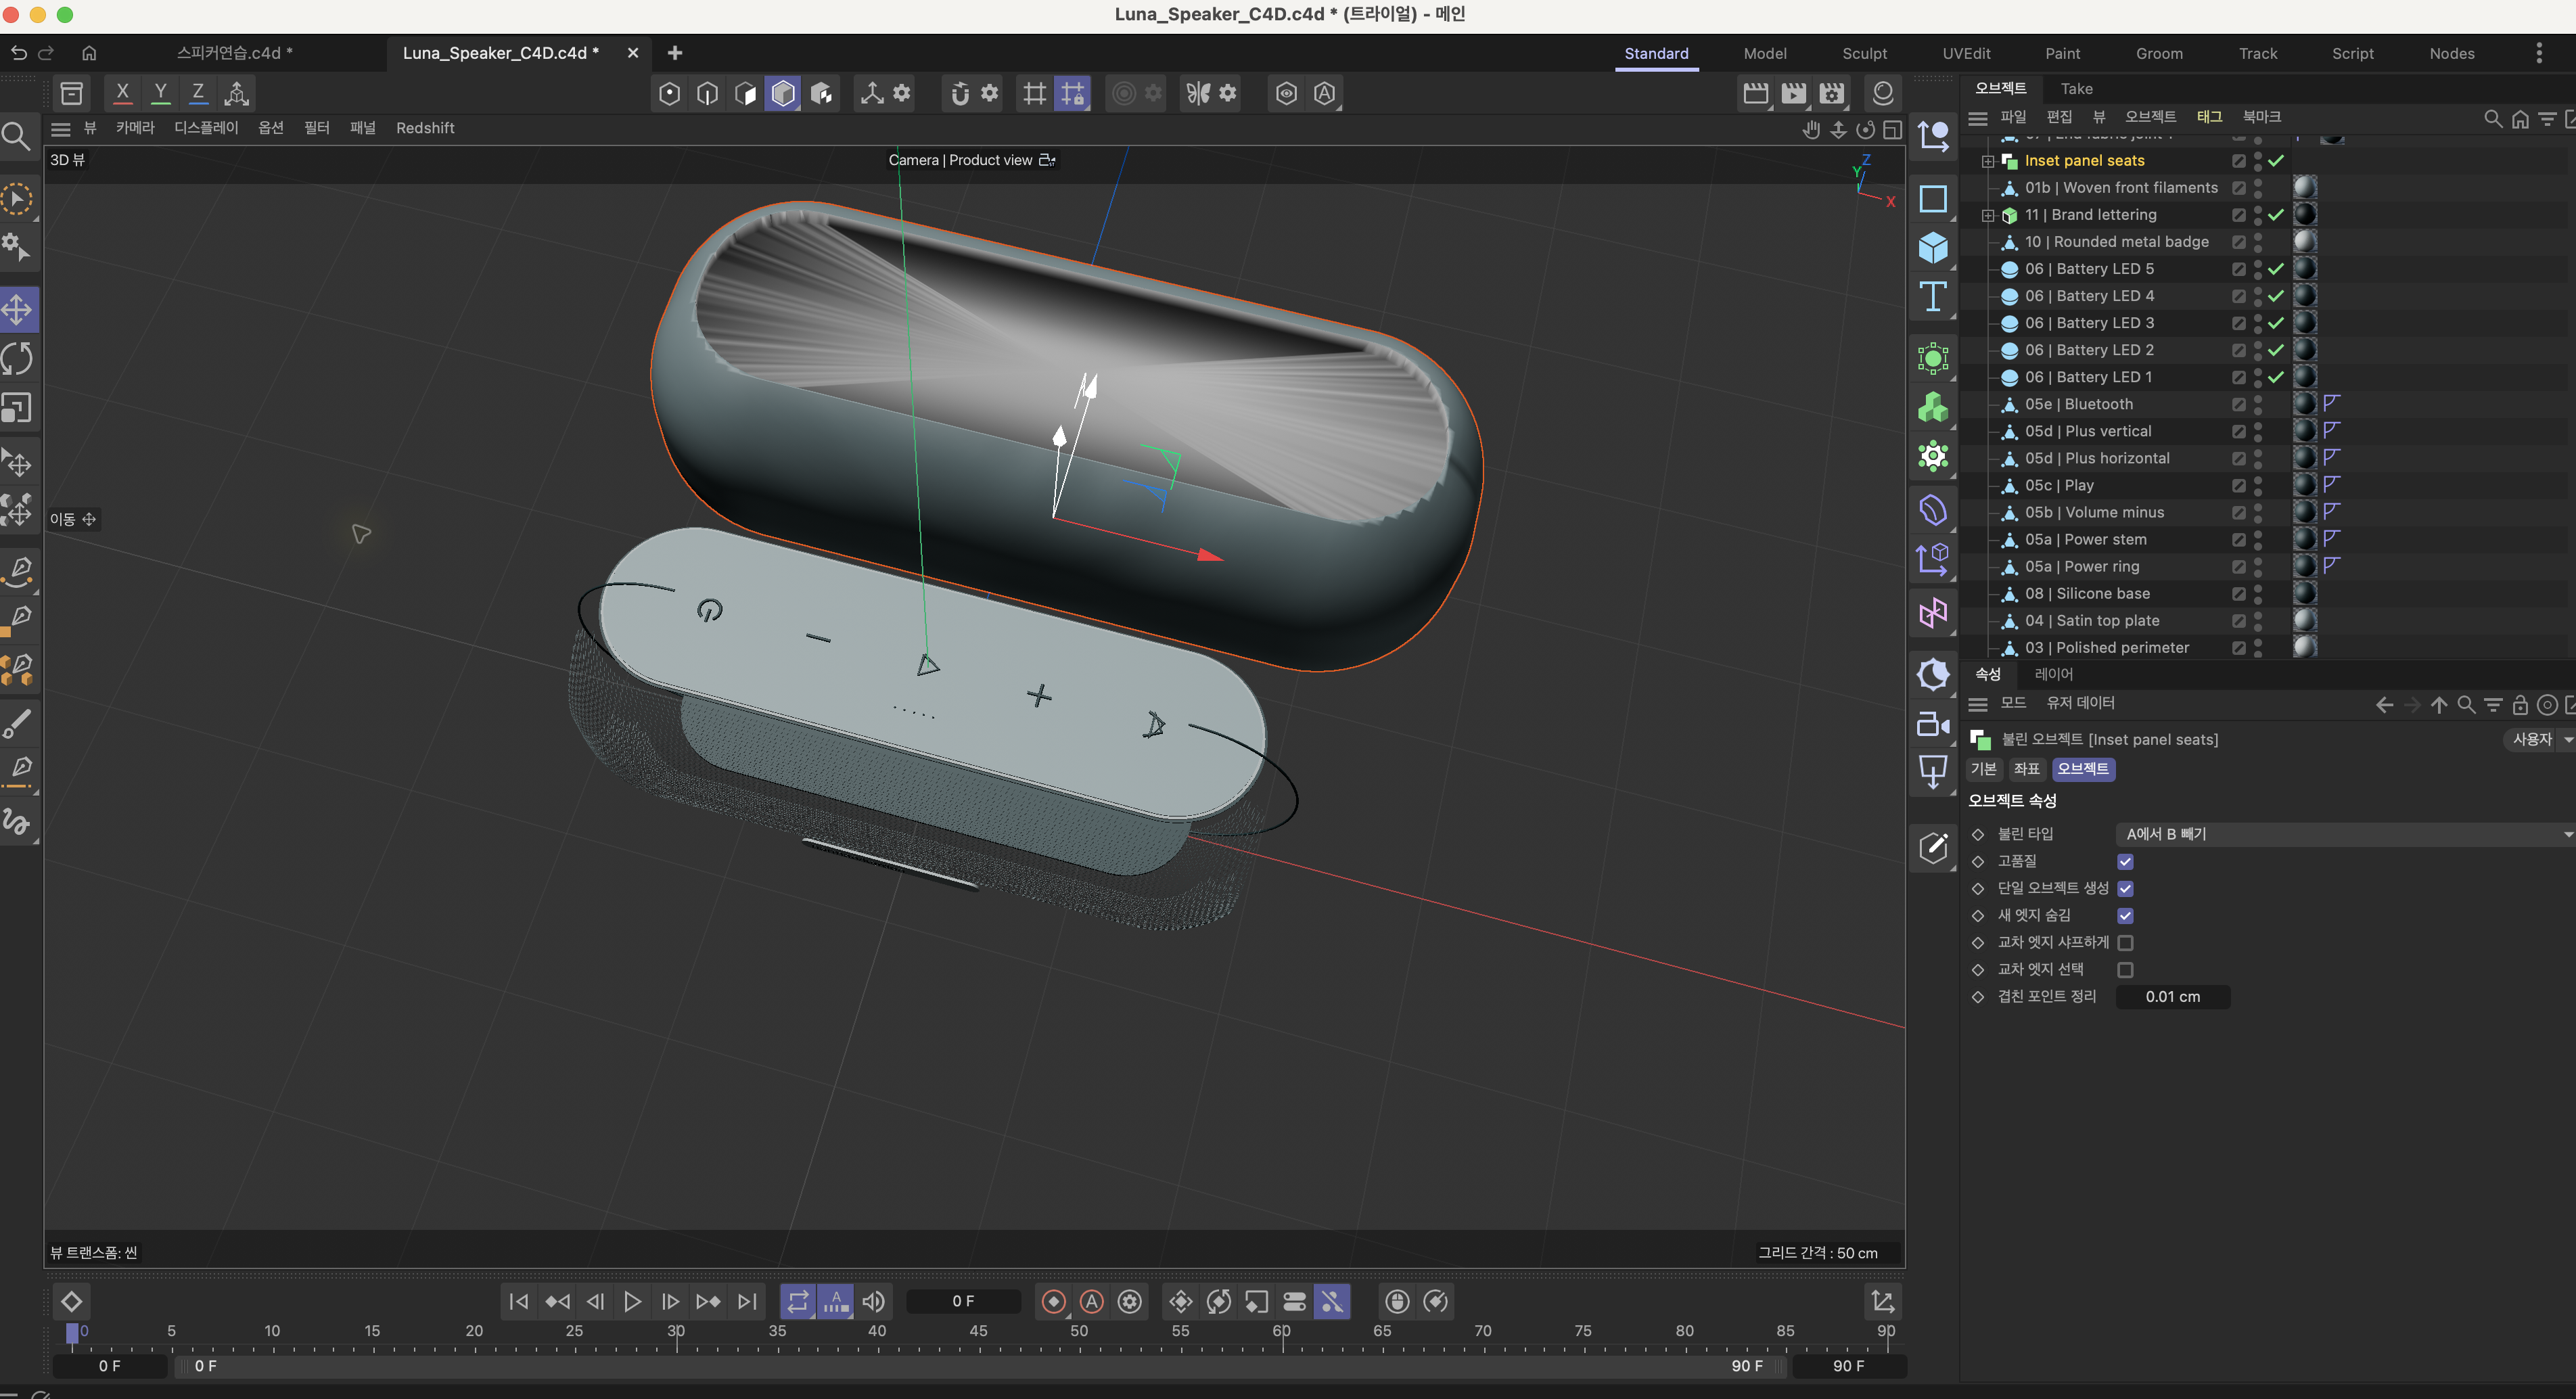
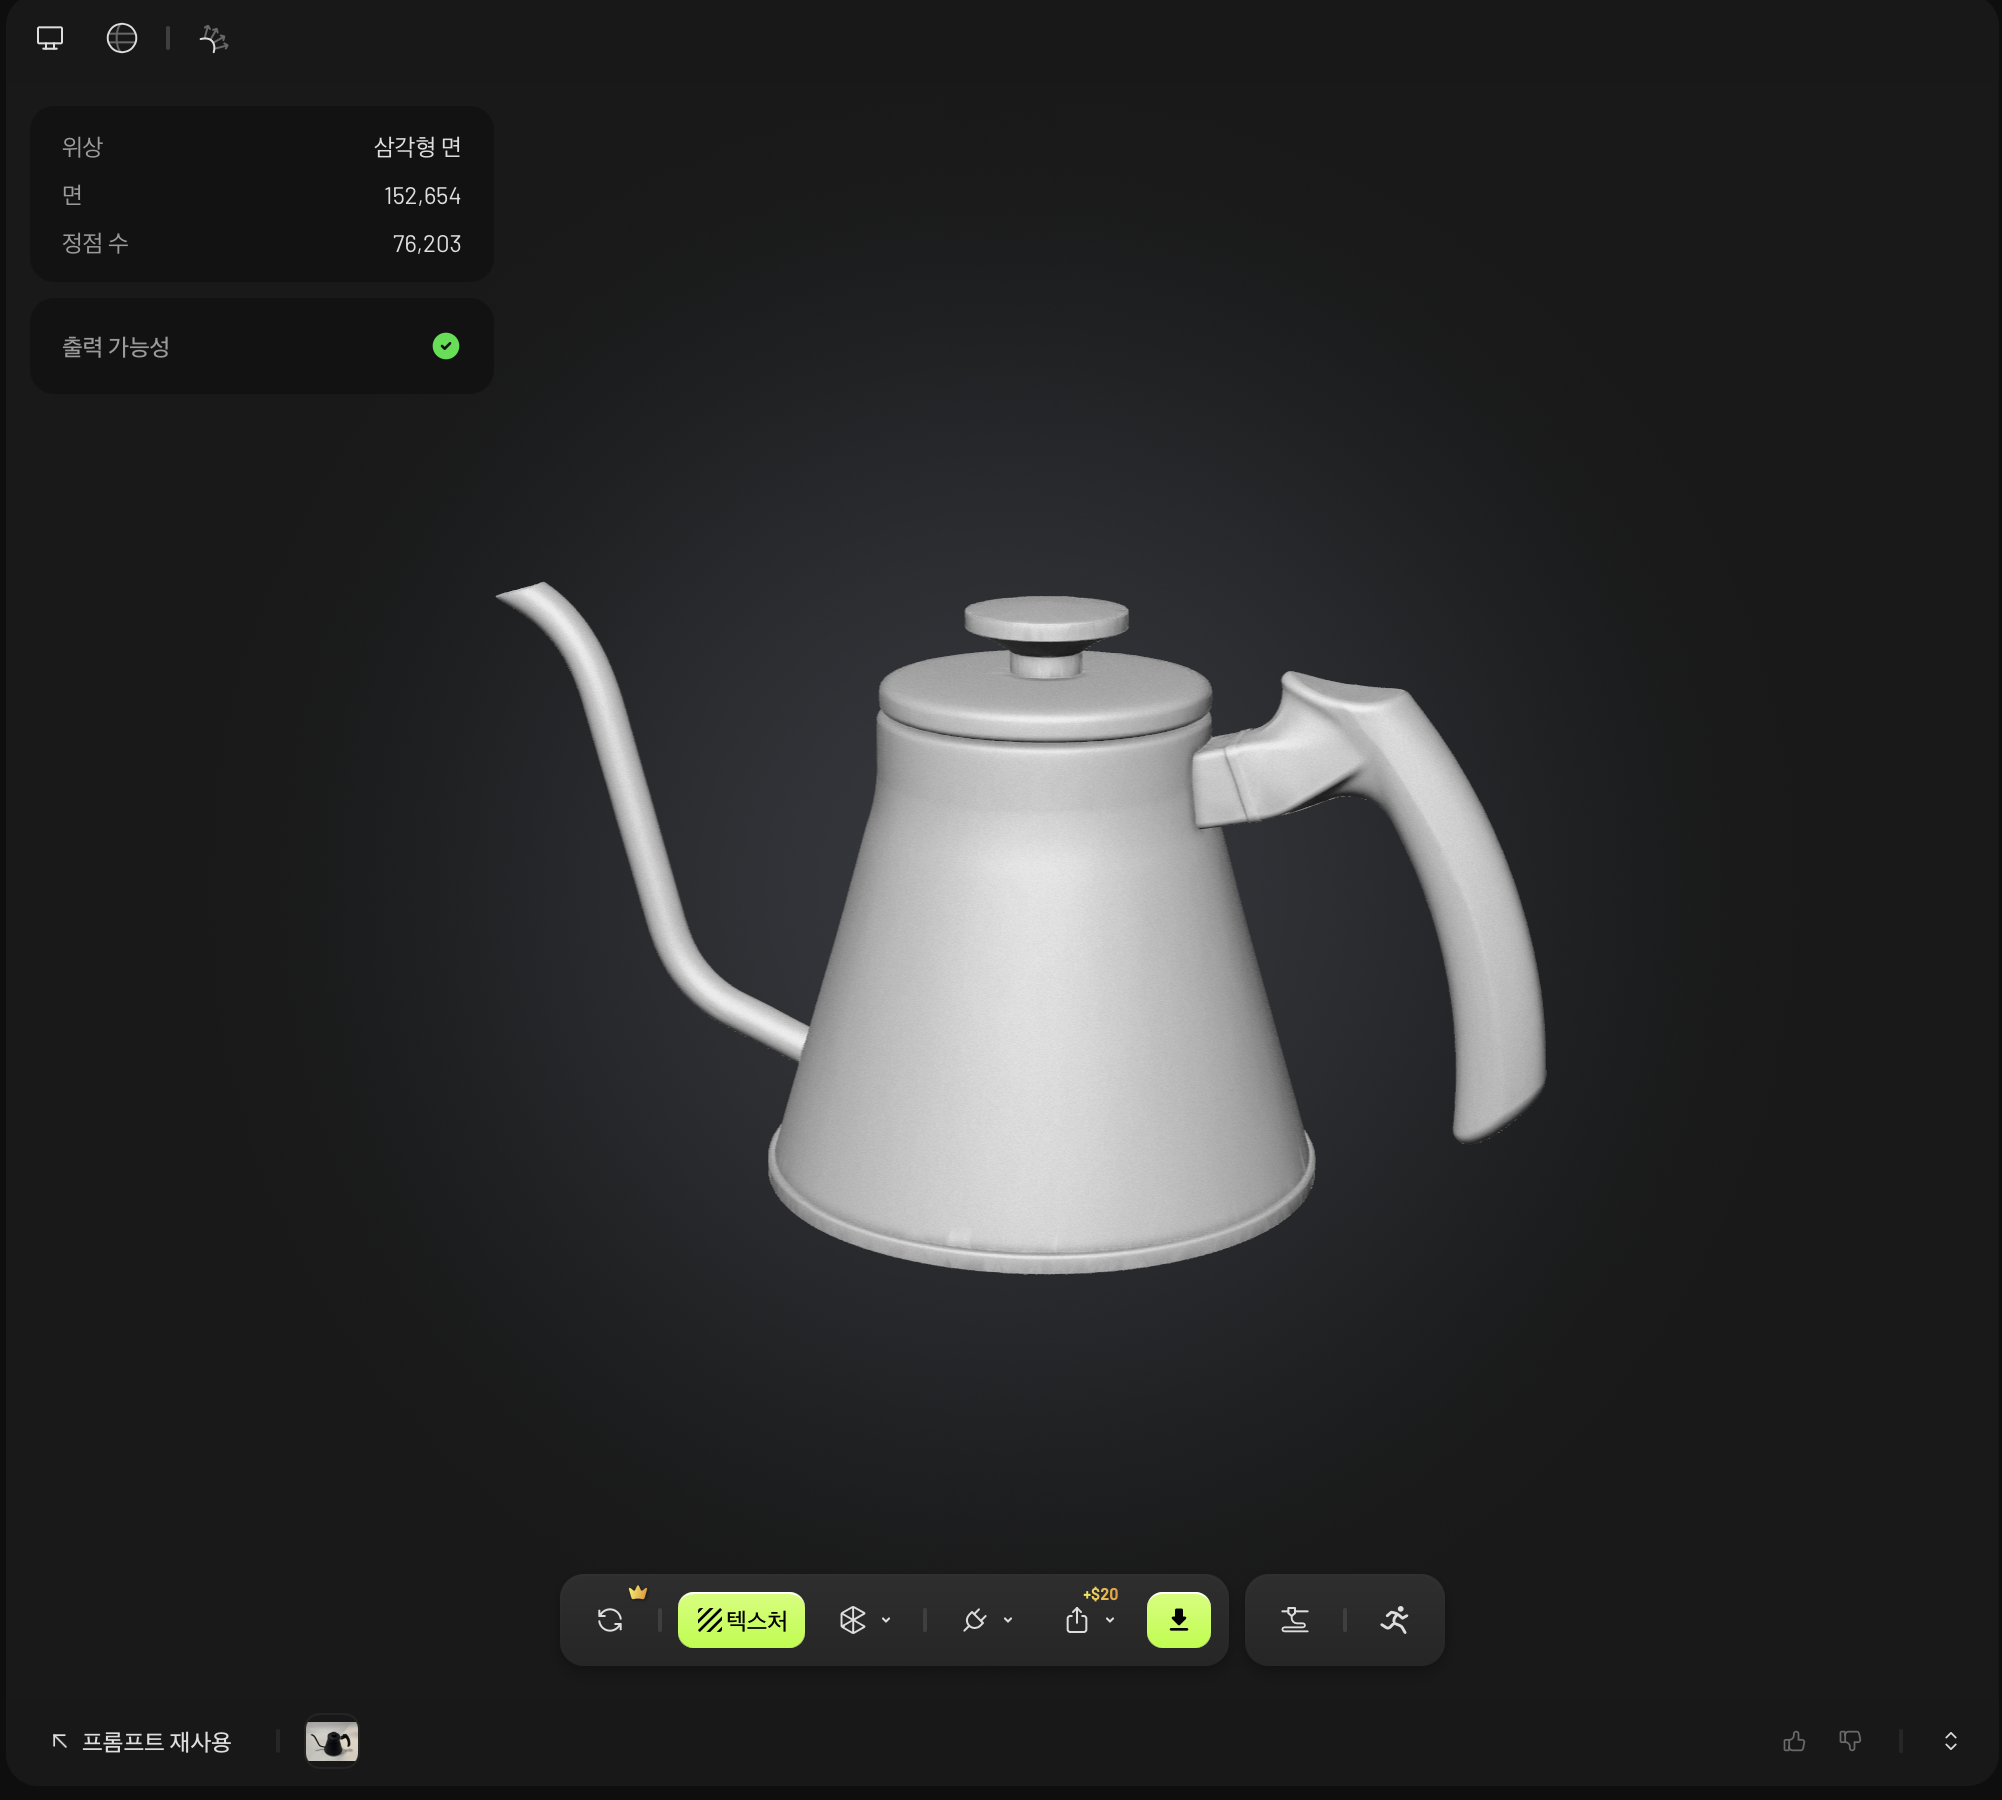
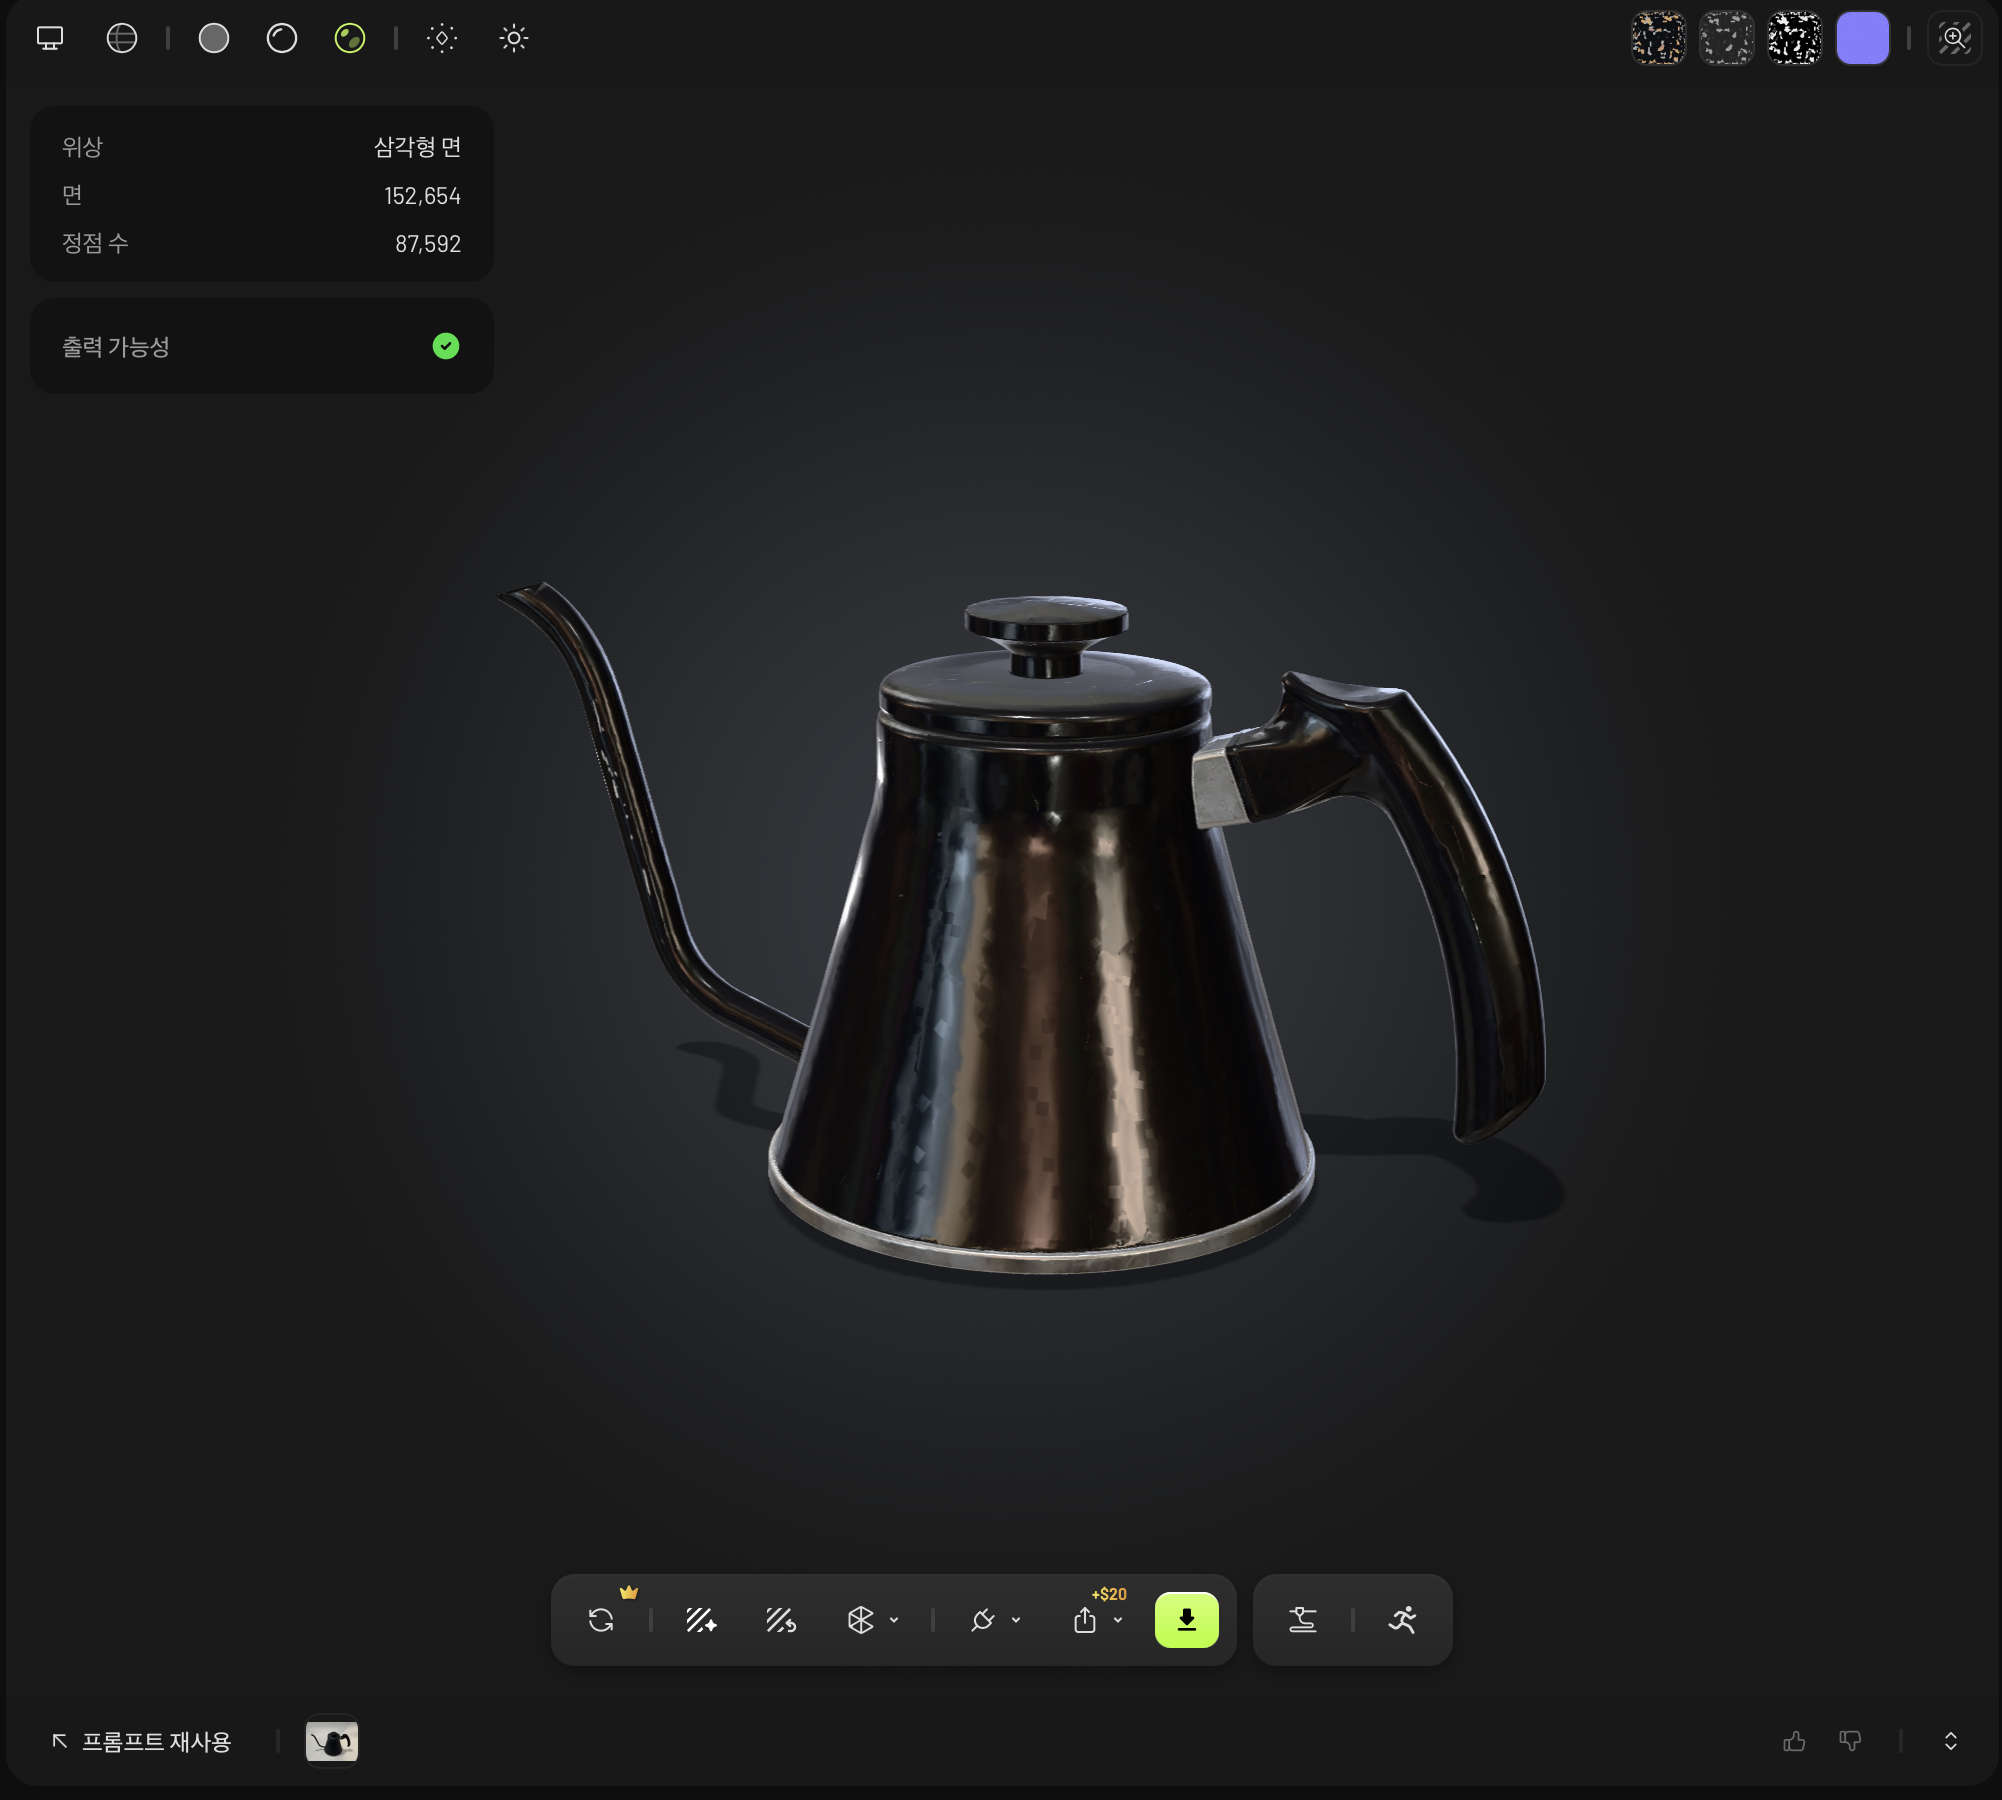
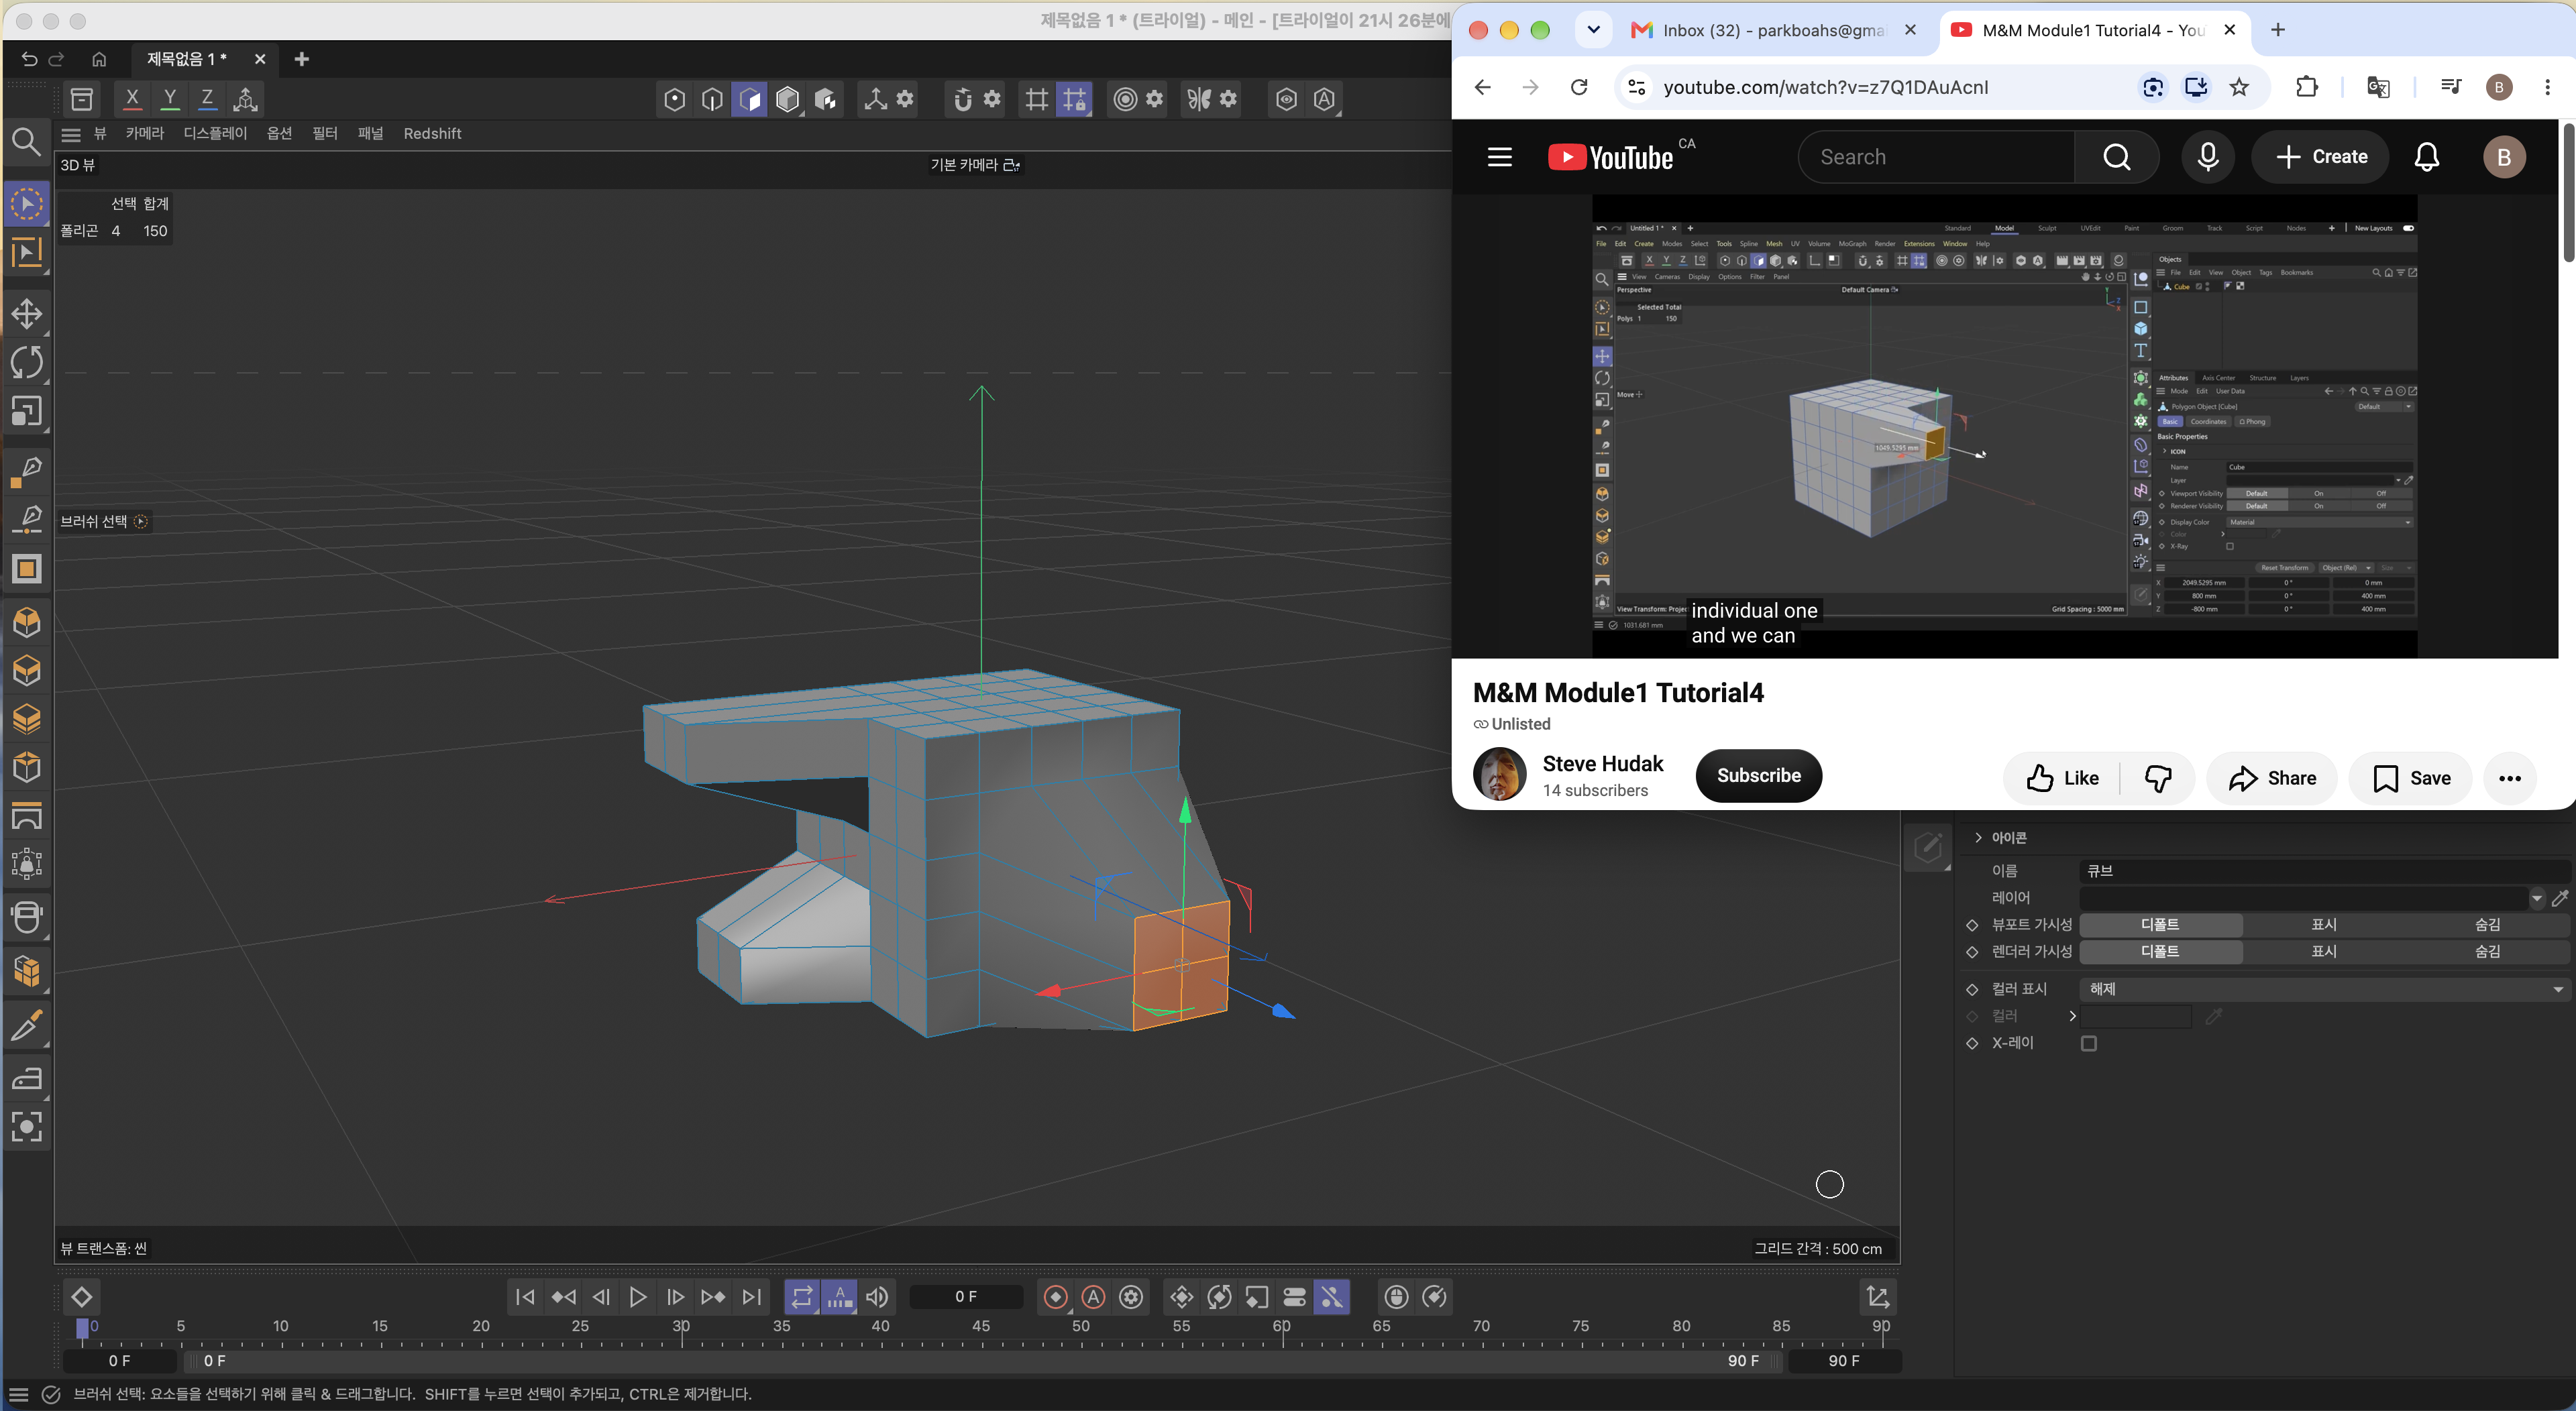
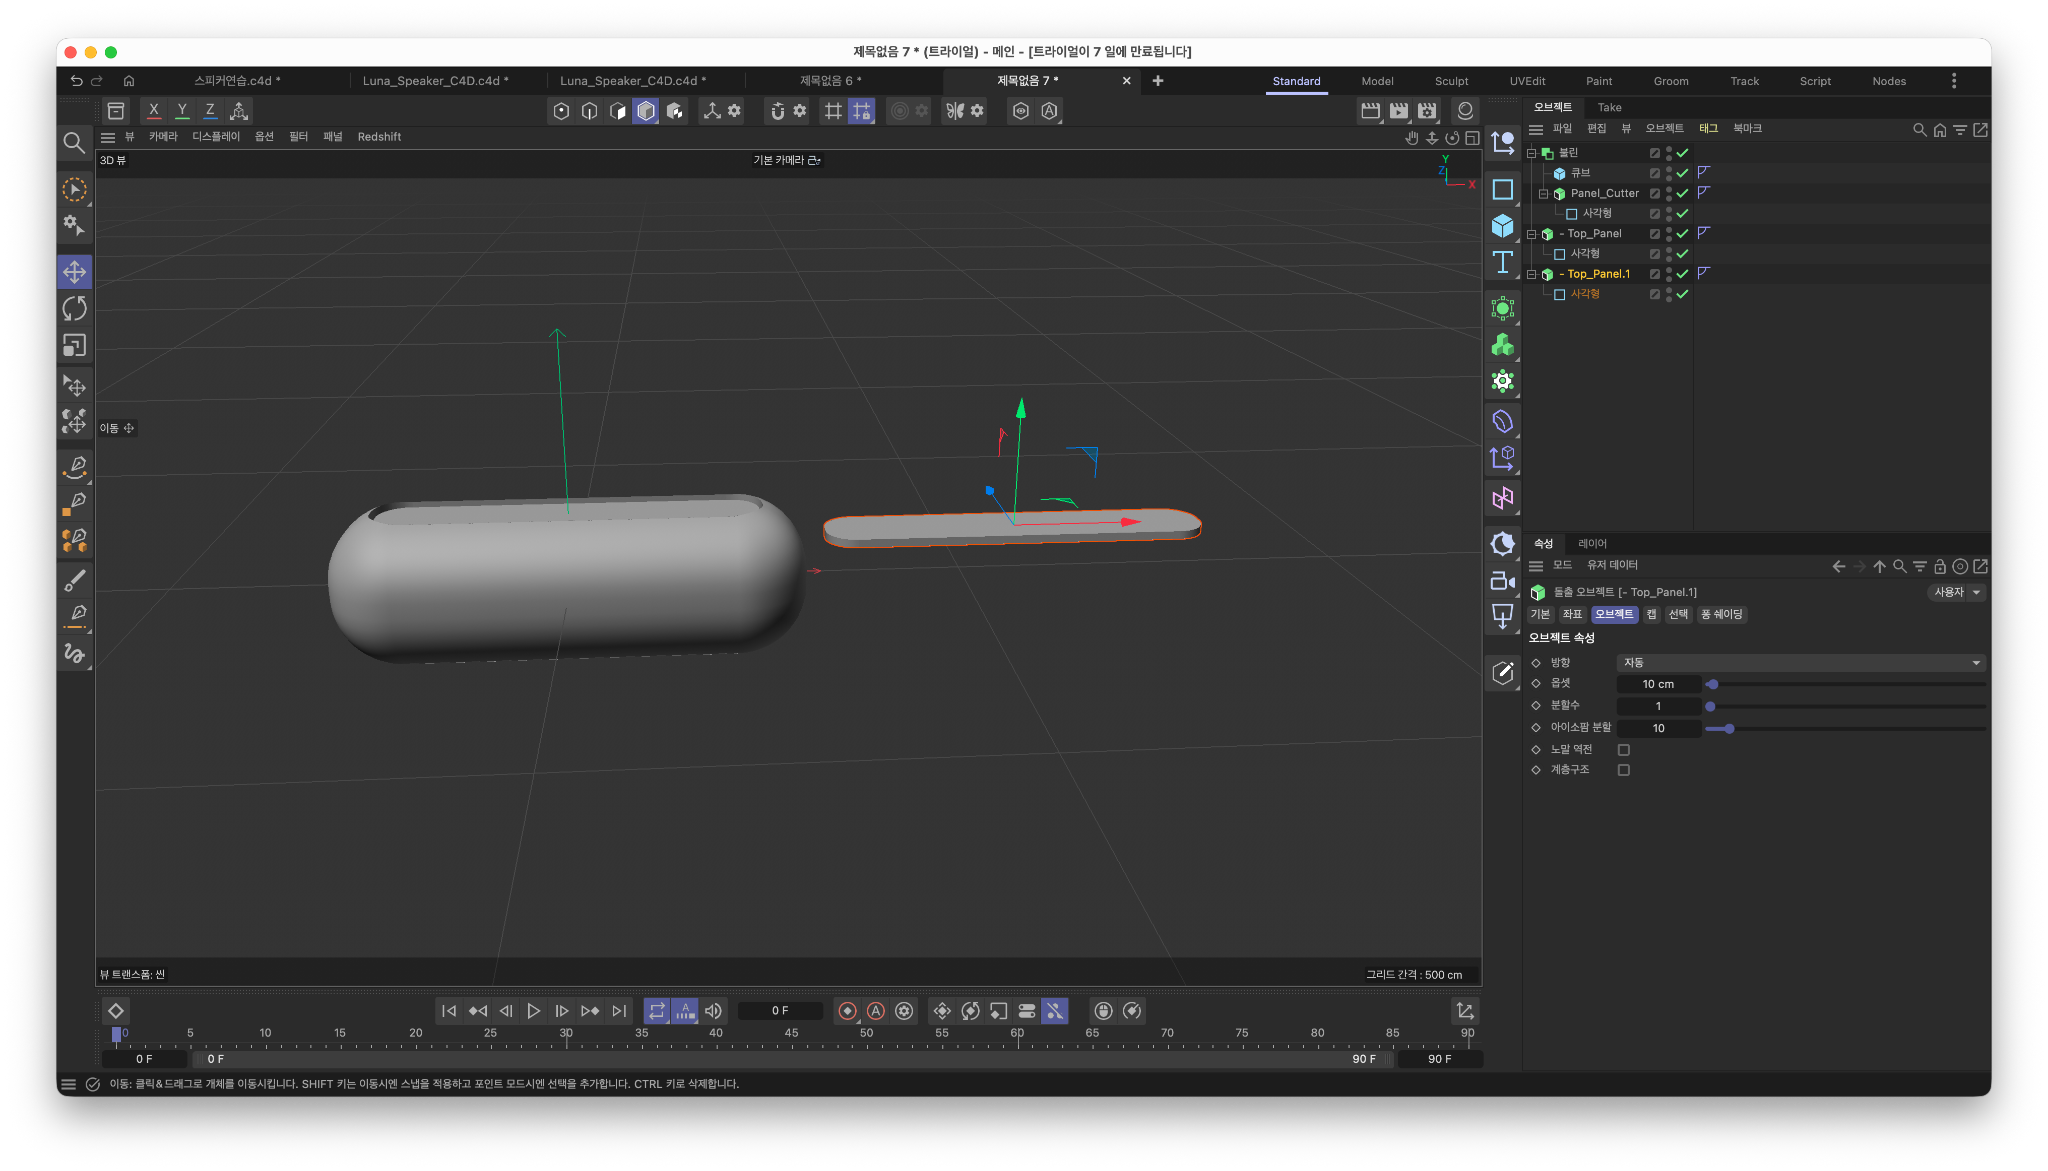
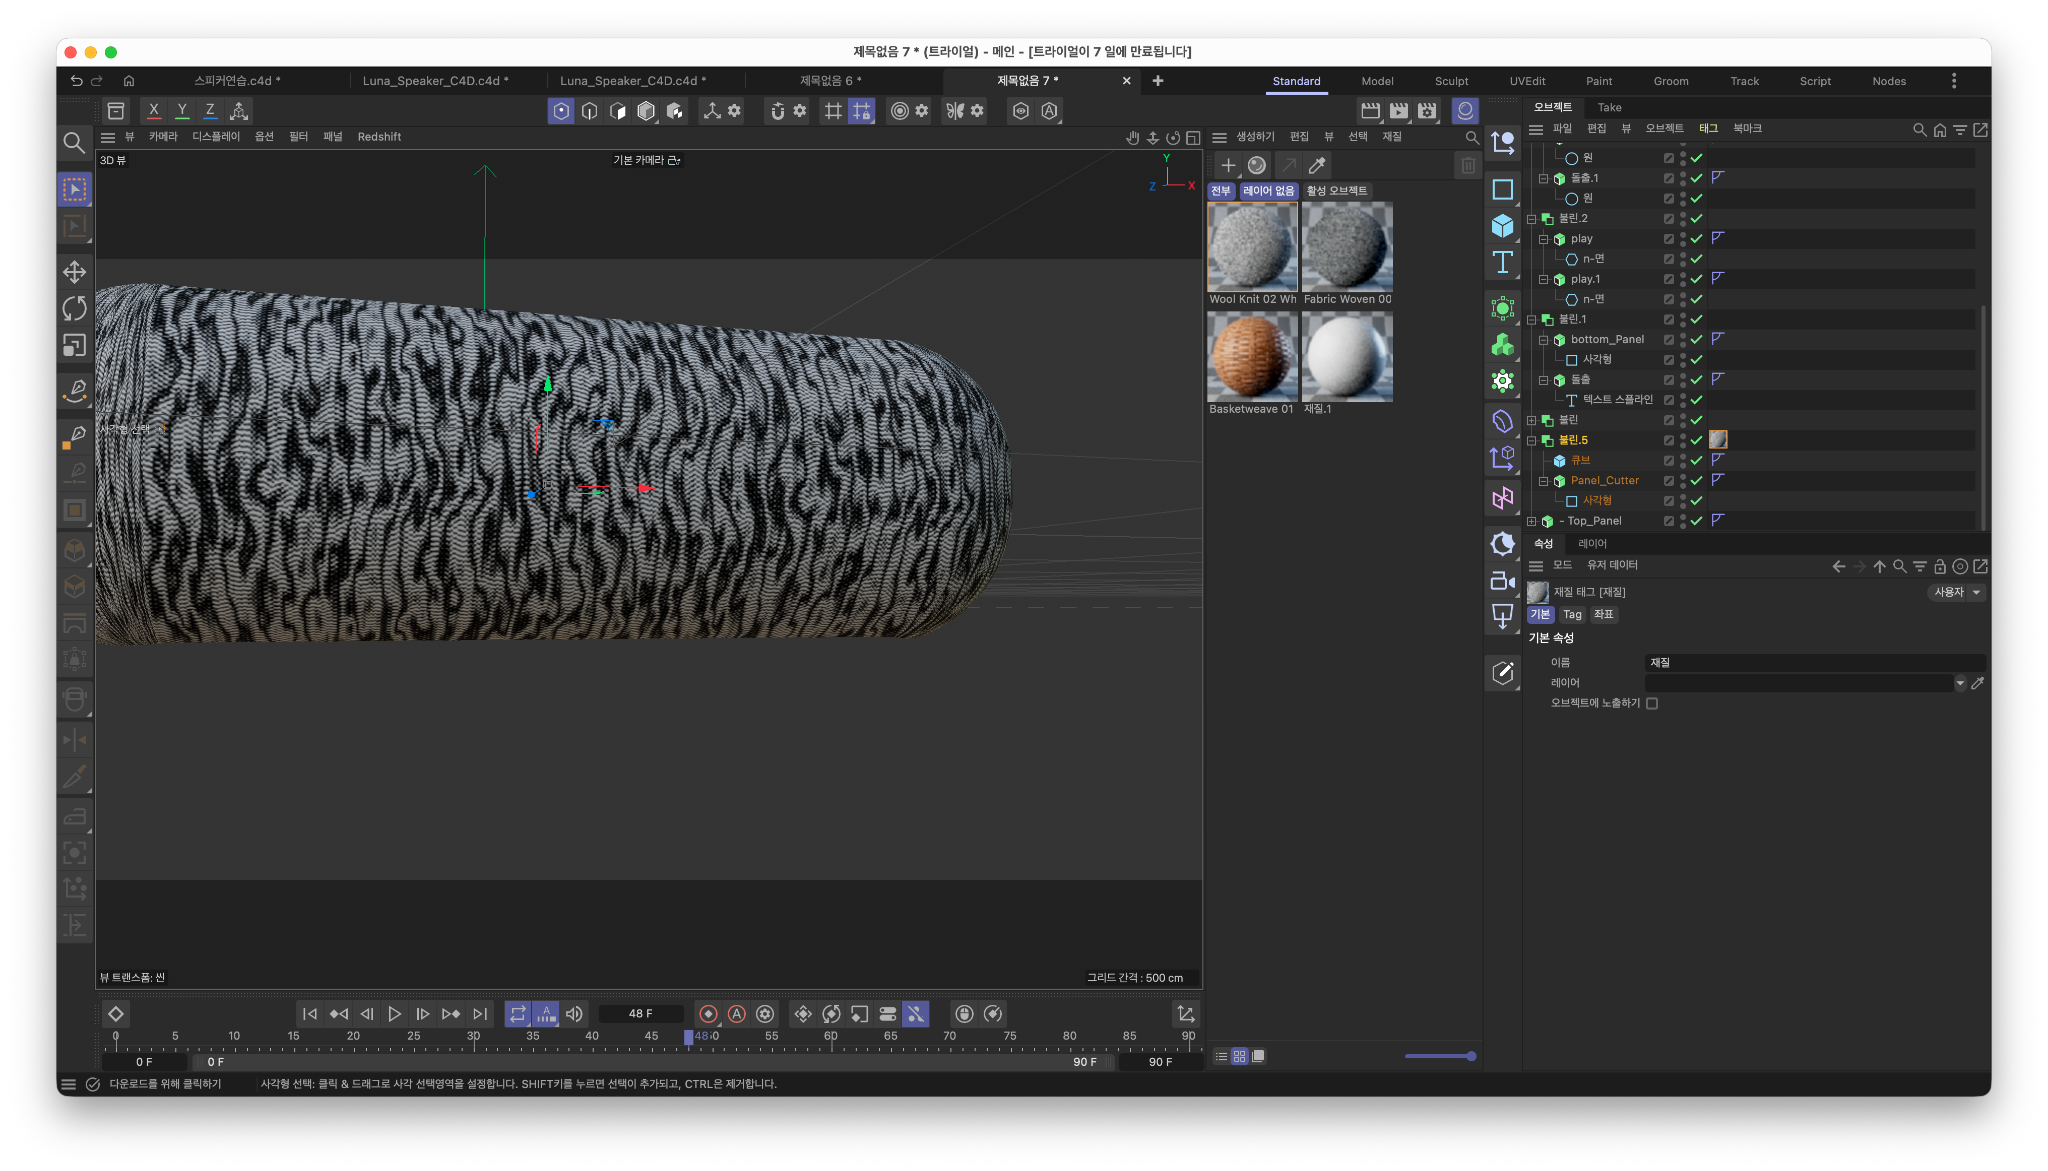
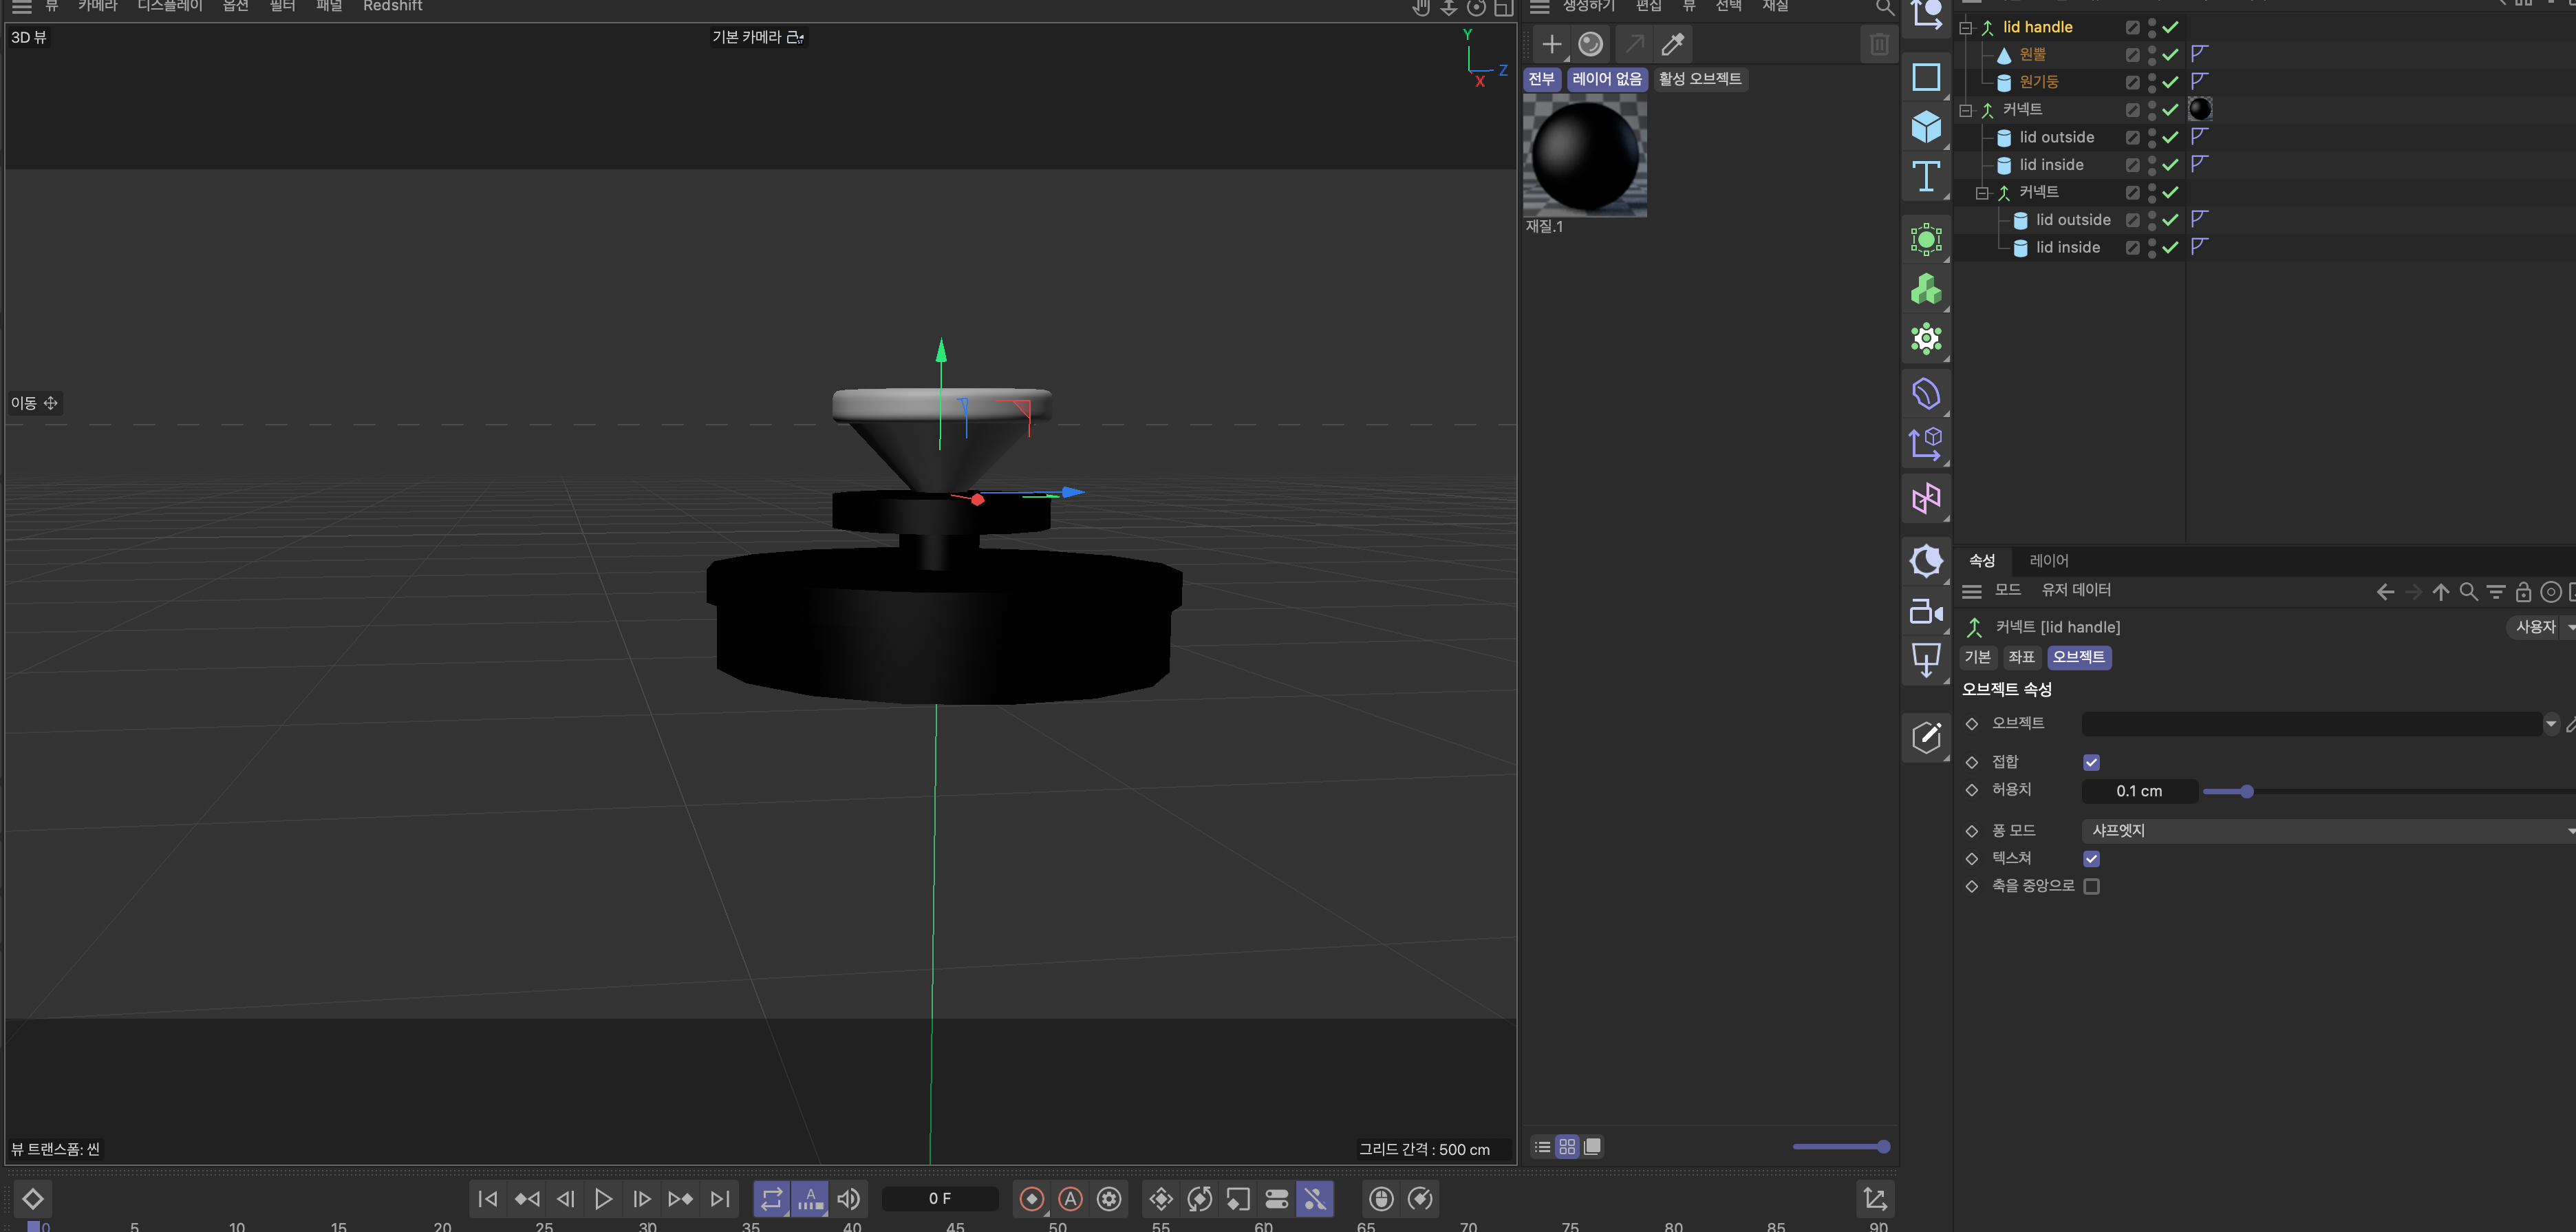
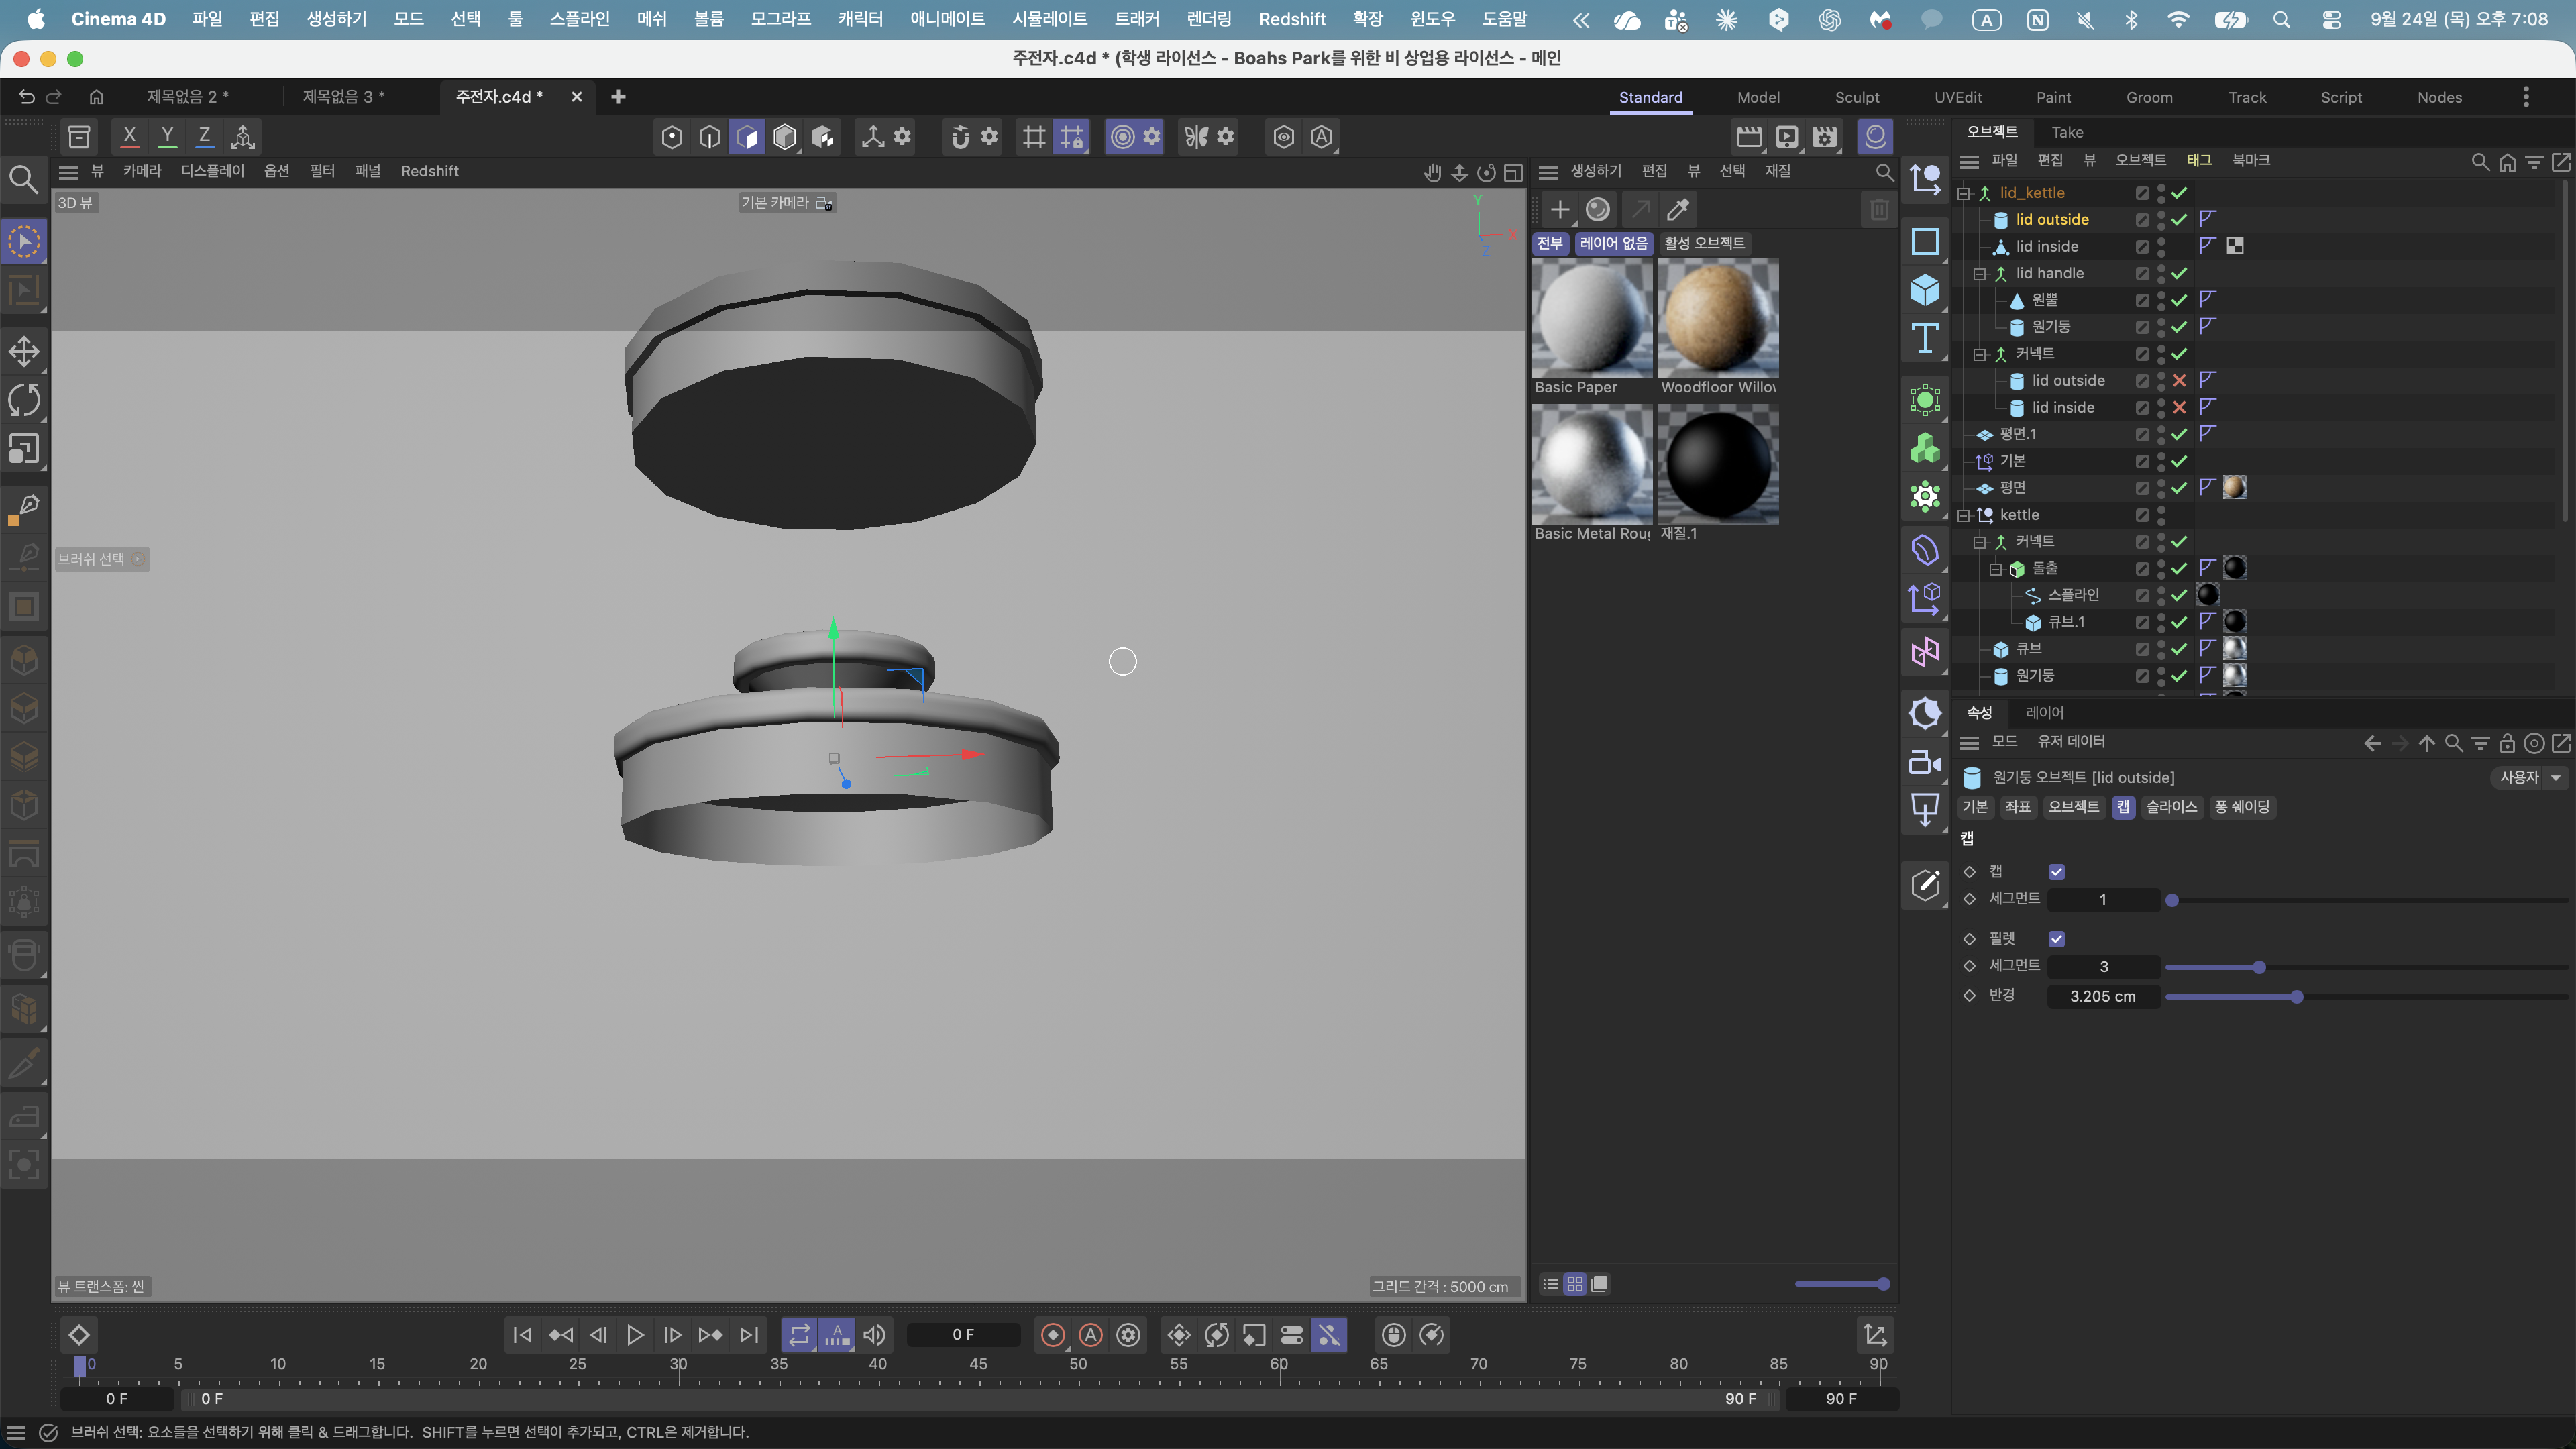
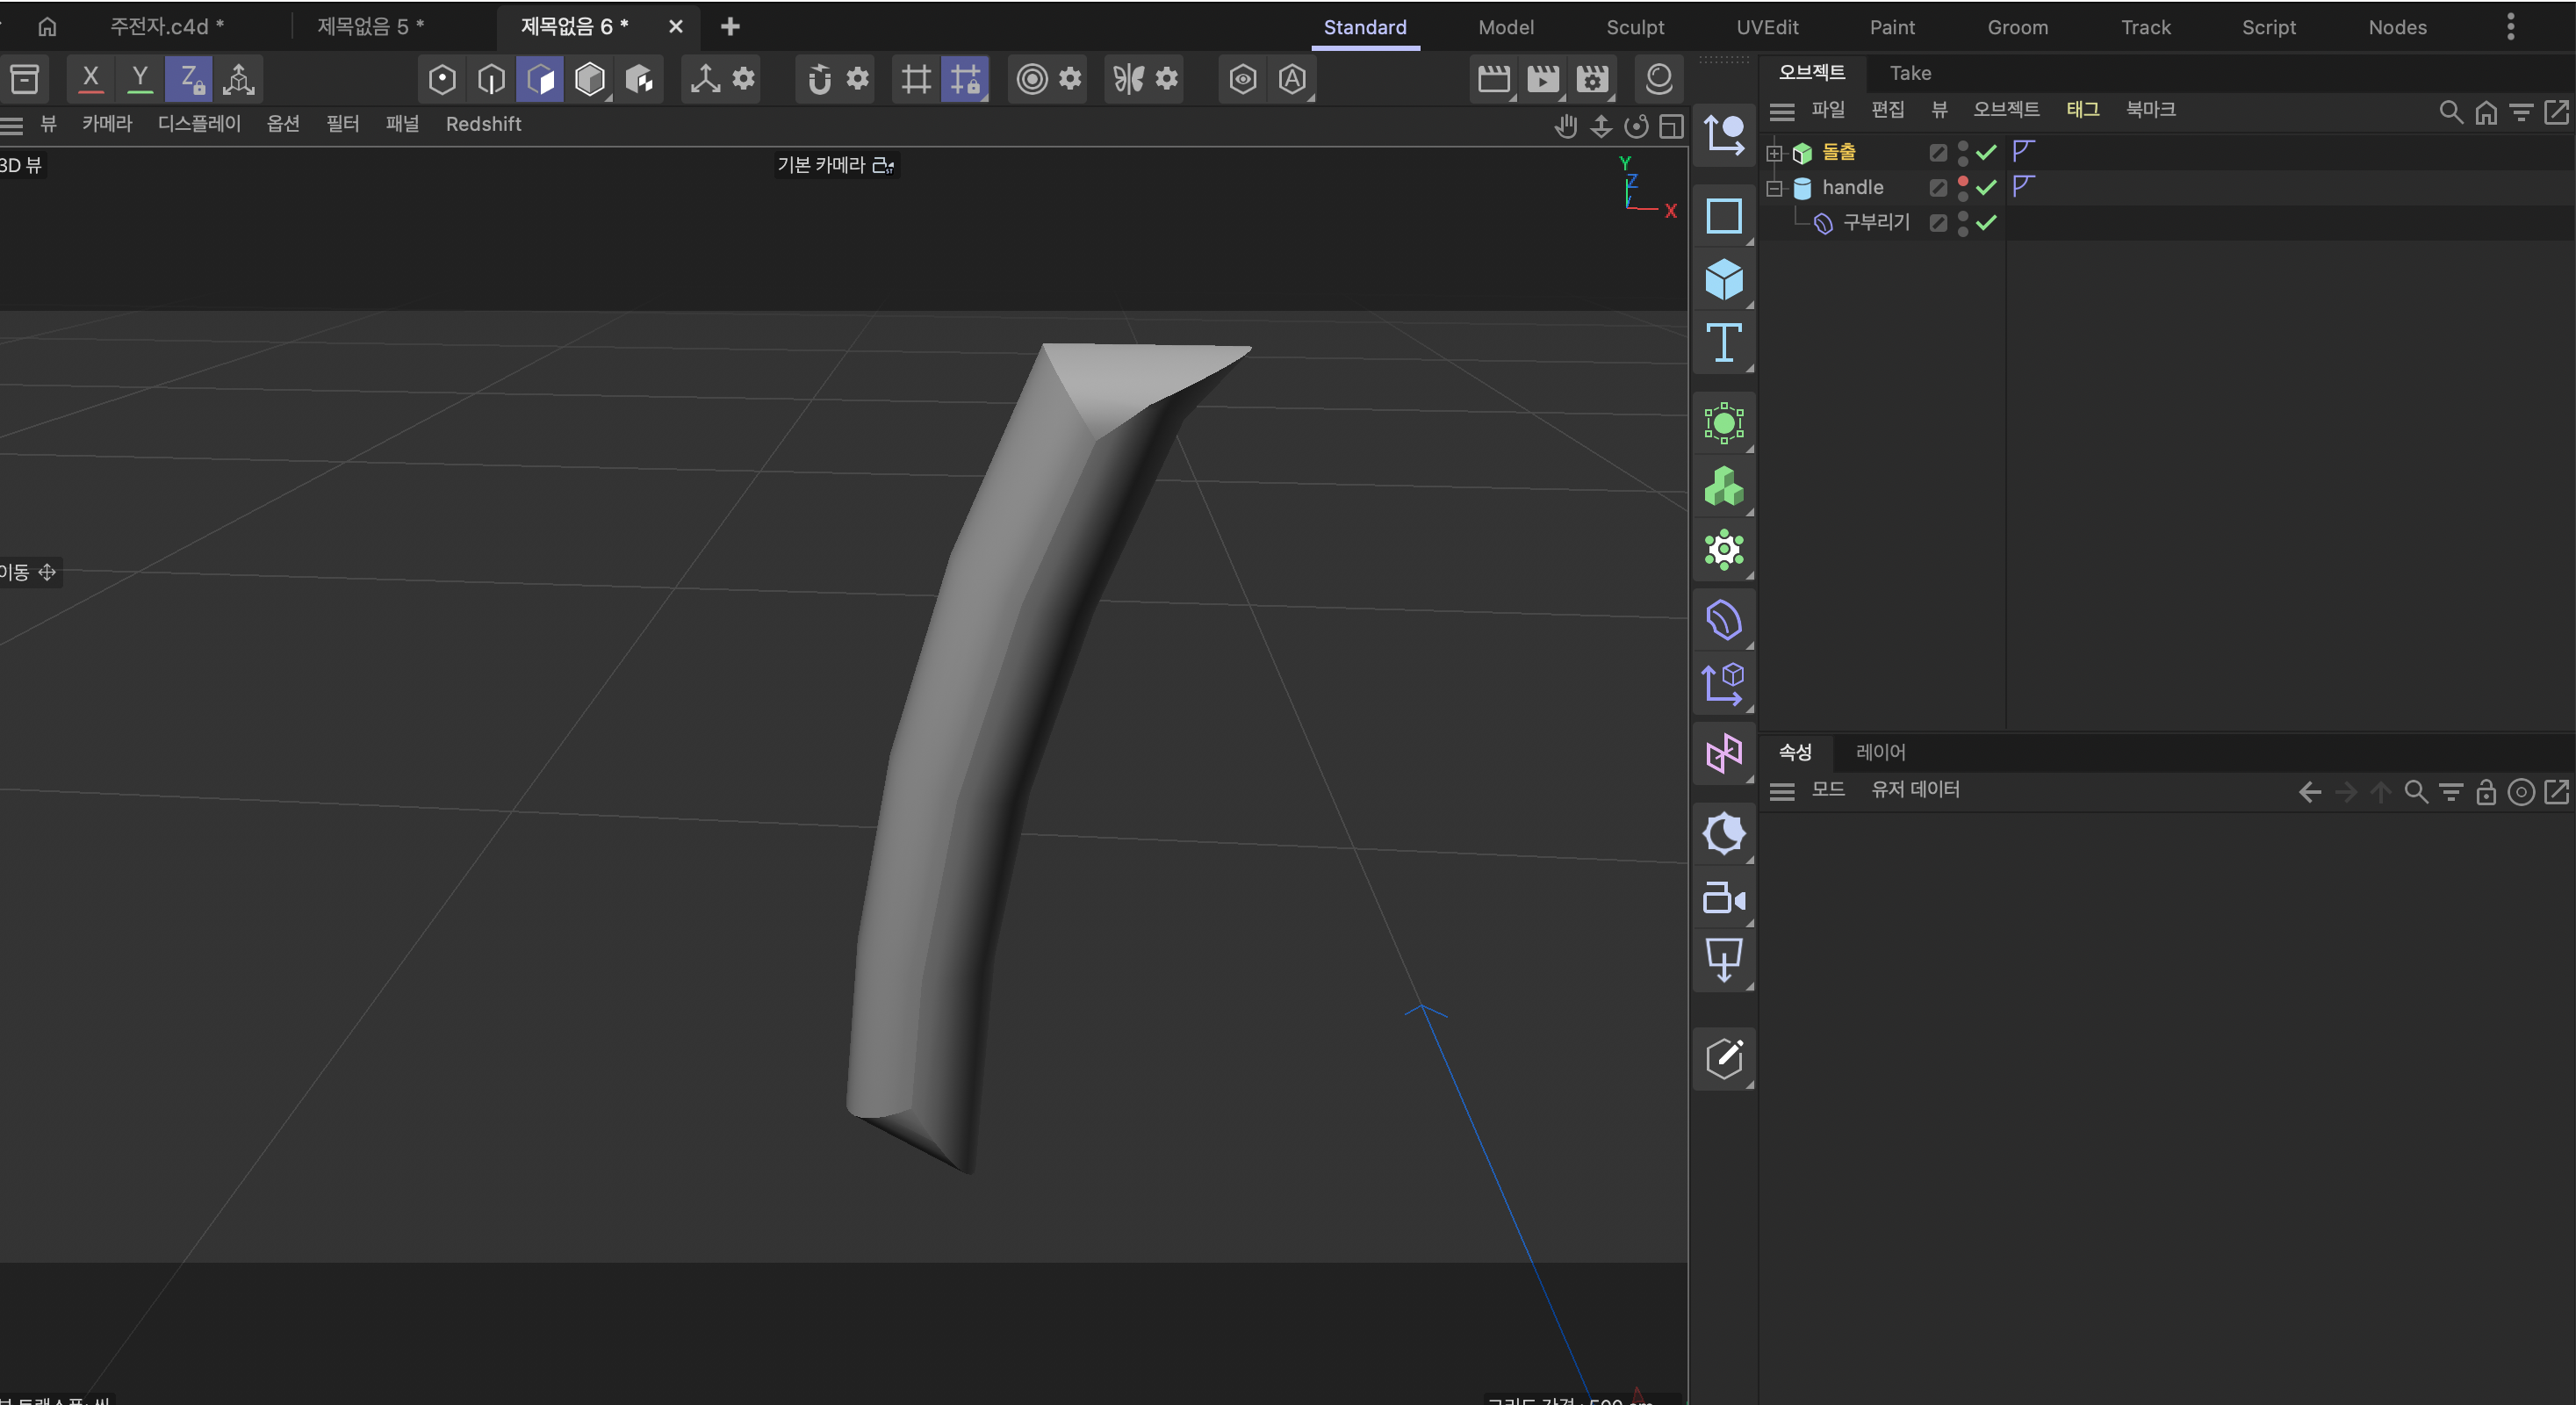
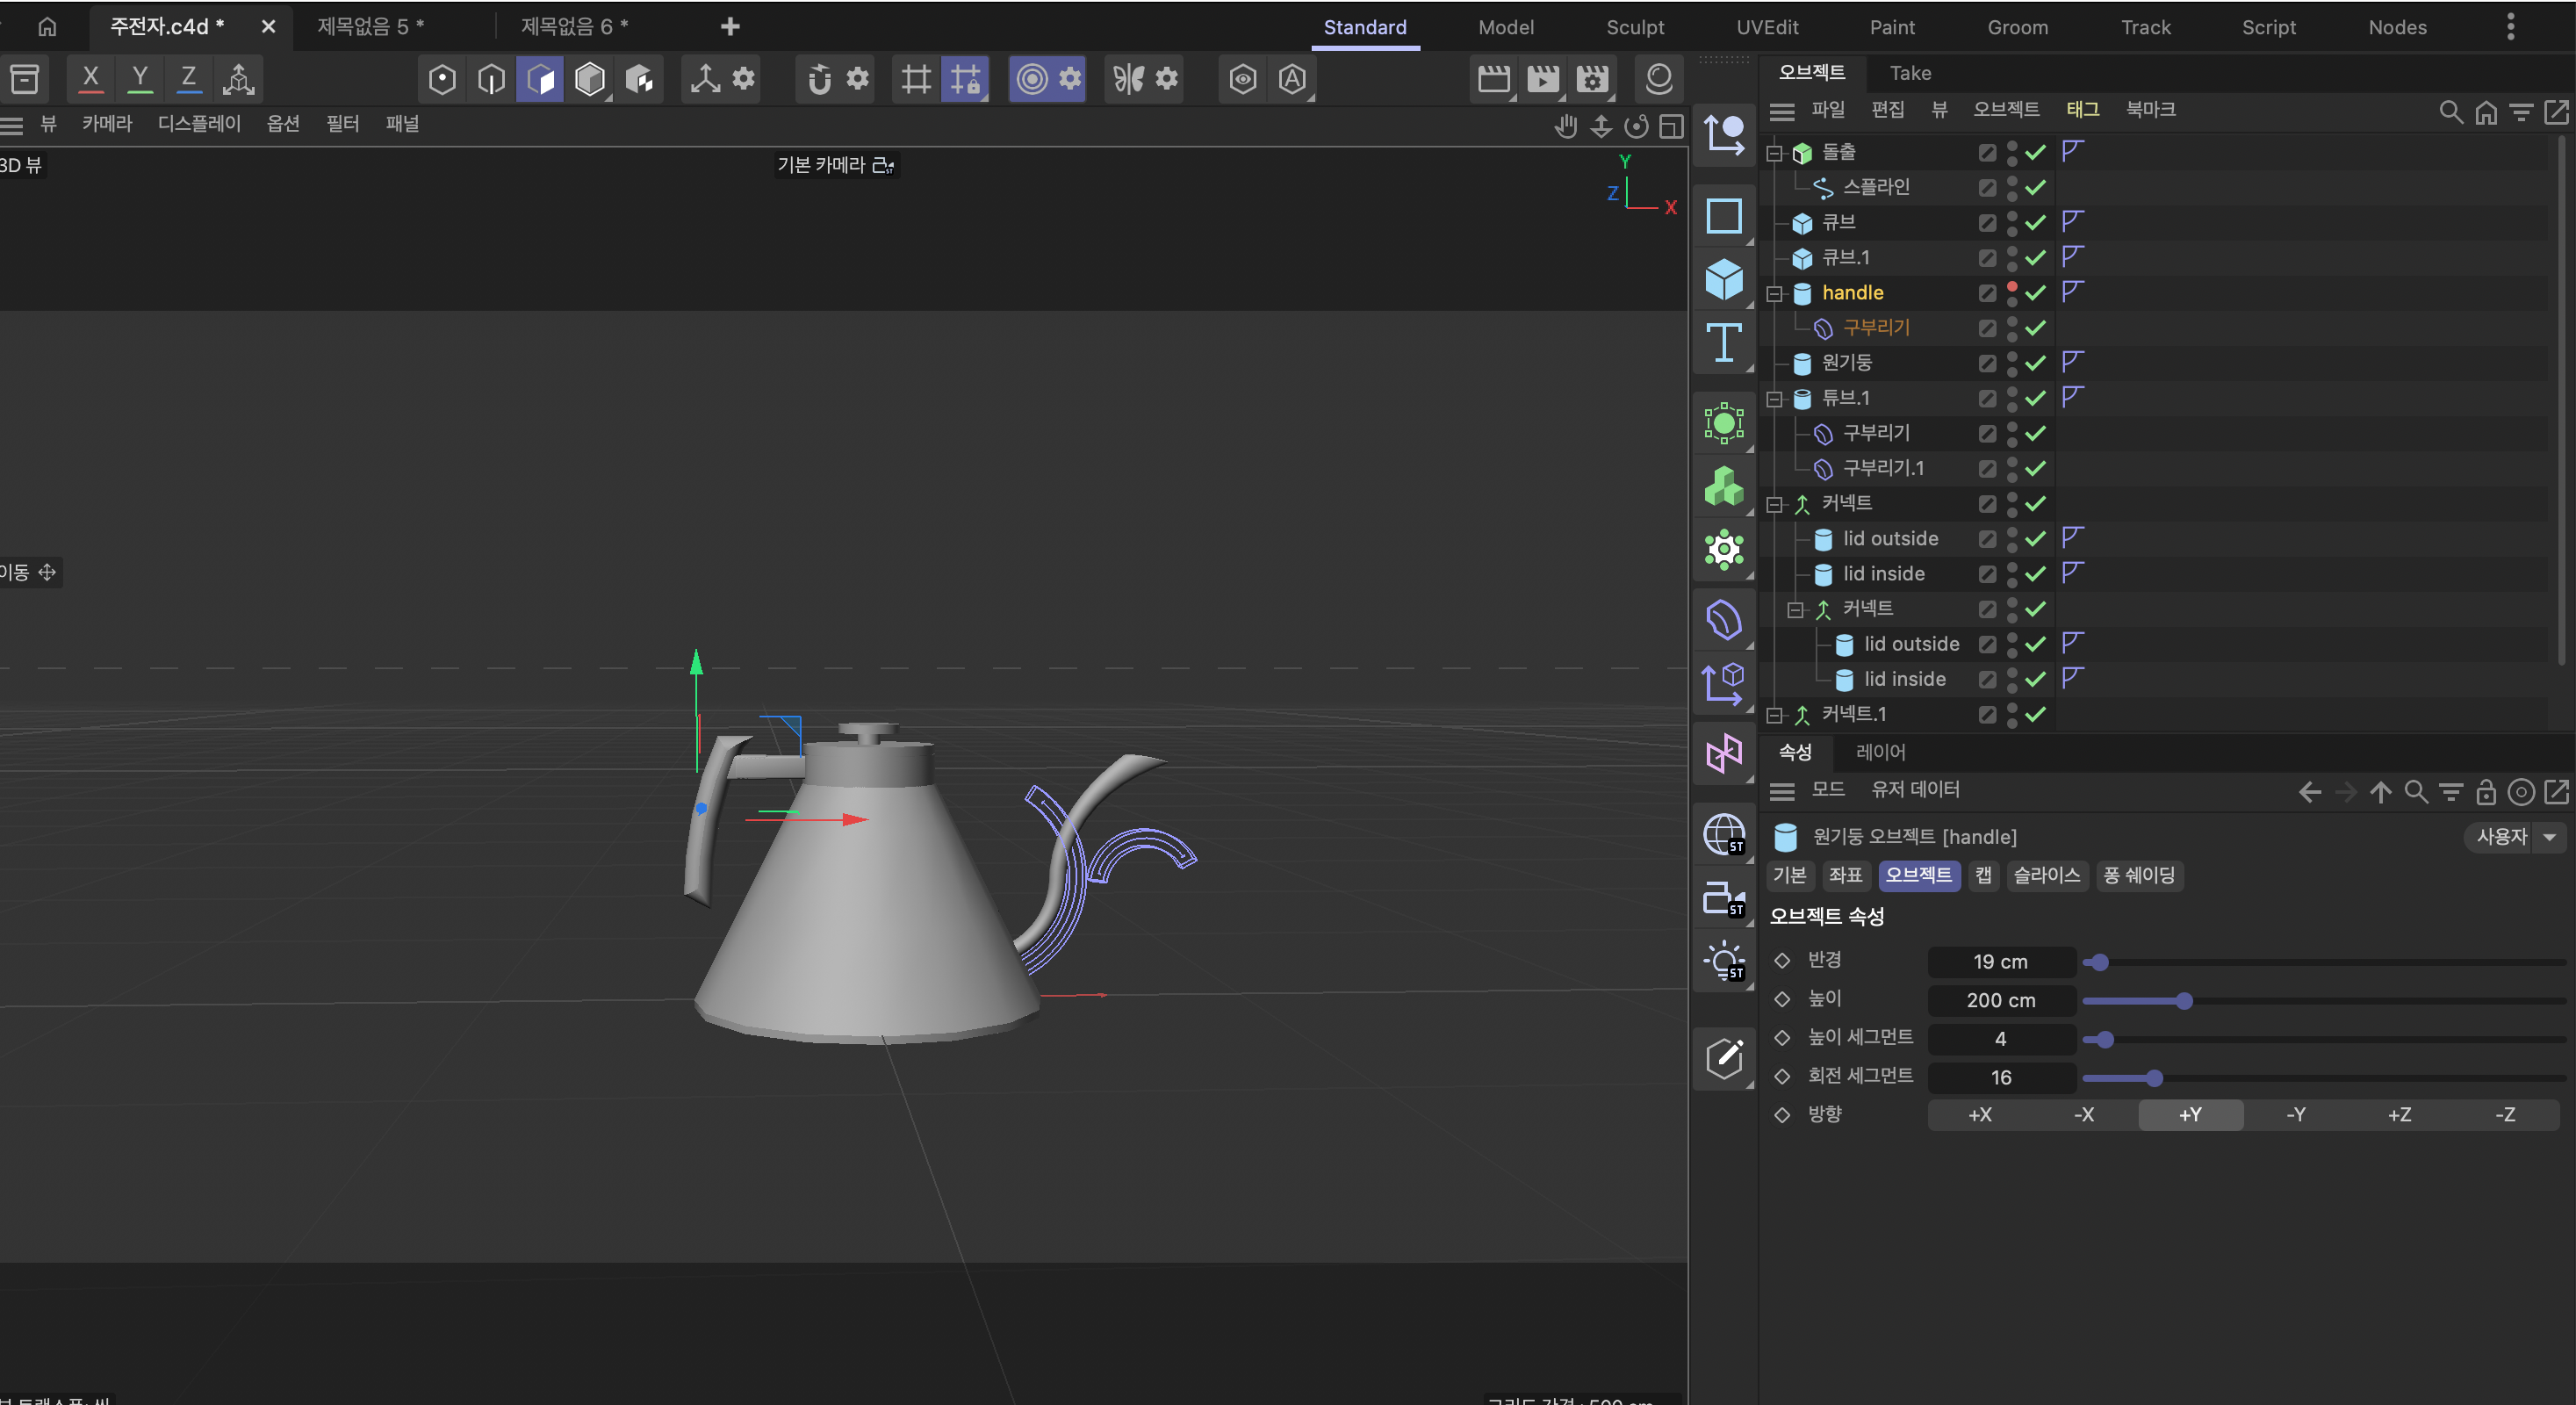
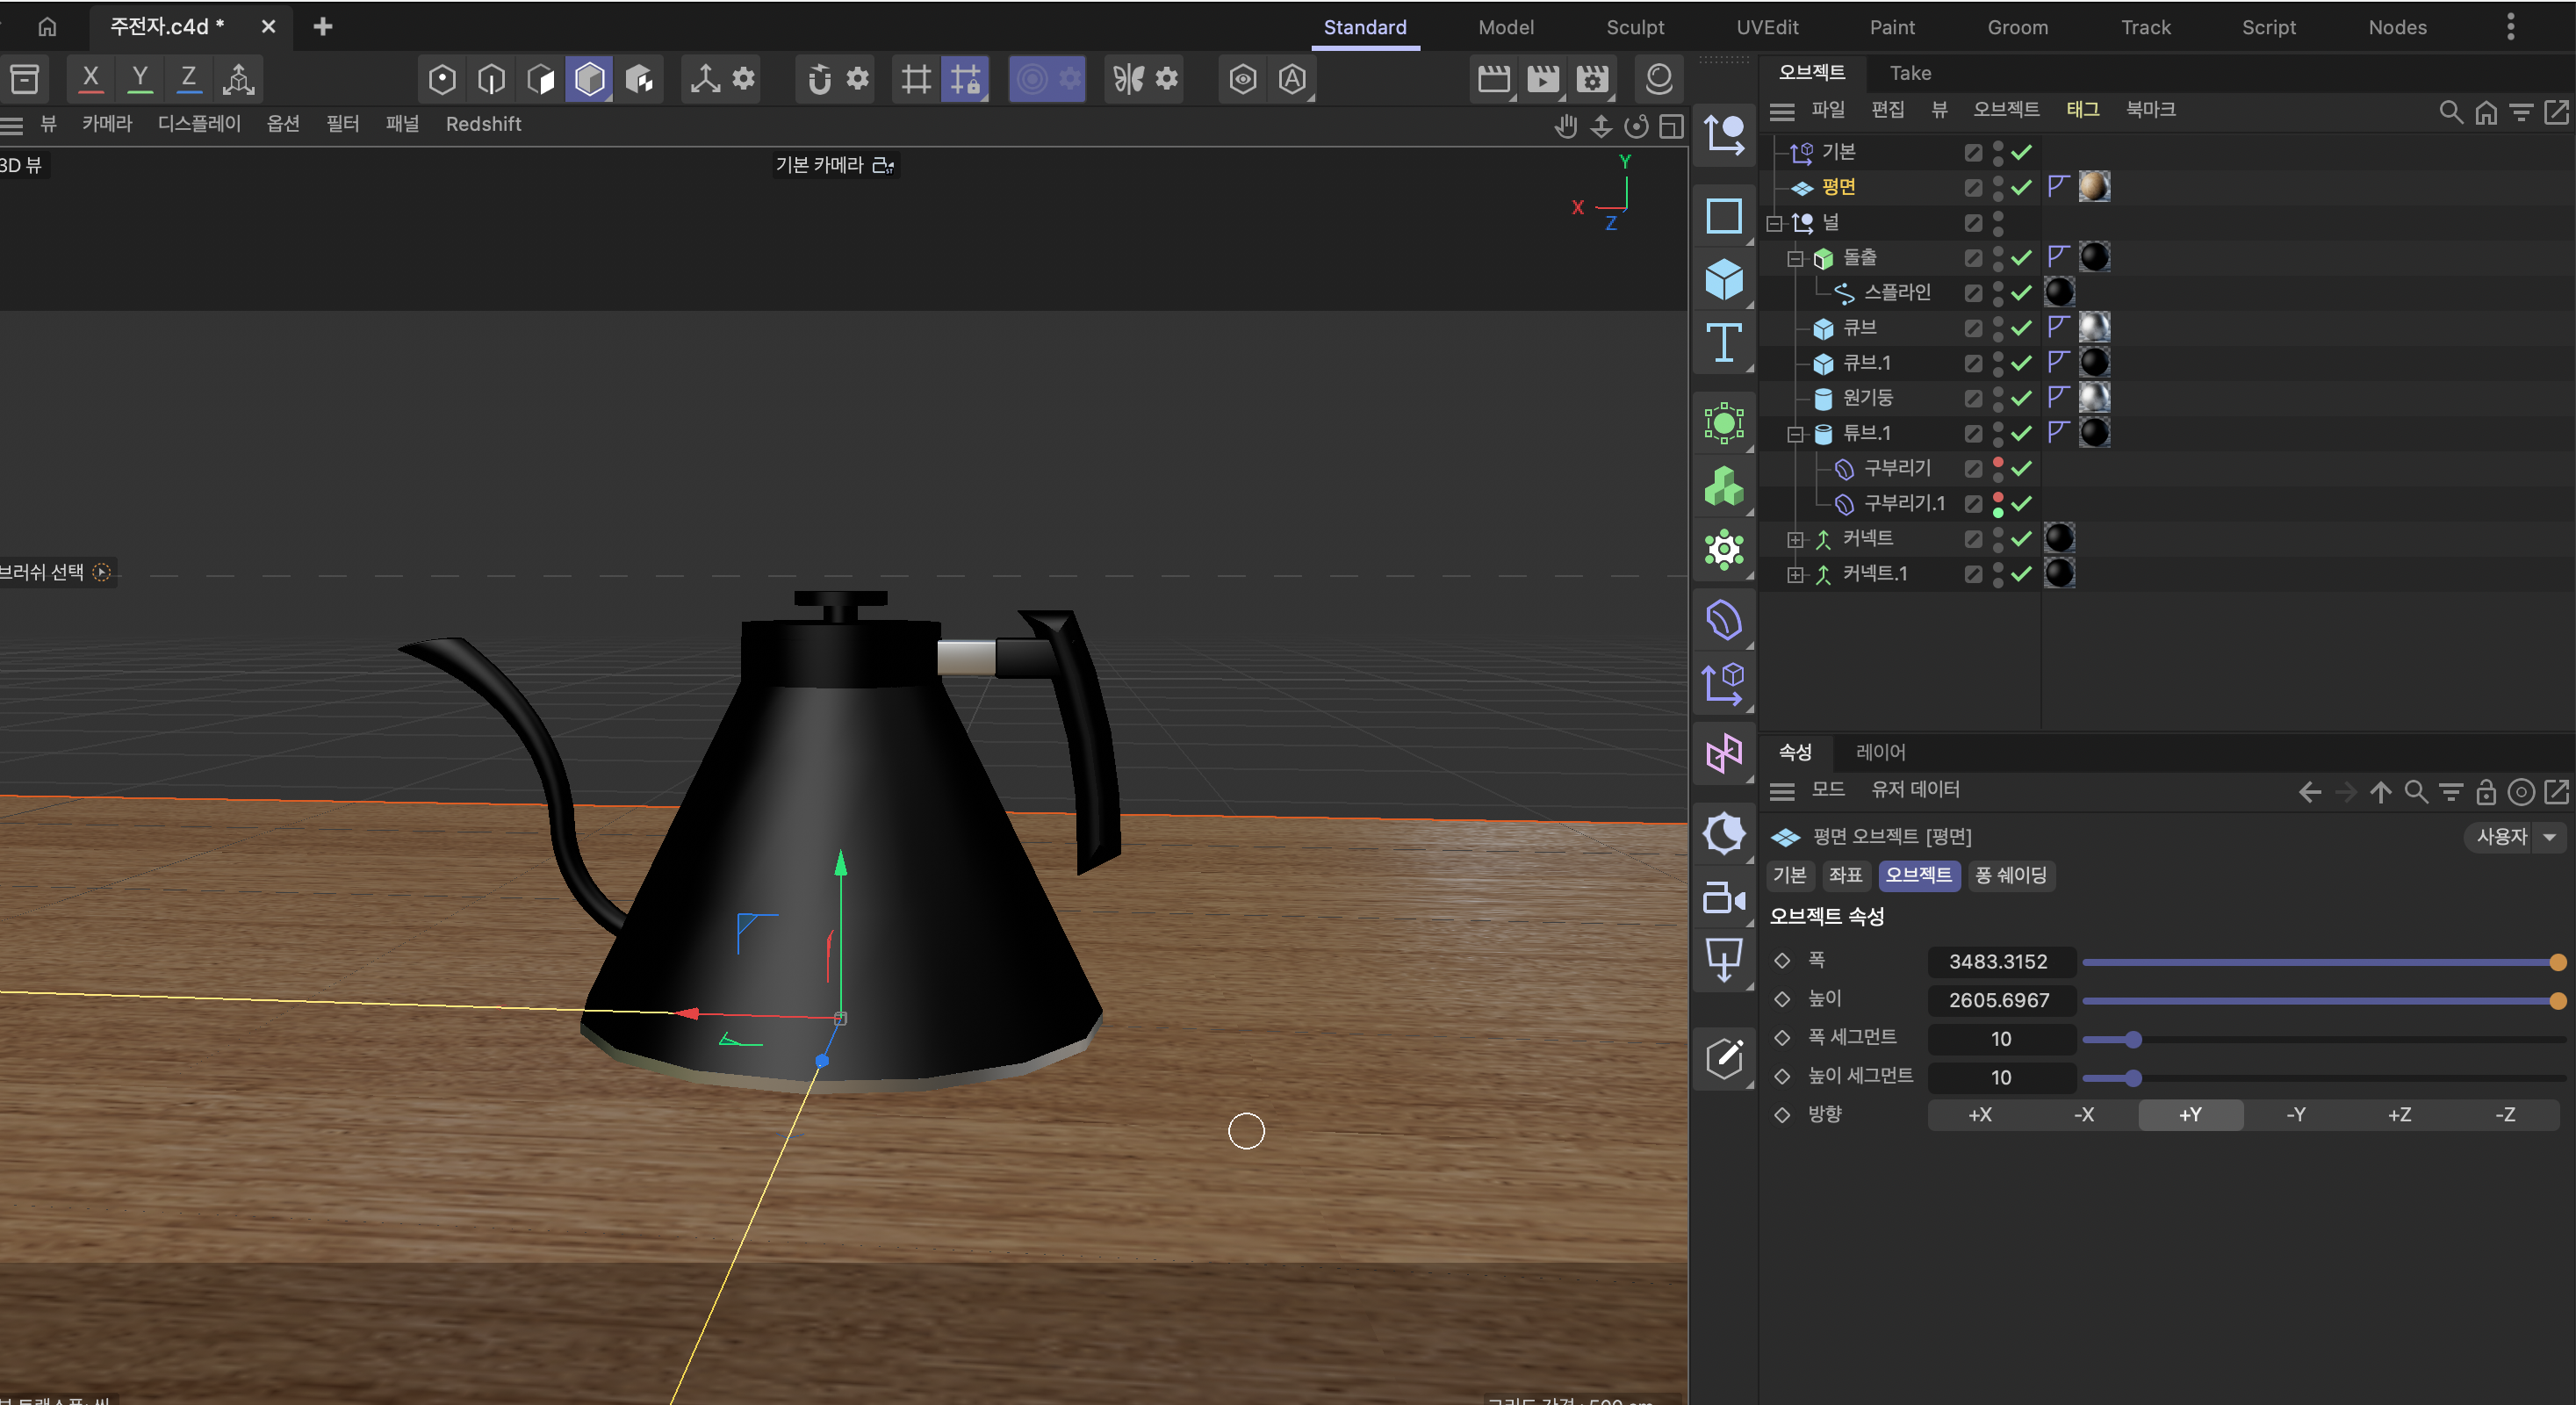
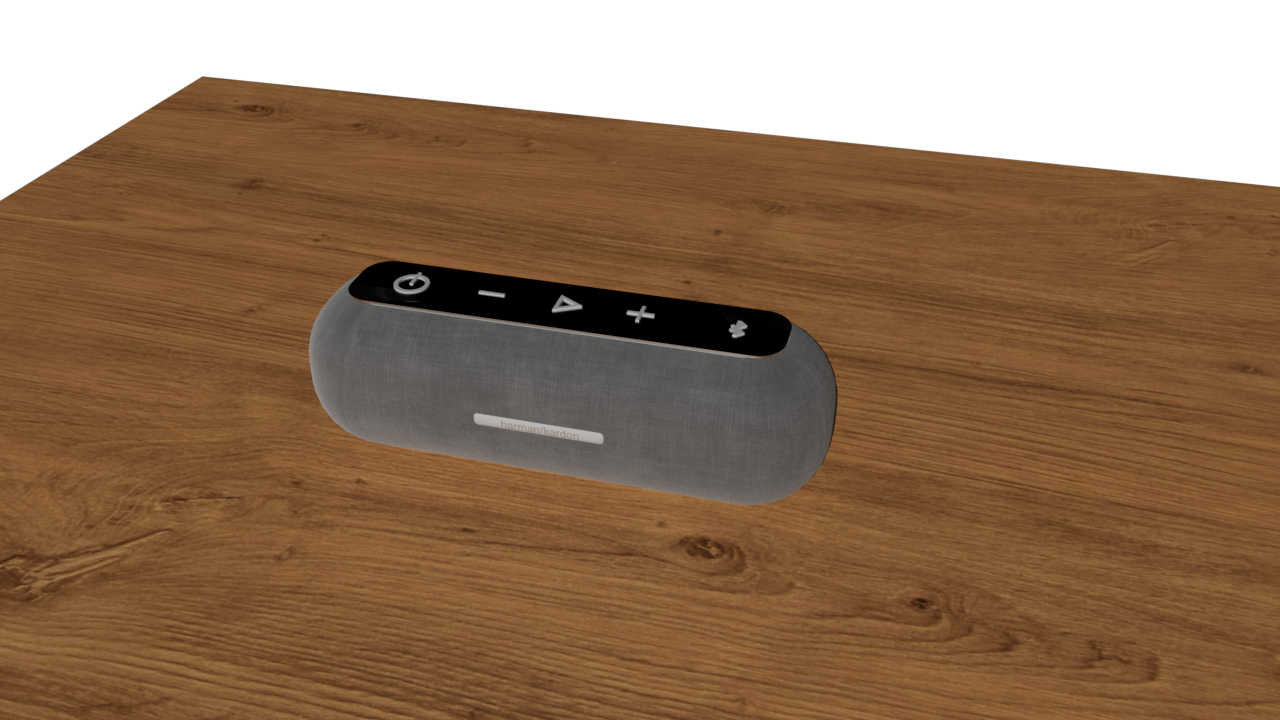
<b>1 Speaker Front View</b><br><br>I began by observing the speaker from the front. Its main form is a long rounded enclosure with smooth transitions between the front, sides, and corners. I also noticed how the woven fabric texture covers most of the body, while the small metallic logo creates a contrasting detail. <b>2 Speaker Side View</b><br><br>The side view helped me understand the depth and curvature of the speaker more clearly. I noticed that the body is not simply a rounded rectangle; the surfaces continuously curve around the sides. The vertical seam also shows where the fabric covering meets. <b>3 Speaker Rear View</b><br><br>Looking at the rear revealed details that were less noticeable from the front. The charging port is placed inside a small rounded rectangular insert, creating a transition between the soft fabric surface and a harder material. This helped me identify smaller components that would need to be modeled separately. <b>4 Speaker Top View</b><br><br>The top view revealed the structure of the recessed control panel. The power, volume, play, and Bluetooth controls are arranged in a simple sequence with small indicator lights. I observed that the panel is a separate rounded form inset into the fabric-covered enclosure. <b>5 Speaker Bottom View</b><br><br>The bottom view showed another component that is almost invisible from normal viewing angles. A large rounded rectangular base is inset into the body and includes the LUNA lettering and regulatory information. This helped me understand how the outer enclosure wraps around a separate bottom structure. <b>6 Kettle Front View</b><br><br>I examined the kettle from the front to understand its main volume. The body is wider at the bottom and gradually narrows toward the top, creating a tapered form. The metallic ring around the bottom also creates a clear material and structural boundary. <b>7 Kettle Rear View</b><br><br>The rear view helped me examine how the handle is positioned in relation to the main body. The handle projects away from the kettle rather than following its surface and reconnects near the top. This showed me that the handle should be treated as a separate three-dimensional form. <b>8 Kettle Side View</b><br><br>The side view revealed the kettle's most distinctive silhouette. The long gooseneck spout extends outward and curves upward, while the handle balances the form on the opposite side. This view helped me understand how several different forms combine to create the overall object. <b>9 Kettle Handle View</b><br><br>I photographed the handle more closely to study how it connects to the kettle. The handle has an ergonomic curved form and is joined to the body through a small metallic connector. This detail showed how different materials and components are assembled rather than formed as one continuous object. <b>10 Kettle Lid View</b><br><br>A closer observation of the lid revealed several layered forms: the metal lid body, dark outer rim, and raised central knob. The knob also changes width through its profile rather than being a simple cylinder. This helped me recognize how even a small component can be broken down into several simpler geometries. <b>11 AI-Assisted Modeling in Blender</b><br><br>I used ChatGPT to generate a Blender script based on my reference images of the Luna speaker. The script created the main form, control panel, buttons, logo, and materials. Seeing the generated script helped me understand how code can be used to construct and organize 3D geometry. <b>12 Blender Rendering Test</b><br><br>After creating the model with the ChatGPT-generated script, I also tested it through Blender’s rendering process. Rendering allowed me to observe the fabric texture, materials, lighting, shadows, and overall form more clearly than in the modeling viewport. It also helped me compare the AI-assisted model with my original reference images. <b>13 AI-Assisted Modeling in Cinema 4D</b><br><br>I repeated the experiment in Cinema 4D using a script generated by ChatGPT. The model was divided into individual components, including the enclosure, control panel, buttons, LEDs, and logo. This helped me understand how a complex product can be constructed from multiple simpler parts. <b>14 Examining the Model Structure</b><br><br>I separated the components of the Cinema 4D model to examine how they were assembled. This revealed the relationship between the outer enclosure, inset control panel, and smaller details. It helped me think about the speaker as a system of layered forms rather than a single object. <b>15 AI Image-to-3D Experiment</b><br><br>I uploaded my kettle reference image to Meshy and generated a 3D model directly from the photograph. The AI successfully interpreted the tapered body, curved handle, lid, and gooseneck spout, although some proportions and smaller details differed from the original object. <b>16 AI-Generated Texture</b><br><br>I also tested Meshy's texture generation. The AI added dark reflective materials and metallic details, bringing the model closer to the appearance of my reference kettle. I could preview the completed model, but I did not download it because exporting required additional paid credits or a subscription. <b>17 tutorial</b><br><br>I followed the course tutorial to practice more complex modeling techniques in Cinema 4D. Working step by step with the tutorial helped me understand how individual polygons can be selected, moved, and reshaped to build more complex geometry. <b>18 Applying the Boolean Technique</b><br><br>After studying both the tutorial and the AI-generated scripts, I practiced applying a Boolean operation to the speaker. I used it to create the recessed opening and then added a separate top panel. This helped me understand how Boolean operations can be used to create openings and layered components. <b>19 Speaker Material Test</b><br><br>I experimented with different materials to recreate the woven fabric surface of the speaker. Some textures appeared too large or distorted when wrapped around the curved body, so this test helped me understand how material scale and mapping affect the appearance of a 3D model. <b>20 Refining the Kettle Lid</b><br><br>After modeling the kettle myself, I returned to the physical object and examined the lid more carefully. I realized that it was made of several layered forms rather than one simple shape, so I revised my model to better represent the lid, rim, and central knob. <b>21 Boolean Detail on the Lid</b><br><br>I used a Boolean operation to create the hollow interior of the kettle lid. Separating the outer and inner forms helped me reproduce its actual construction more accurately and gave me additional practice using Boolean modeling for smaller details. <b>22 Refining the Handle</b><br><br>I worked on the handle separately so I could focus on its curved shape and thickness. I adjusted the form several times to make it fit the kettle more naturally. This was good practice for creating more complex curved objects. <b>23 Building the Kettle with Splines</b><br><br>I used splines to create the curved parts of the kettle, including the spout and handle. This helped me understand how splines can be used to create smooth and controlled shapes that are difficult to make with basic objects. <b>24 Materials and Scene Setup</b><br><br>After completing the kettle model, I experimented with different materials and added a wood surface to create a simple scene. This helped me understand how materials can change the appearance of an object and make the model feel more realistic. <b>25 Rendering and Lighting Test</b><br><br>I also experimented with rendering the speaker. Lighting was more difficult than I expected, especially when trying to balance the brightness, shadows, and materials without overexposing the scene. After several adjustments, I was able to achieve a more balanced result.

Material Workshop 1
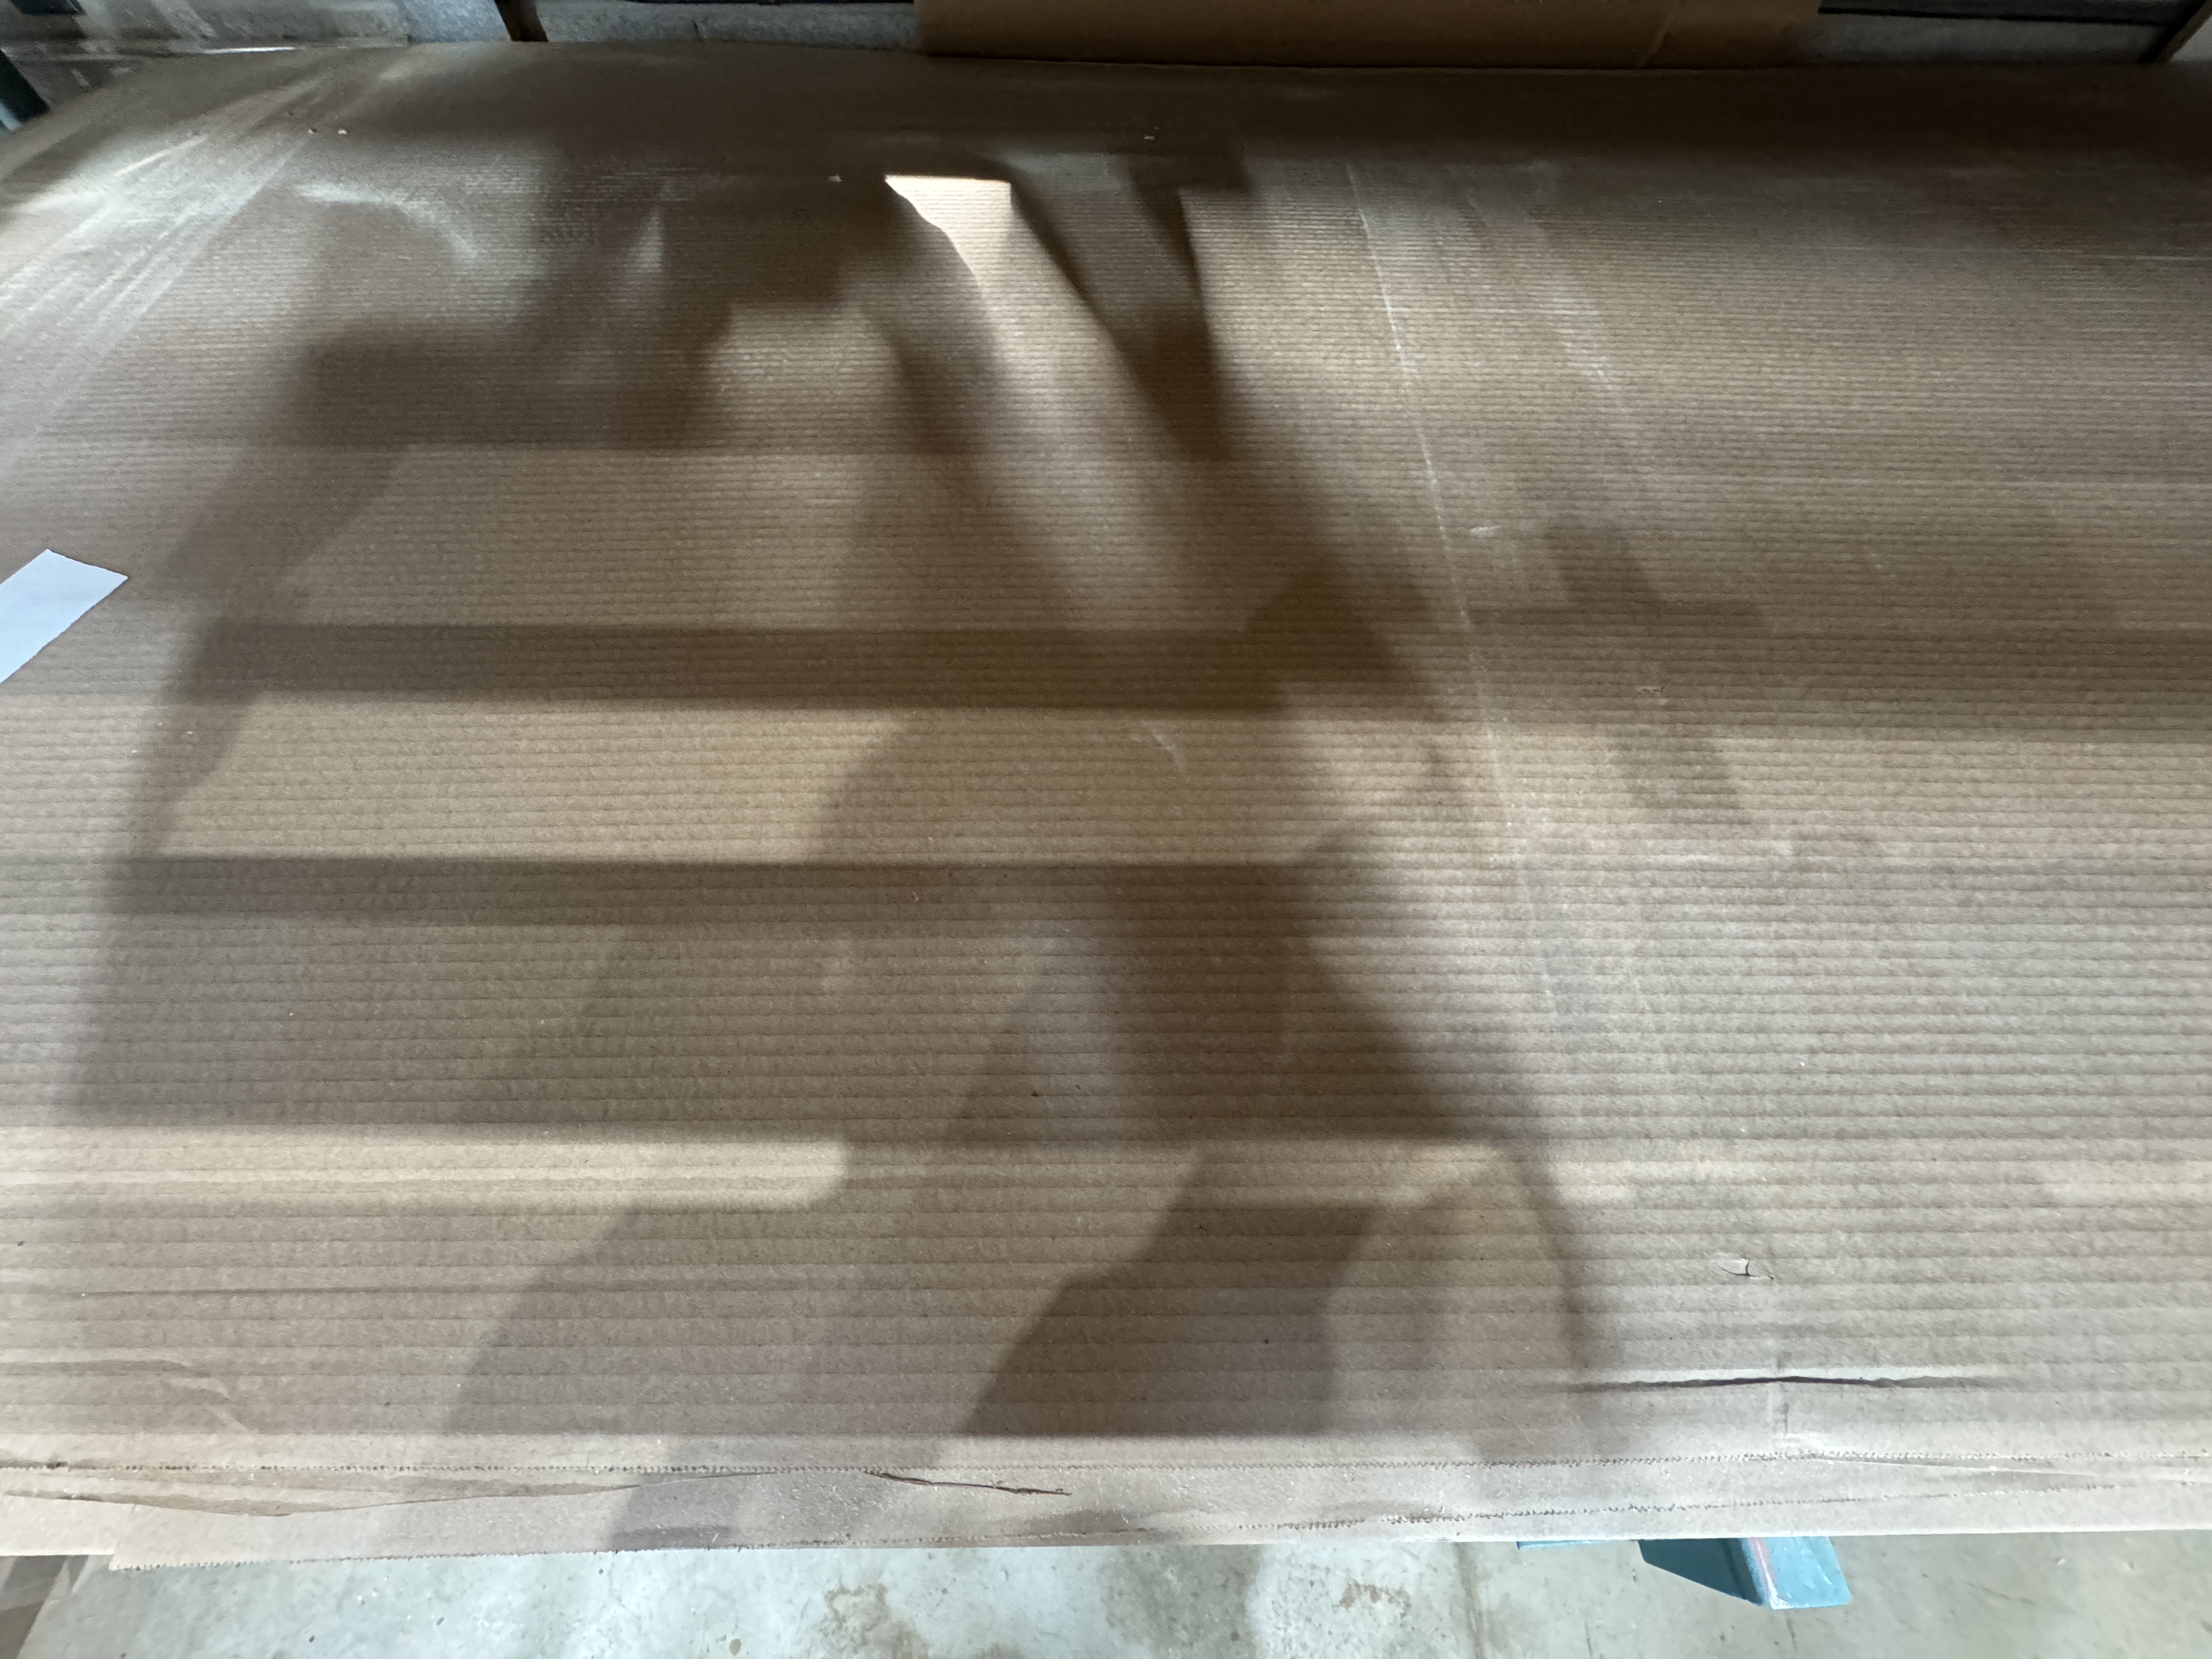
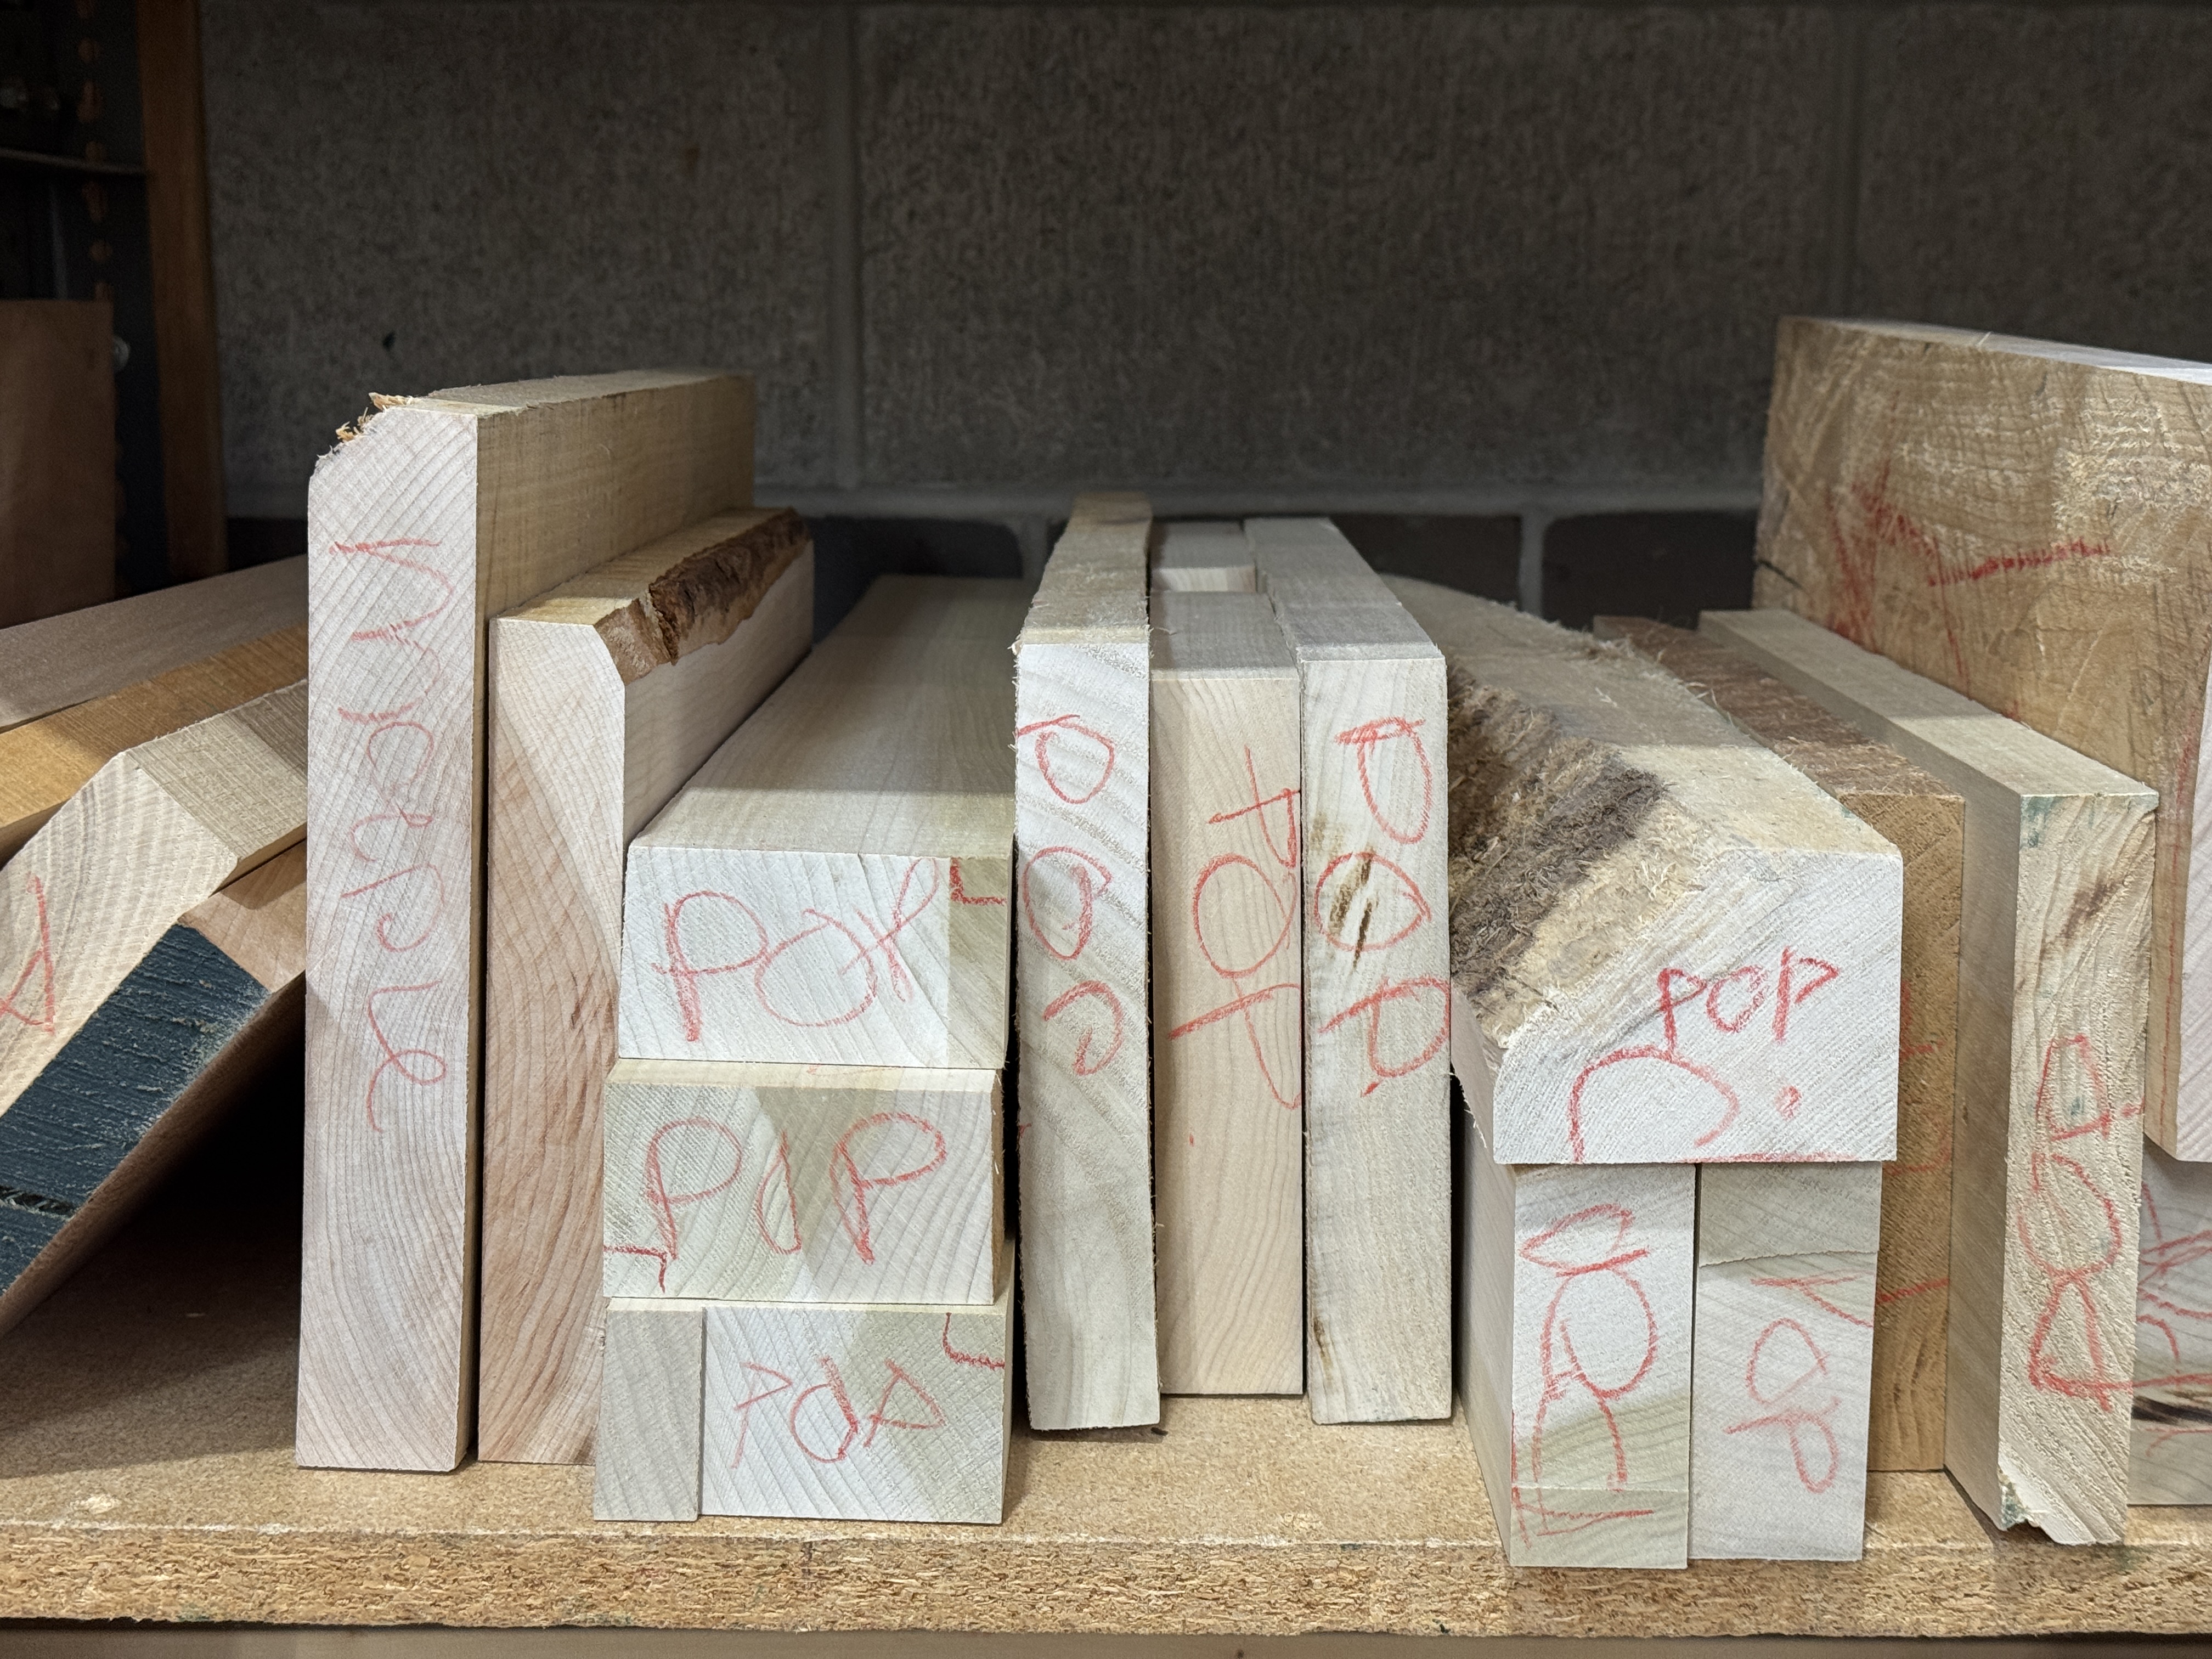
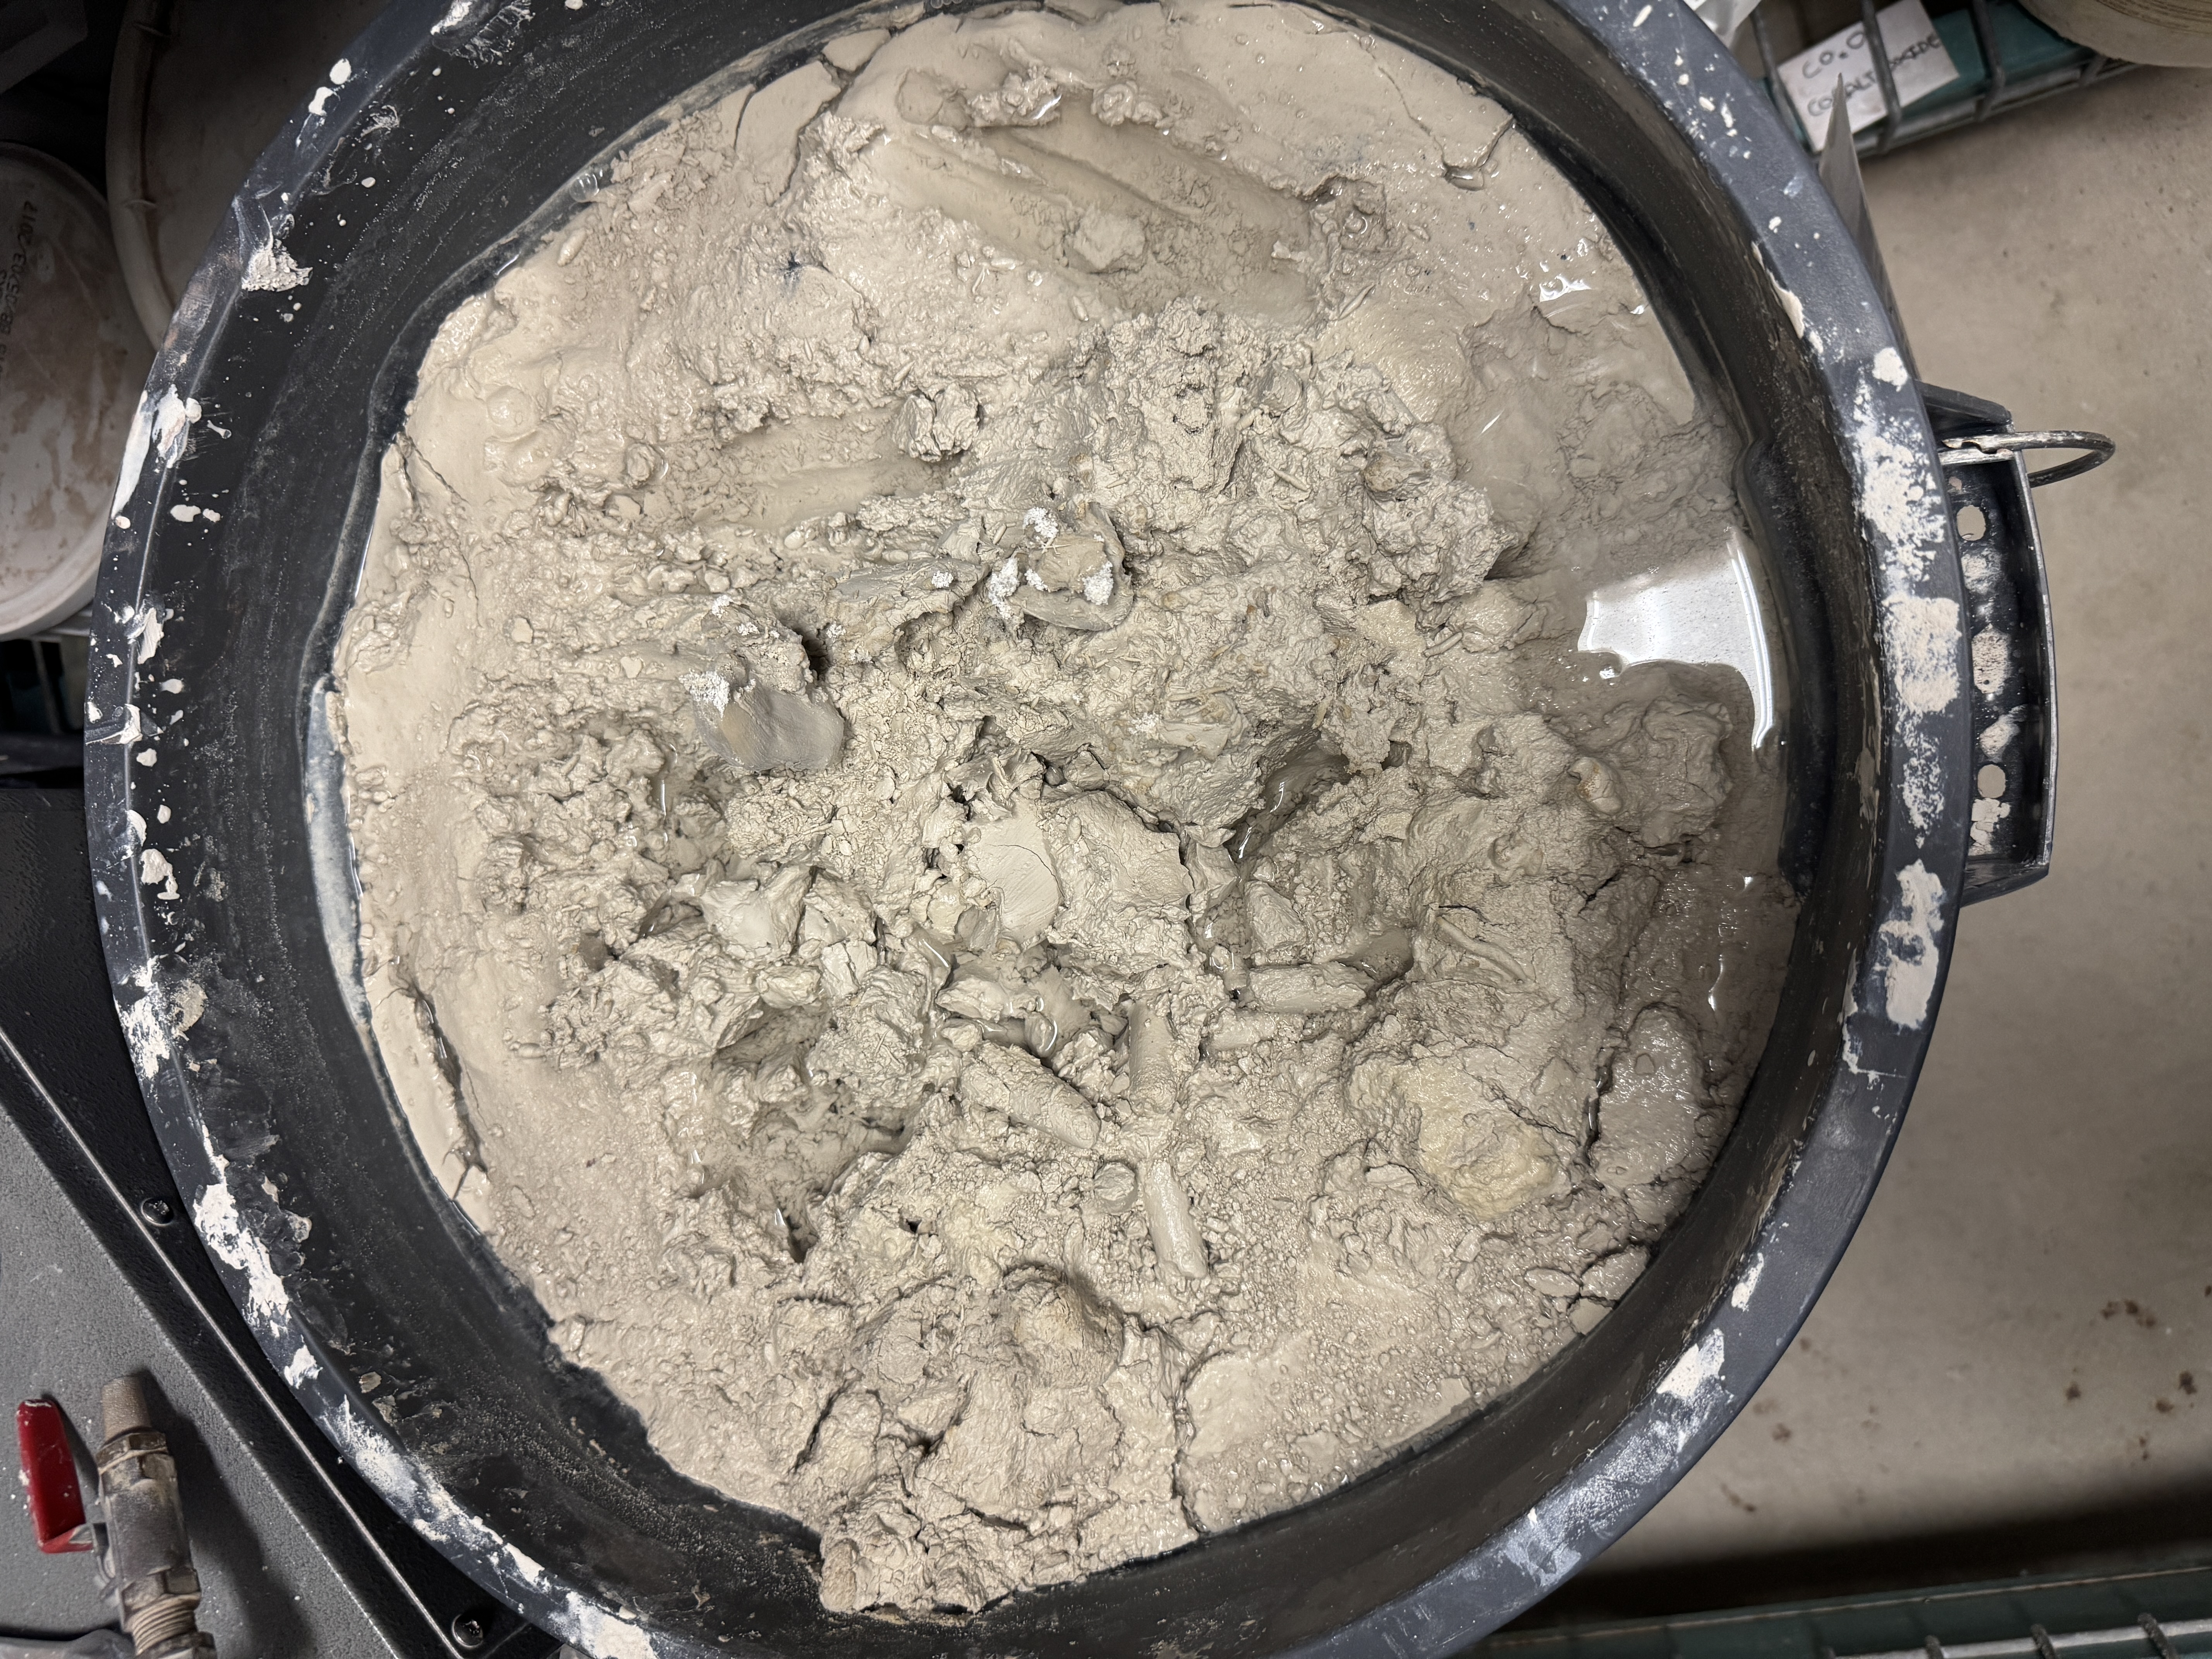
<b>1. Corrugated Cardboard</b><br><br>I found sheets and scraps of corrugated cardboard in the workshop area. Looking closely at the cut edges, I could see the layered structure that gives the material strength while keeping it lightweight. The nearby recycling notice also showed how scraps are collected and managed after use. Cardboard can be useful for quick prototypes, mock-ups, packaging, and testing forms before working with more permanent materials. <b>2. Wood</b><br><br>I observed different pieces of solid wood prepared for workshop use. The cut surfaces revealed variations in grain, colour, density, and texture, while some pieces still showed rough natural edges. Unlike manufactured sheet materials, each piece of wood has its own visible grain pattern and physical characteristics. This material is closely connected to woodworking, furniture making, and other craft practices that involve cutting, joining, shaping, and finishing. <b>3. Ceramic Clay</b><br><br>In the ceramics area, I observed clay in a wet and workable state before firing. Its soft and uneven texture showed how different ceramic material is from wood or cardboard at this stage. Clay can be shaped while wet, but after forming, drying, and firing it becomes a hard ceramic object. Seeing the material before firing helped me understand ceramics as a process rather than only as a finished surface.

Material Workshop 2

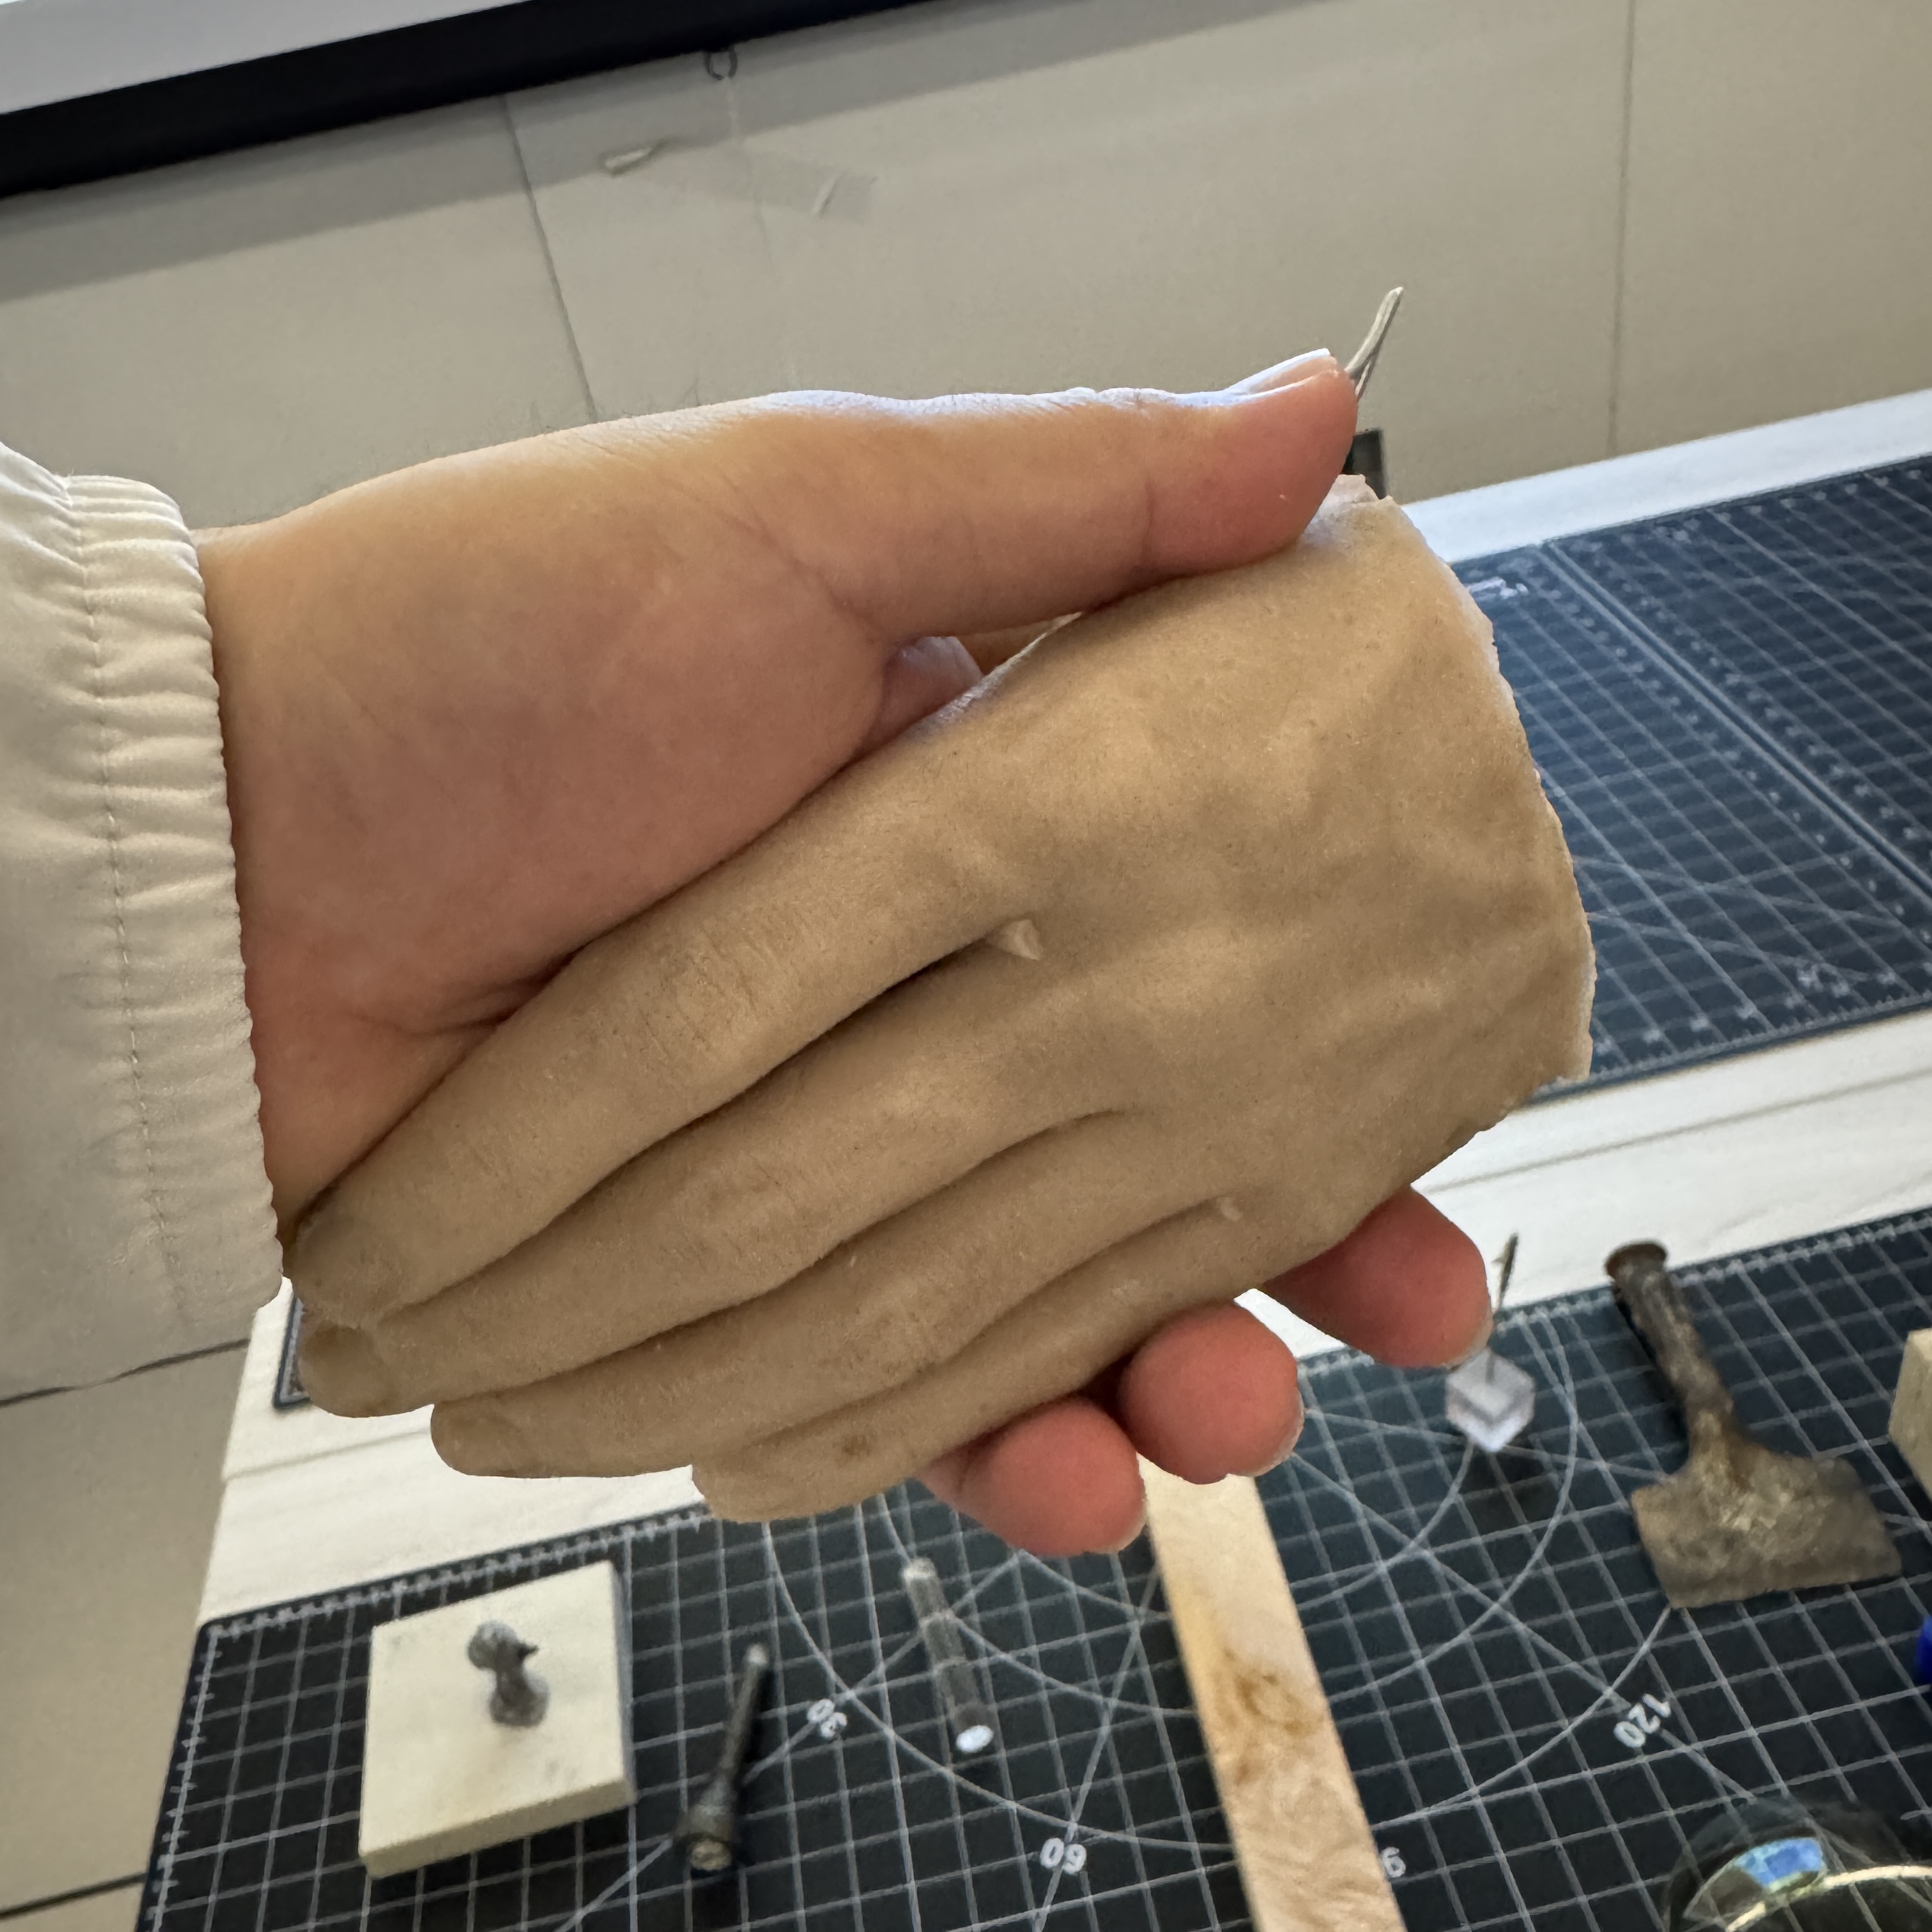
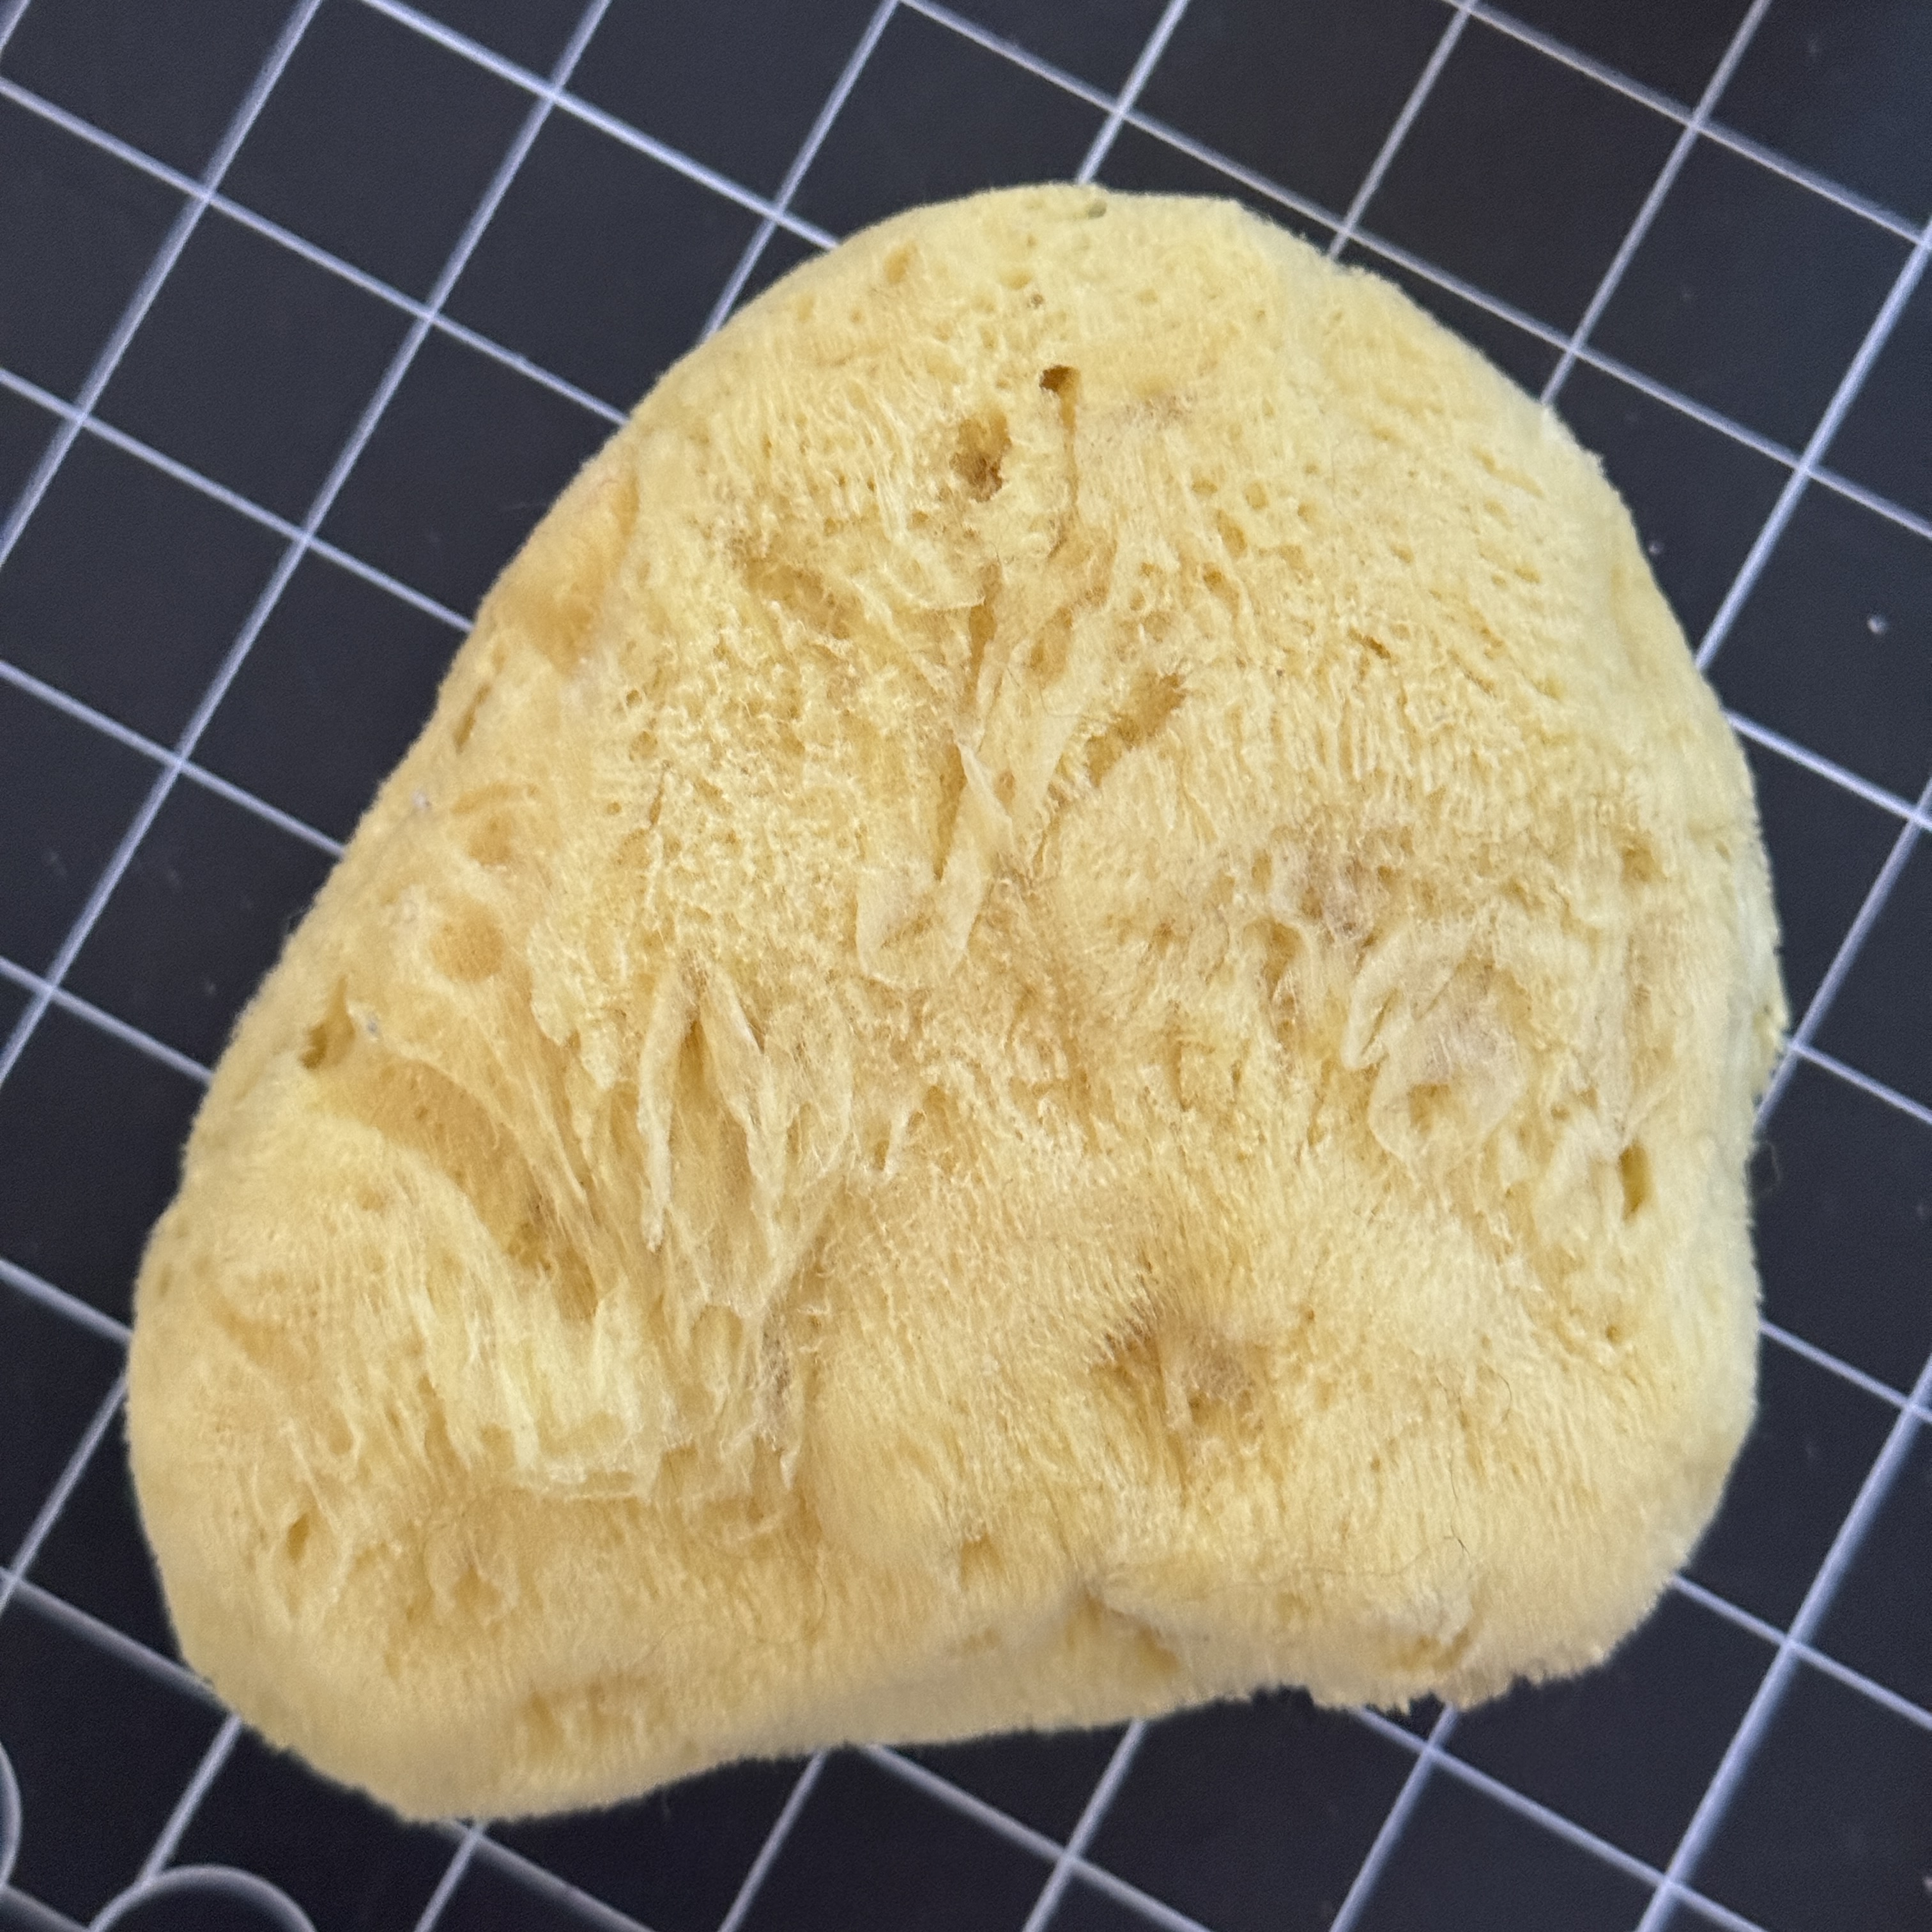
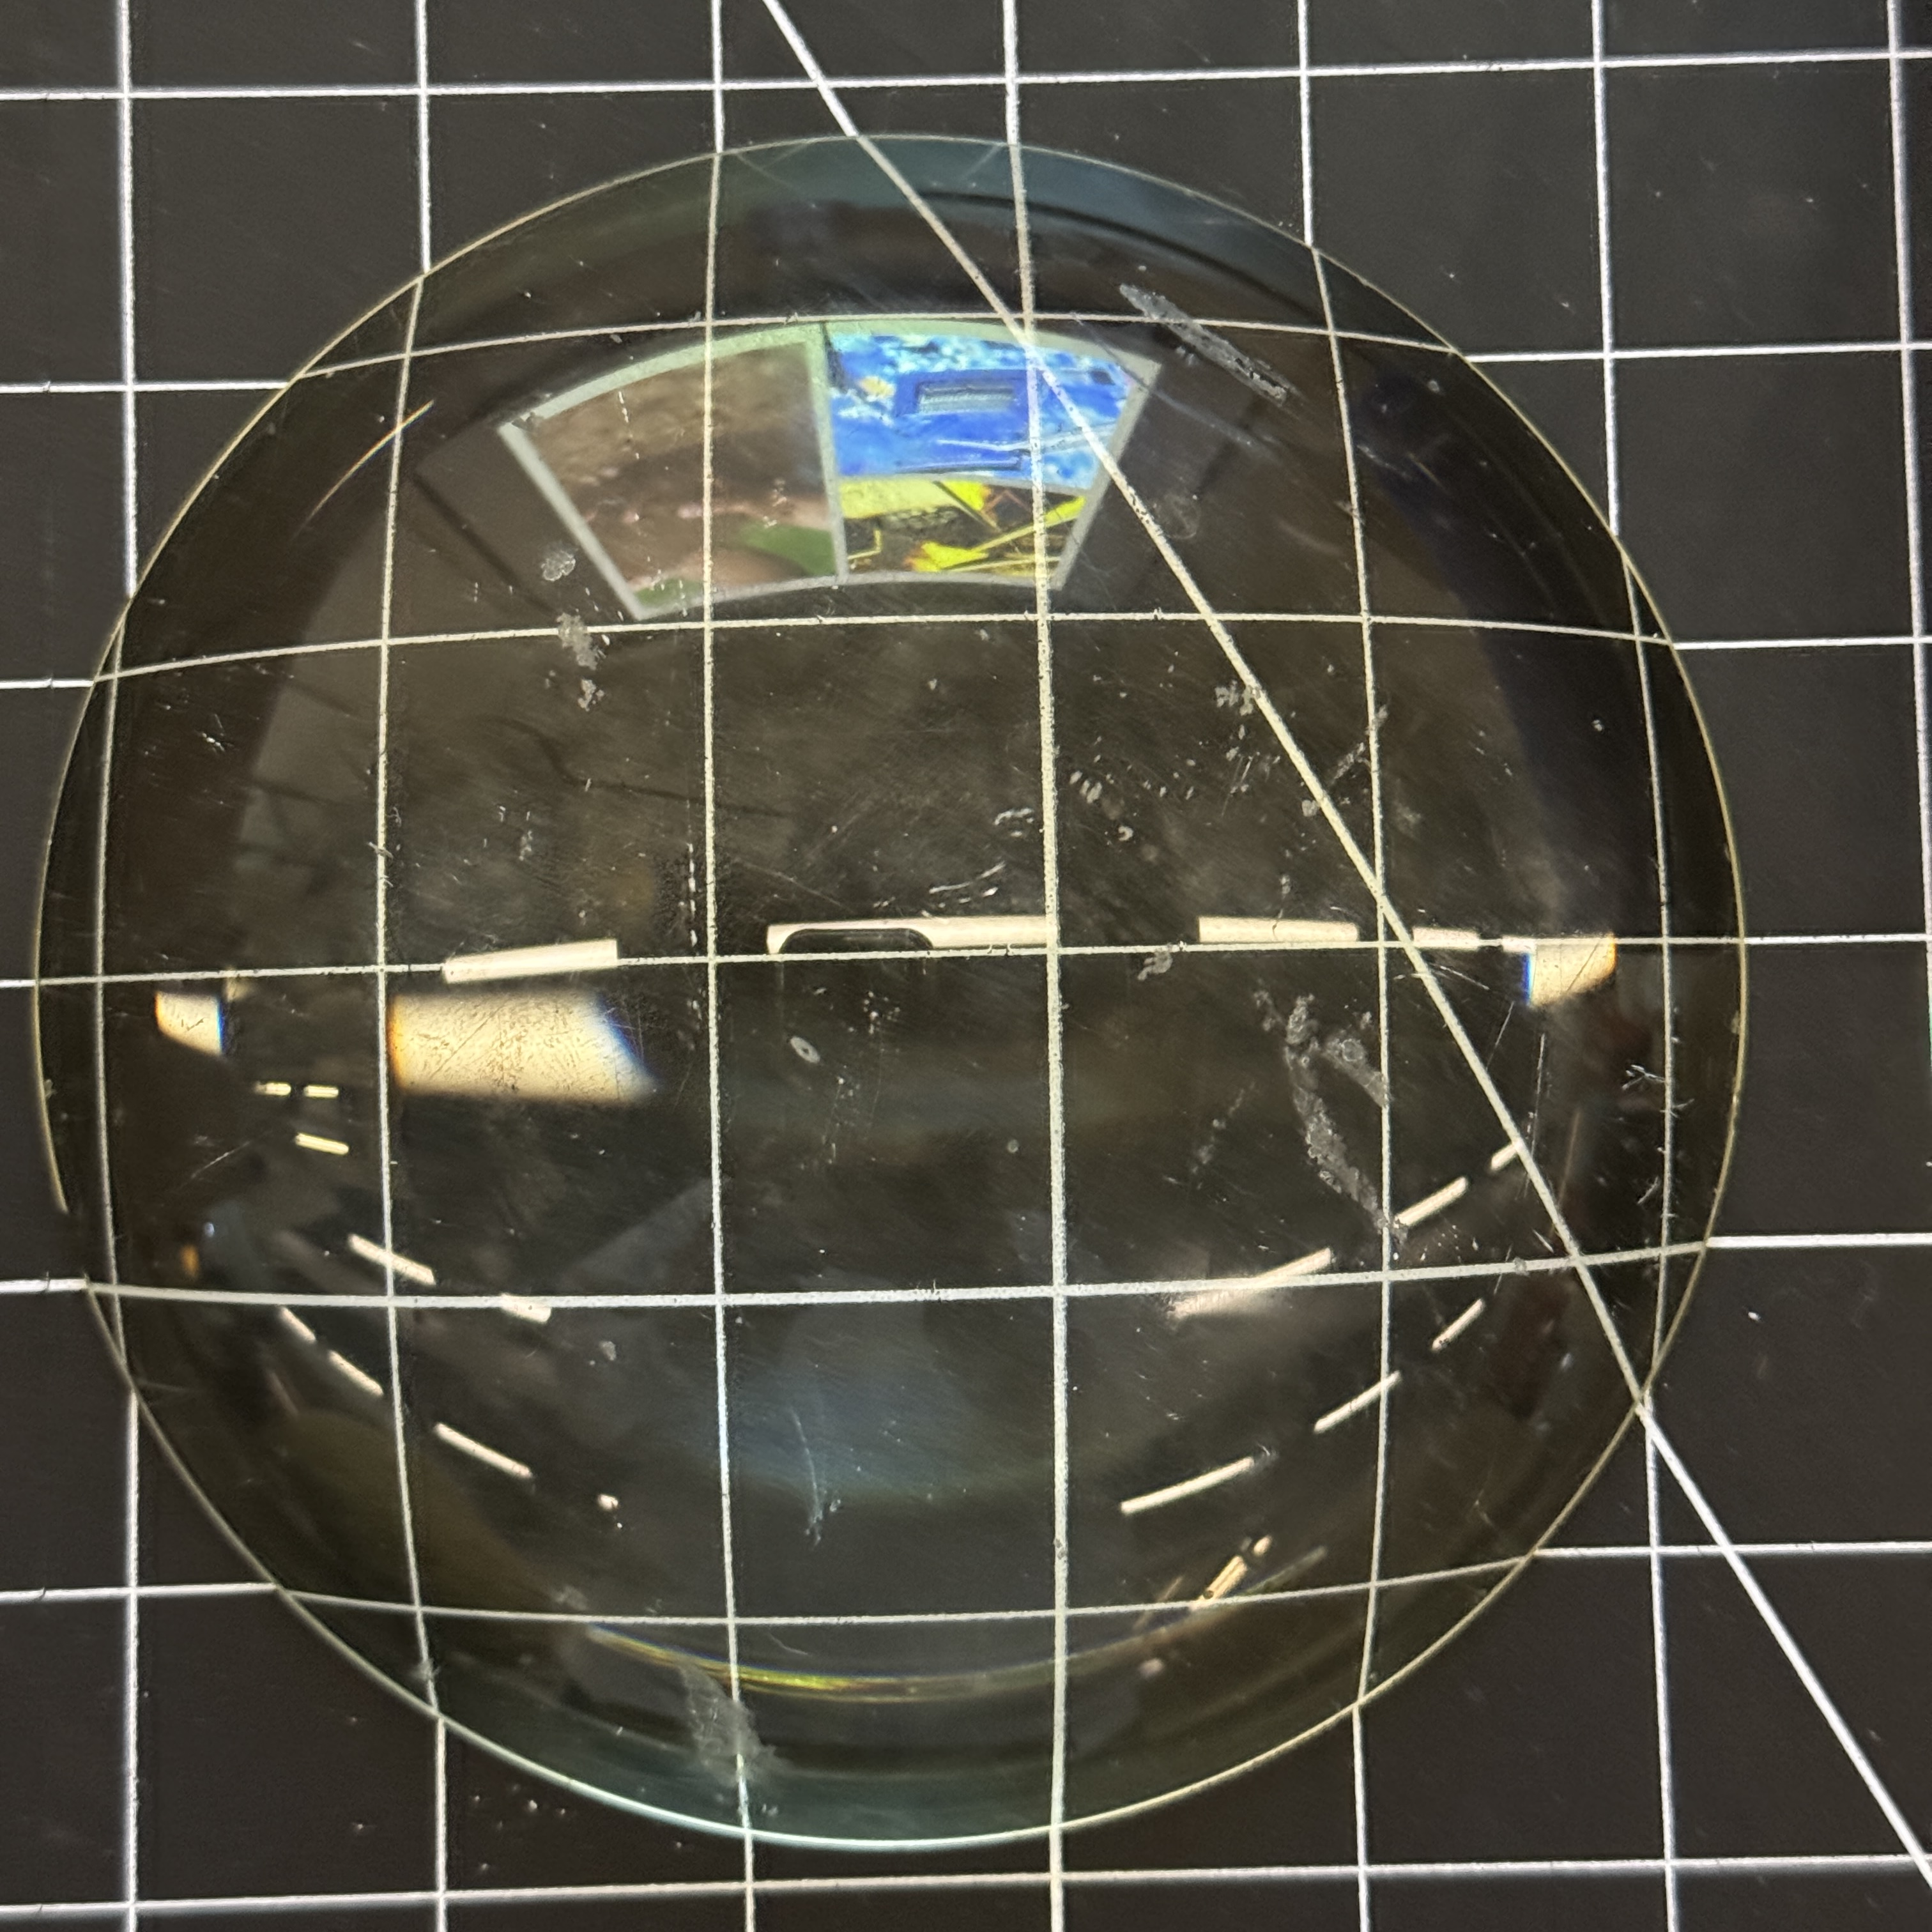
<b>1. Silicone Hand</b><br><br>I examined a silicone hand that felt surprisingly similar to human skin. Its soft, flexible surface reminded me of touching a real hand. However, the silicone felt noticeably cold in a way that was different from touching a person's cold hands or feet. I realized that temperature, as well as texture and flexibility, affects how we experience a material. <b>2. Sponge</b><br><br>When I first saw this object from a distance, I could not identify the material. After looking more closely and touching it, I realized it was a sponge. Its porous surface and soft texture were easier to recognize up close. This experience showed me that appearance alone does not always communicate what a material is or how it feels. <b>3. Glass</b><br><br>I observed a curved glass object with a smooth, transparent surface. Reflections of the surrounding lights and objects were visible across the glass, while its curved shape affected how the background appeared. This observation made me consider how transparency, reflection, and surface curvature contribute to the visual qualities of glass.

Project 1


Coffee Ritual — Published 3D Models

Each image opens its interactive Spline view. You can also open each model in a separate browser tab.

Published 3D Model 1 — Figure

I modeled the figure in Cinema 4D from a red figurine reference. I adjusted its proportions and pose, then tested joints and skin binding for the coffee-pouring scene.
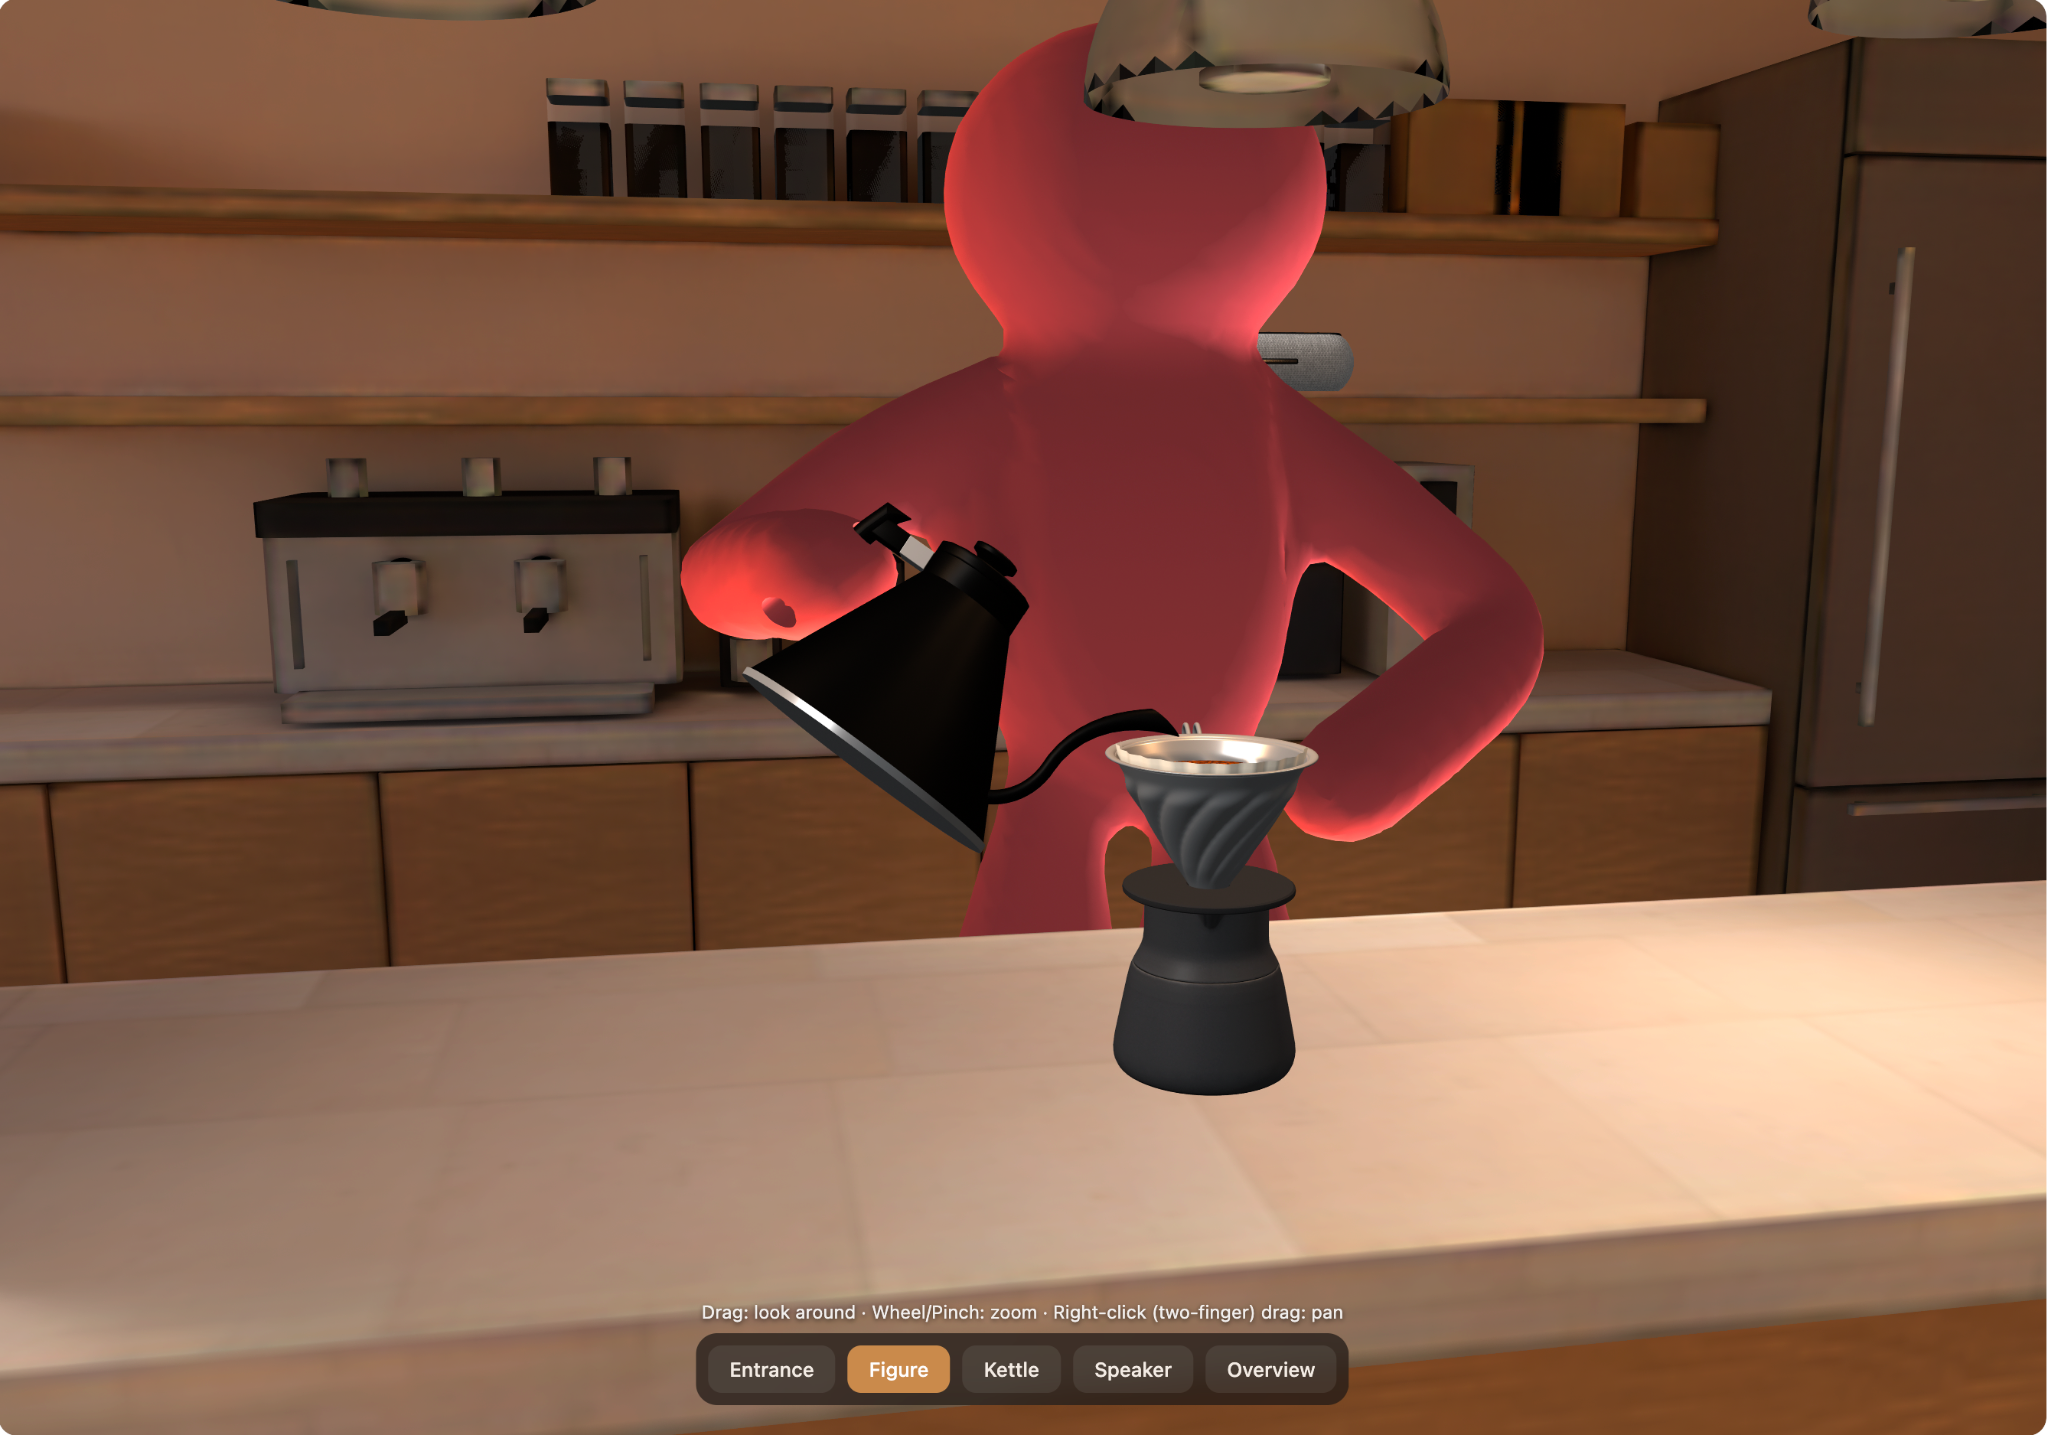
<b>Figure — Cinema 4D model</b><p>I modeled the figure in Cinema 4D from a red figurine reference. I adjusted its proportions and pose, then tested joints and skin binding for the coffee-pouring scene.</p><div class='container'><iframe class='responsive-iframe' src='https://my.spline.design/cafeinteractive-Q3QJsFQHnmsTFi7iqfLoKY90/?view=figure' title='Figure interactive 3D model' loading='lazy' allowfullscreen></iframe></div><p><a href='https://my.spline.design/cafeinteractive-Q3QJsFQHnmsTFi7iqfLoKY90/?view=figure' target='_blank' rel='noopener noreferrer'>Open Figure in Spline</a></p>

View Figure in Spline (new tab)

Published 3D Model 2 — Kettle

I modeled the pour-over kettle in Cinema 4D and refined its tapered body, curved spout, handle proportions, and materials.
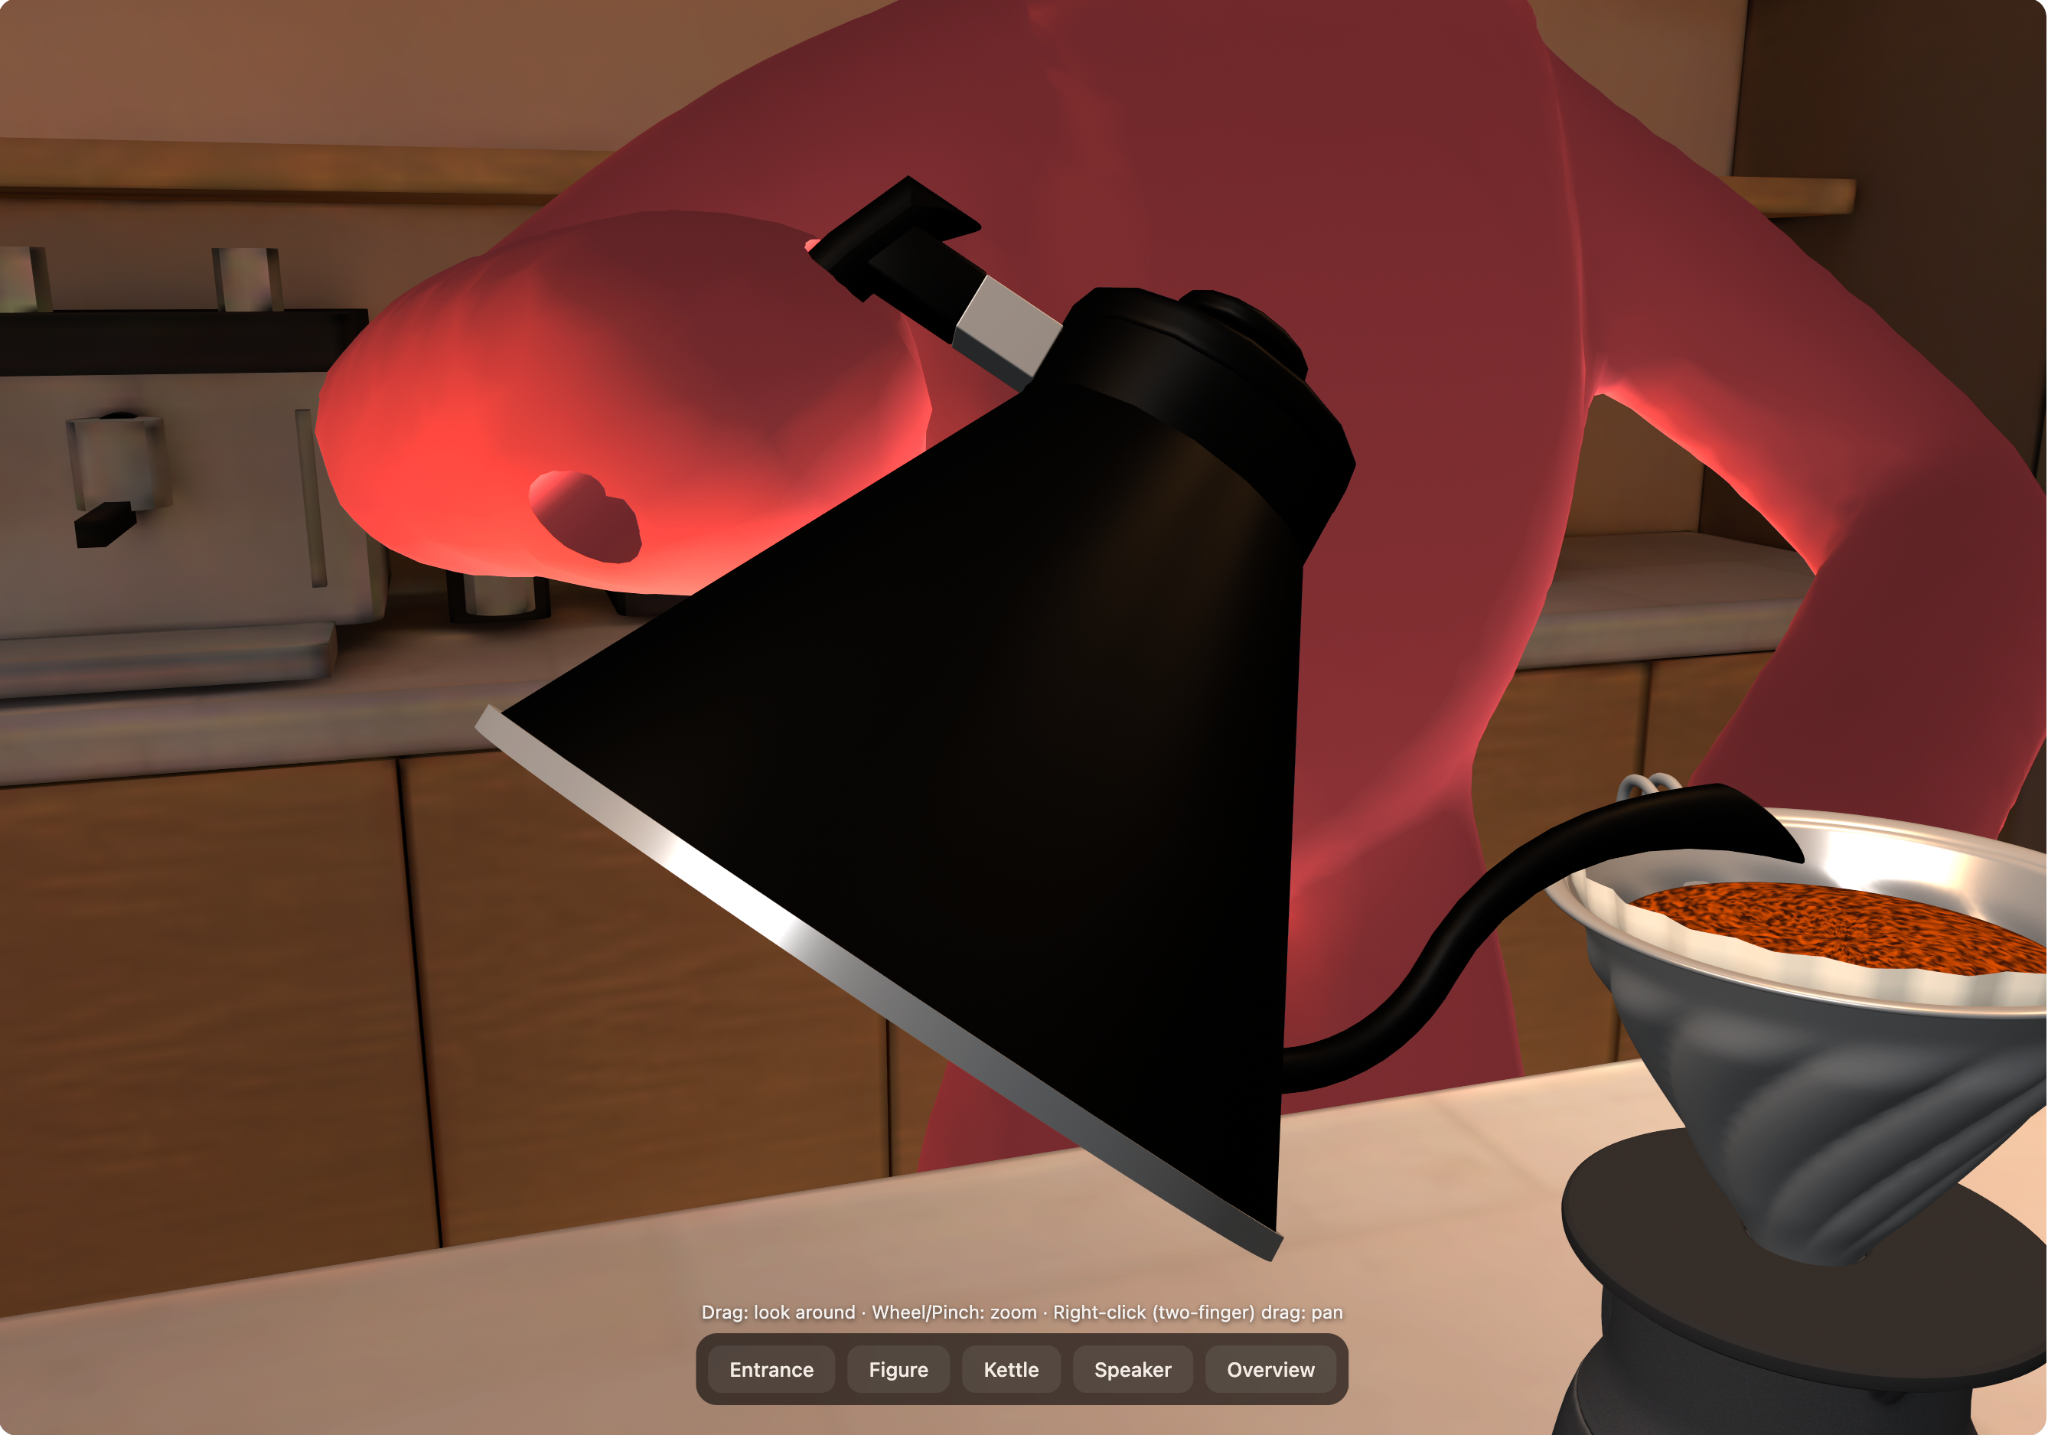
<b>Kettle — Cinema 4D model</b><p>I modeled the pour-over kettle in Cinema 4D and refined its tapered body, curved spout, handle proportions, and materials.</p><div class='container'><iframe class='responsive-iframe' src='https://my.spline.design/cafeinteractive-Q3QJsFQHnmsTFi7iqfLoKY90/?view=kettle' title='Kettle interactive 3D model' loading='lazy' allowfullscreen></iframe></div><p><a href='https://my.spline.design/cafeinteractive-Q3QJsFQHnmsTFi7iqfLoKY90/?view=kettle' target='_blank' rel='noopener noreferrer'>Open Kettle in Spline</a></p>

View Kettle in Spline (new tab)

Published 3D Model 3 — Speaker

I modeled the rounded speaker enclosure, recessed top panel, and woven surface in Cinema 4D. Refining materials and object hierarchy required several adjustments.
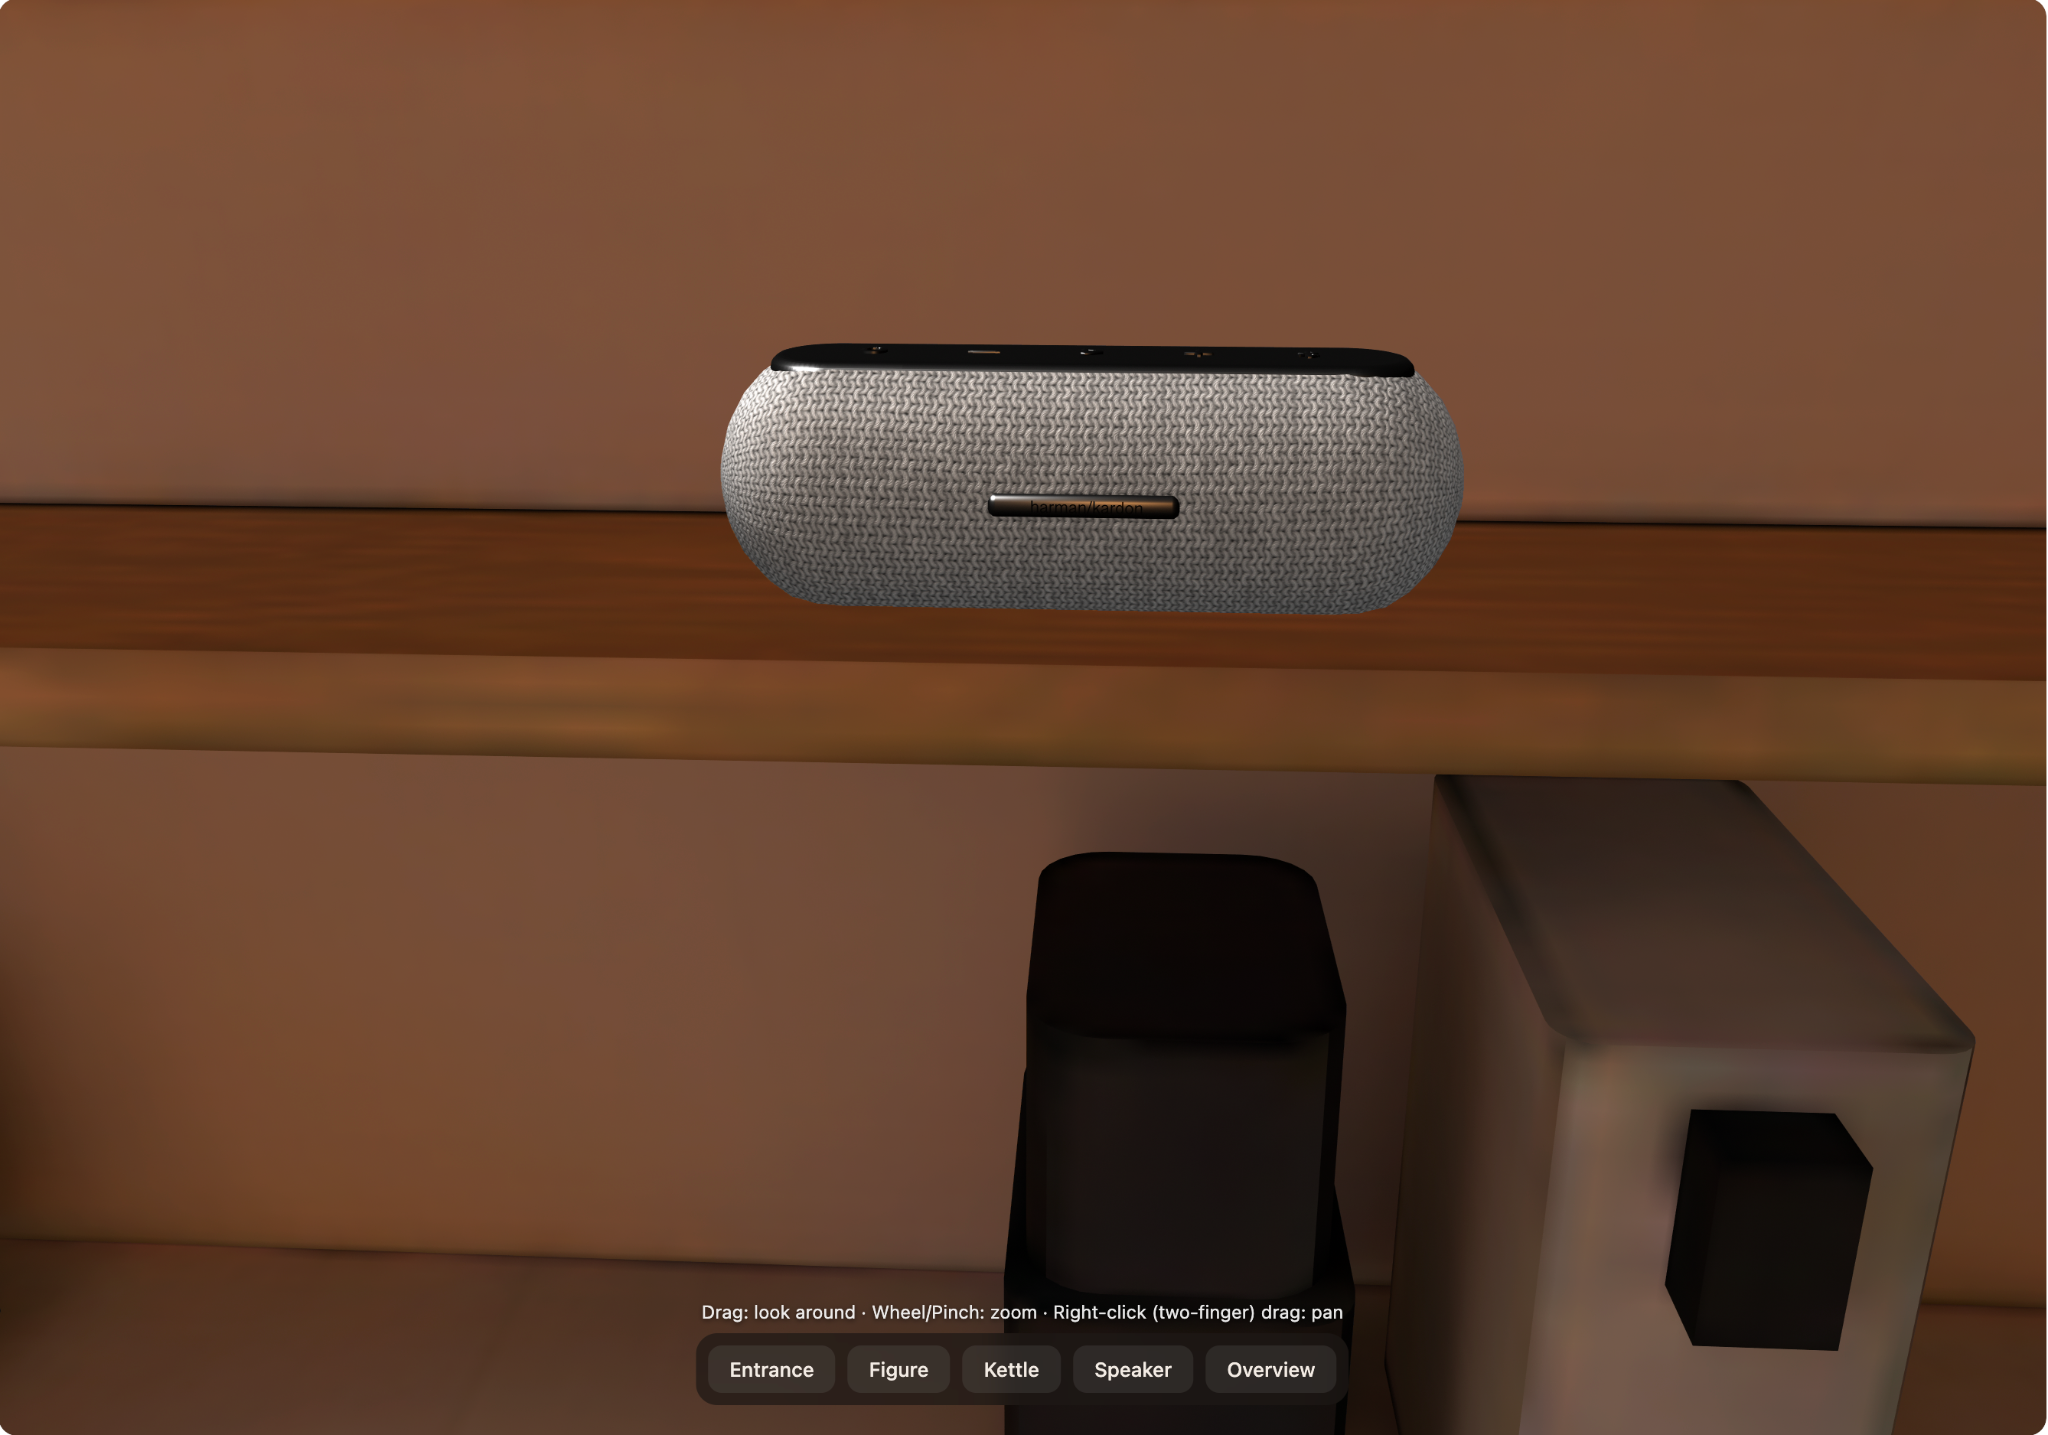
<b>Speaker — Cinema 4D model</b><p>I modeled the rounded speaker enclosure, recessed top panel, and woven surface in Cinema 4D. Refining materials and object hierarchy required several adjustments.</p><div class='container'><iframe class='responsive-iframe' src='https://my.spline.design/cafeinteractive-Q3QJsFQHnmsTFi7iqfLoKY90/?view=speaker' title='Speaker interactive 3D model' loading='lazy' allowfullscreen></iframe></div><p><a href='https://my.spline.design/cafeinteractive-Q3QJsFQHnmsTFi7iqfLoKY90/?view=speaker' target='_blank' rel='noopener noreferrer'>Open Speaker in Spline</a></p>

View Speaker in Spline (new tab)

×

Powered by w3.css